This post may contain affiliate links. Please read our disclosure policy.
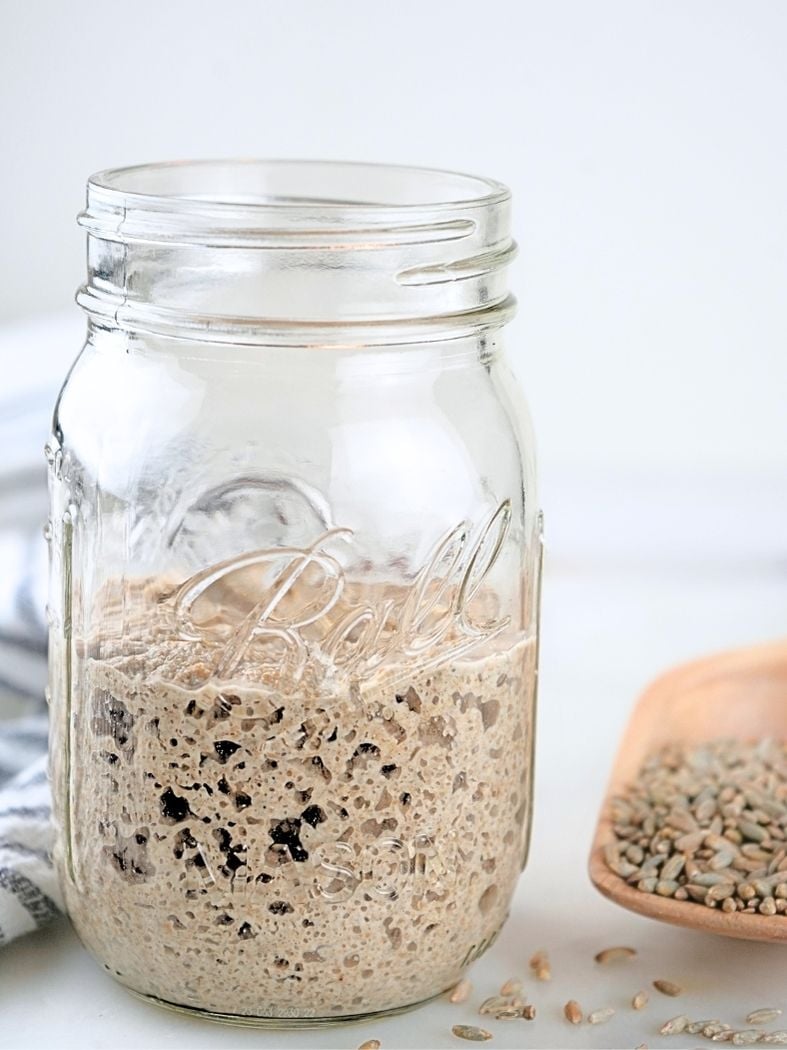
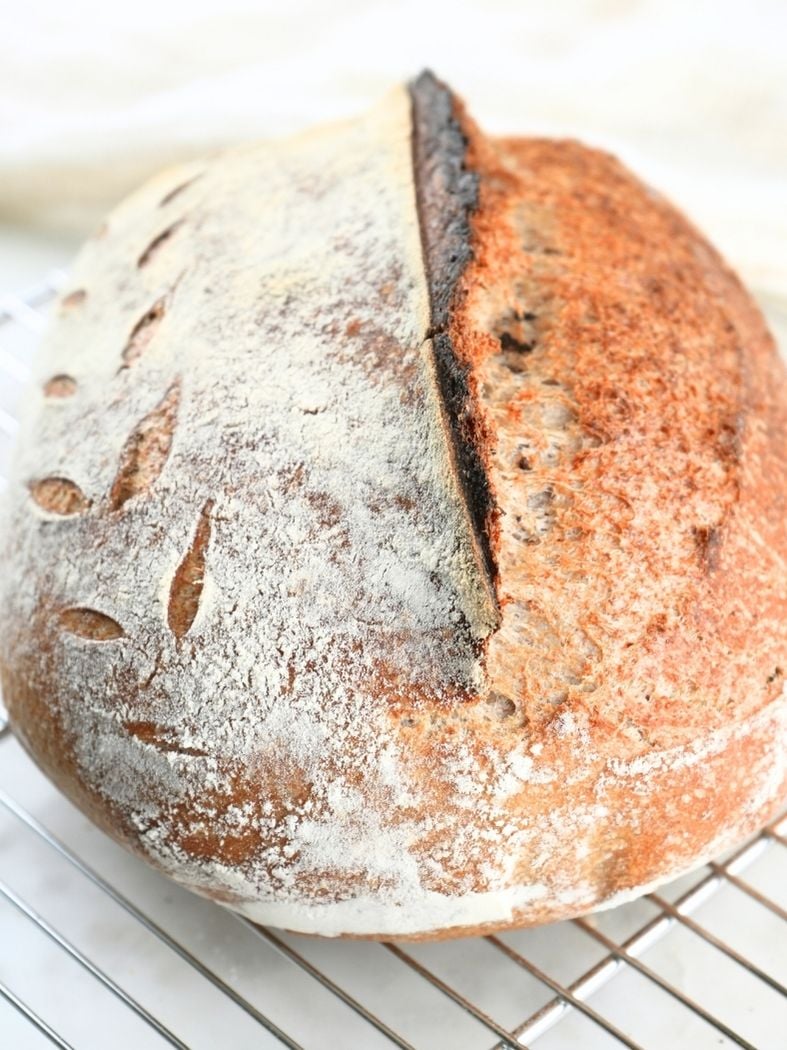
Learn how to make a fresh-milled flour sourdough starter with these simple steps. This foolproof guide will walk you through the process so you can bake beautiful artisan sourdough in 10-14 days.
For folks new to sourdough, there is often a little anxiety about making a sourdough starter and keeping it alive. Couple that with fresh-milled flour, and many people feel it is too complicated.
But don’t give up before you get started because I have really good news for you: making a fresh-milled sourdough starter isn’t difficult at all.
It’s the same process as a regular sourdough starter, except you use fresh-milled flour and just a little more water. (P.S. If you are new to milling grains, check out my grain milling beginner’s guide.)
Fresh flour tends to be “thirstier,” so if you are used to using equal parts flour and water in your starter, it might seem odd that I recommend a little more.
But after experimenting and caring for my fresh-milled starter, I’ve found that it does better with just a little more water. Other than that, the process is identical.
You can use your fresh-milled starter for any recipe that calls for starter, but my favorites include half-fresh milled sourdough and fresh-milled sourdough sandwich bread.
And I even like to use it for recipes that call for white flour, like burger buns and brioche rolls.
Video-Fresh-Milled Starter Tutorial
Follow along step-by-step as I make a fresh-milled sourdough starter and share what I learn along the way.
Don’t forget to subscribe to my YouTube channel. New videos come out weekly!
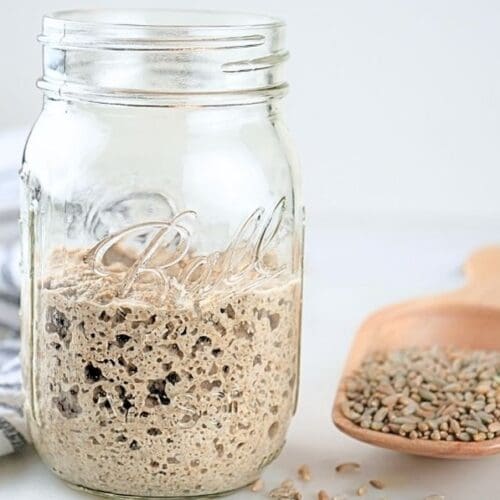
What Is a Fresh-Milled Sourdough Starter
A sourdough starter is a simple mixture of flour and water that cultivates wild yeast and beneficial bacteria. The colony of natural organisms in the starter ferments and leavens bread dough.
So instead of commercial yeast, sourdough breads rely on wild yeast and bacteria to rise.
You can use any type of wheat flour for starter, but a fresh-milled starter is made by milling whole wheat berries just before mixing.
Because the flour is freshly milled, it contains all three parts of the wheat berry-endosperm, bran, and germ-which offer more nutrients for the yeast and bacteria to metabolize.
In other words, fresh-milled flour is like a superfood for your starter-and for you!
Why You’ll Love Making a Fresh-Milled Starter
More Nutrients: A fresh-milled sourdough starter is made with all three parts of the wheat berry, making it more nutrient-dense.
Flavor: Fresh-milled flour has more flavor than store-bought flour. Using a fresh-milled flour will add depth of flavor to your bread and discard recipes.
Self-Sufficient: Making a fresh-milled sourdough starter is an easy way to reclaim a traditional skill and make something from scratch using whole ingredients.
Faster Fermentation: Fresh-milled flour usually ferments faster because it has more micronutrients that supercharge the natural yeast and bacteria.
Fun: Milling flour and learning how to use it is fun! That alone is reason enough to make and experiment with a fresh-milled starter.
Choosing the Right Wheat Berries
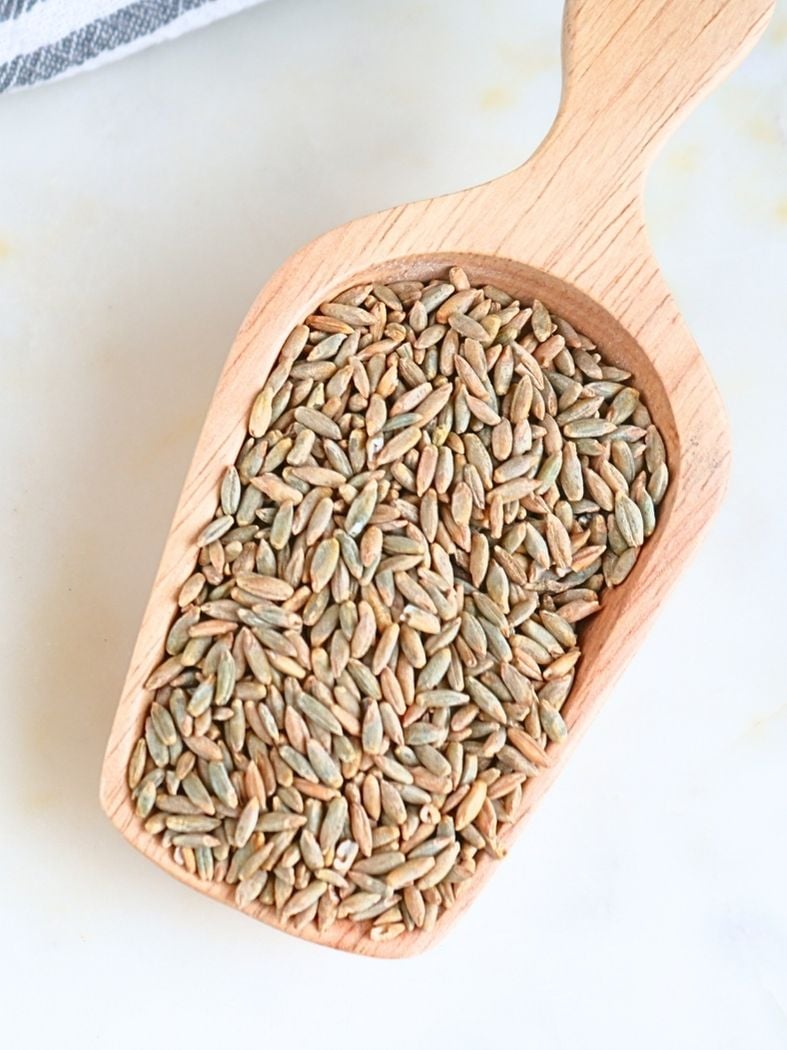
I recommend rye, hard red, or hard white wheat berries for your sourdough starter.
But here is a quick breakdown of some of the most popular varieties:
Hard Red Wheat: Hard red wheat has a deeper, earthier flavor. Because it is a hard wheat, its high gluten content is great for making sourdough starter.
Hard White Wheat: This wheat berry is milder in flavor (and my personal favorite for baking bread). It has a high gluten content, so it’s ideal for making a starter.
Rye: Rye wheat berries are a reliable choice for making a new starter. It has an earthy and slightly sour flavor. I used rye wheat berries for the starter in this post’s pictures.
Soft wheat: Soft wheat is not a good choice for a starter. It doesn’t have the gluten content needed for a sourdough starter. Instead, it is better suited for baked goods like chocolate chip muffins.
Ingredients

Wheat Berries: Any hard wheat berries will work. Rye, hard red, and hard white wheat berries are reliable choices. I get most of my wheat berries from Azure Standard.
Water: Use filtered water to make your sourdough starter. I use the water from my fridge dispenser.
Get the full list of ingredients and measurements on the printable recipe card below.
Tools You Will Need
Grain Mill: I use a Mockmill 200 Professional. Other popular grain mills include Nutrimill and KoMo.
Kitchen Scale: I recommend using a waterproof digital scale for accuracy. If you don't have a scale, volume measurements are included in the printable recipe card below.
Jars: You’ll need a few pint-sized mason jars for your starter.
Spurtle: A spurtle is a tool that makes stirring up your starter easier. It isn’t necessary, but it does help.
Lid: For your starter, use a cloth cover secured with a rubber band or a loose-fitting lid. Never use an airtight lid.
Step-by-Step Instructions
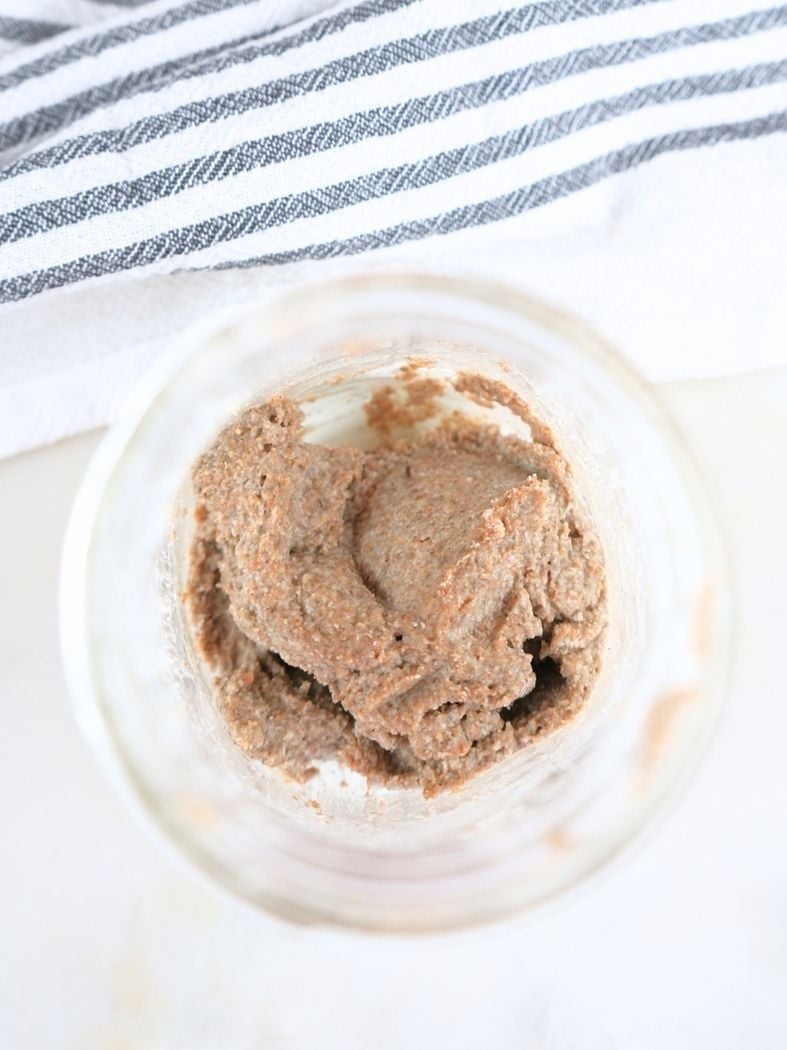
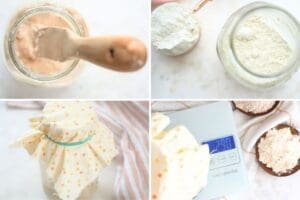
Day 1: Mill 50 grams of wheat berries. (If you are using cups, you will need 1/3 cup of milled flour.)
Add the flour to a mason jar, then pour in 55 grams of water (approximately 1/4 cup). Stir well until thoroughly combined and no dry flour remains.
Cover the jar with a cloth secured by a rubber band, or use a loose-fitting lid. Let it sit at room temperature for 24 hours.
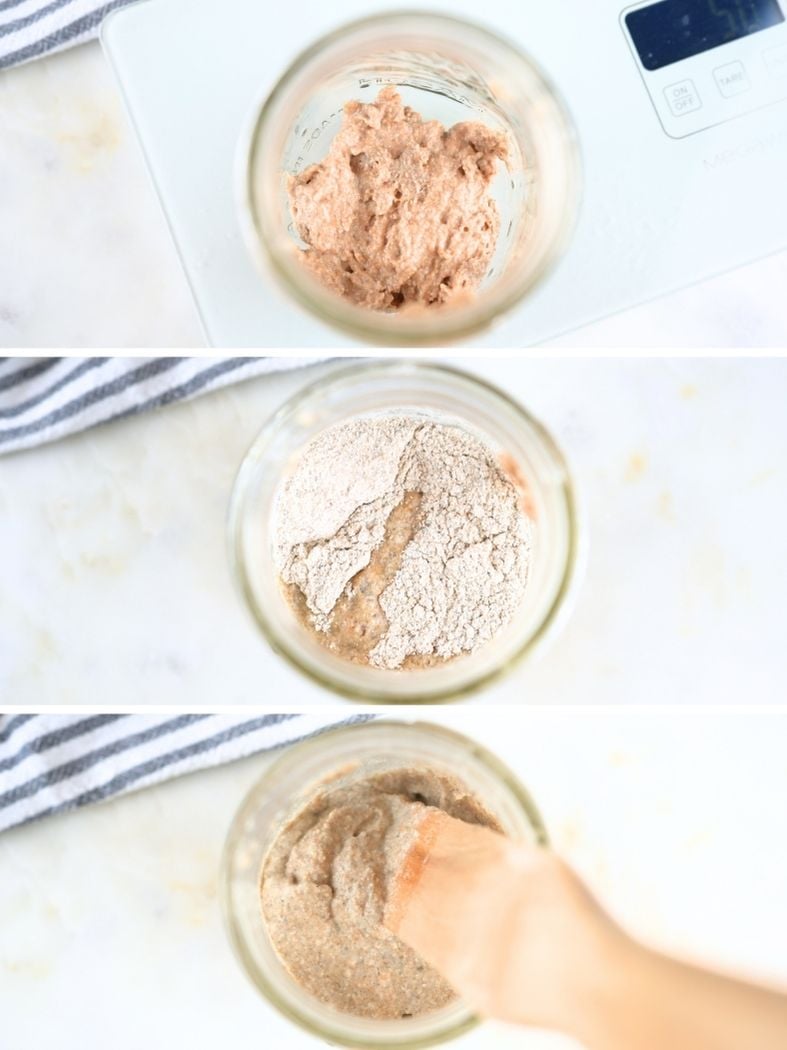
Days 2-5: Transfer 50 grams of the sourdough starter into a clean jar.
Throw the remaining starter away (the starter you throw away is called "discard").
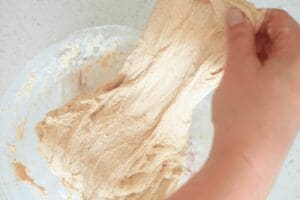
Add 50 grams of fresh-milled flour and 55 grams of water to the 50 grams of reserved starter. Mix thoroughly.
Cover and allow to sit at room temperature for 24 hours.
Days 6-End: At this point, your starter may or may not be doubling with each feeding. Either way, begin feeding it every 12 hours. Follow the same steps and measurements as before for each feeding.
Once your starter doubles regularly and smells good (like sourdough), it’s time to start baking, usually around Day 10-14.
Baking and Maintenance: When you are ready to bake, use the amount of starter called for in the recipe.
Don’t forget to leave some in the jar to save as your “master starter.” What’s left in the jar is what you will feed and maintain for future baking.
If you are not using your fresh-milled starter daily, I recommend storing it in the refrigerator. Feed once a week if it’s in the fridge or every 12-24 hours if stored at room temperature.
Tips for Success
- It is normal for a new starter to double around Day 2 or 3 and then slow down. That initial doubling is just a big influx of yeast and bacteria working itself out and stabilizing. Even if your starter doubles at this point, keep following the remainder of the feeding instructions.
- You can use your discard for discard recipes like brownies or skillet cookies once your starter is fully established. Until then, continue to throw it in the trash.
- Around Day 2 or so, it’s normal for your starter to stink. That’s just the yeast and bacteria stabilizing themselves. Just hold your nose and keep feeding it. In a few days, it will start to smell like sourdough
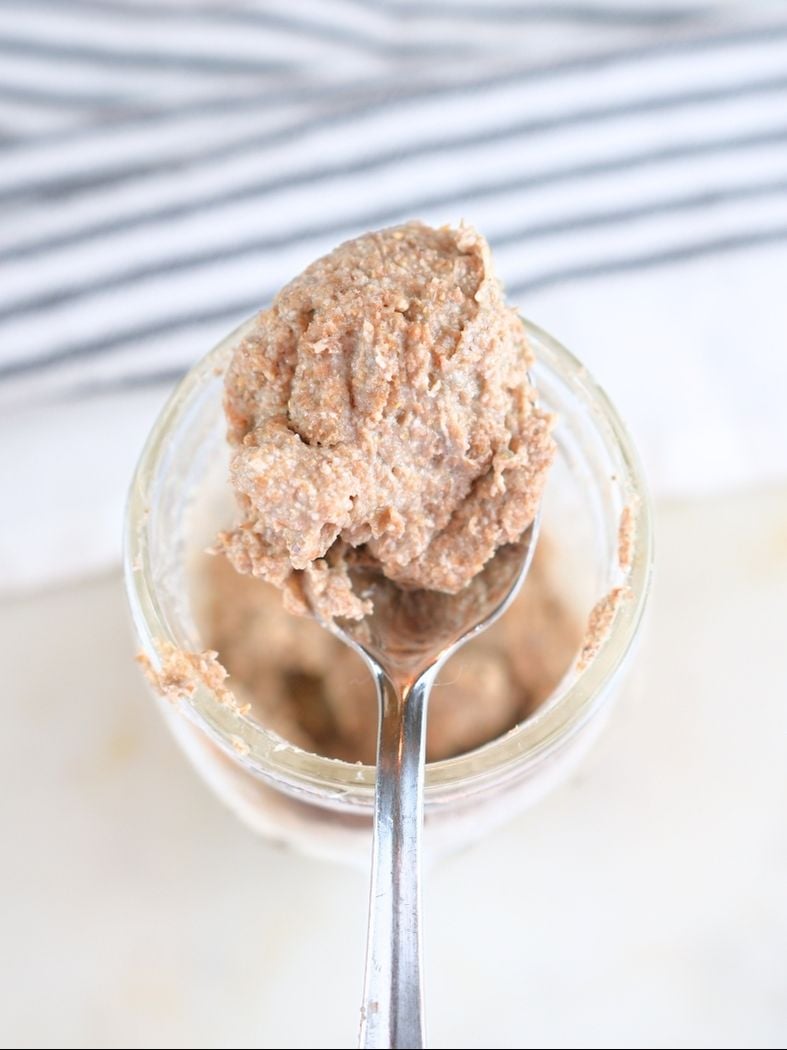
- If you’re used to feeding your starter with store-bought flour, a fresh-milled flour starter may feel slightly slick or oily. This is normal because fresh-milled flour contains more natural oils from the whole grain.
- Do not put your discard down the drain. It can harden and eventually clog the pipes.
- I recommend using a kitchen scale. Measuring by weight (not volume) offers accuracy and consistency with each feeding.
- Different wheat berries absorb water differently. If your starter is too thick or too thin, adjust the water until it's the consistency of thick pancake batter. It may take a few feedings to dial it in.
- The lid should not be tight. The bacteria and yeast's off-gassing creates pressure that can shatter the glass if there isn't enough breathing room. Use 100% cotton secured with a rubber band or a loose-fitting lid.
- The warmer the spot, the more active the yeast and bacteria will be. Try to keep your starter in a place that is 70°-80° F. If you don't have a warm spot, a proofing box can help.
When Can You Bake with Your Fresh-Milled Starter?
How long it takes for your starter to be ready for baking depends on various factors, but most new sourdough starters are ready around Day 10 or so.
Keep an eye on your starter and look for these signs to know when it’s ready to use:
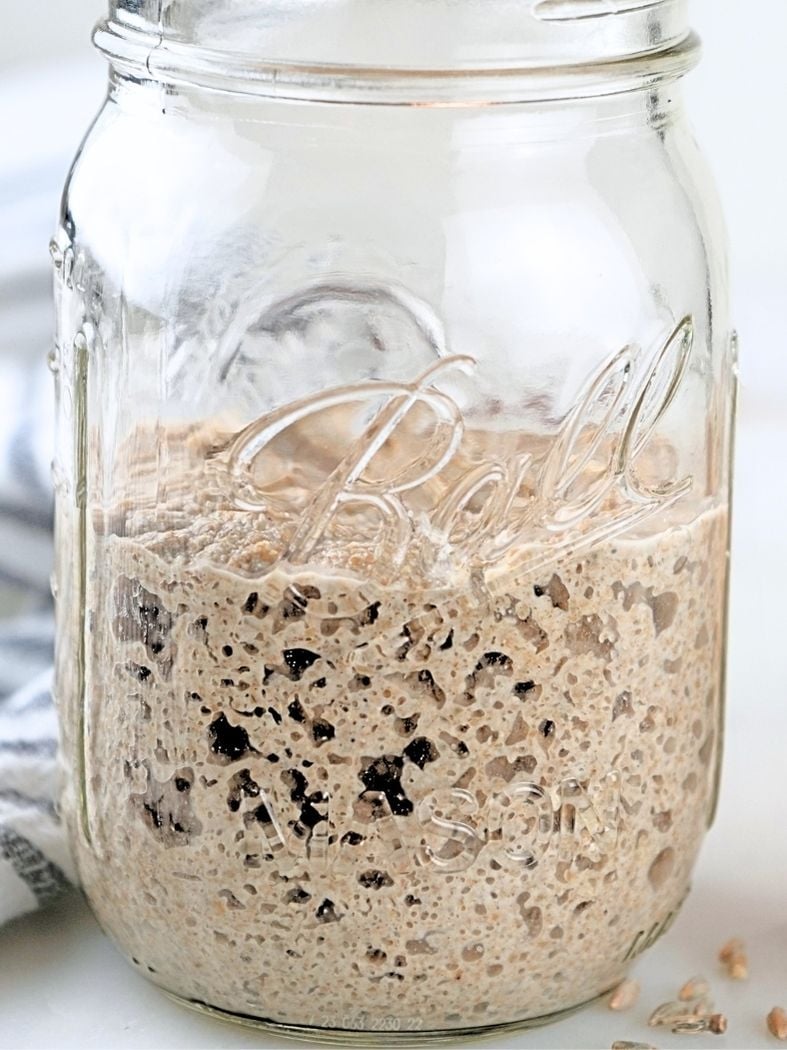
Doubling: Your starter should increase in size after each feeding. With fresh-milled flour, it may not always double, but it should consistently ” grow” with each feeding.
Bubbly: It should be bubbly and airy throughout, not just on the surface or bottom.
Smell: Your starter should smell pleasant, like sourdough or even akin to beer.
Note: The float test is not a reliable way to test the viability of your starter. Fresh-milled flour is heavier and may not float even if the starter is mature.
How To Maintain Your Fresh-Milled Starter
Fridge Method: The easiest way to maintain your sourdough starter is to keep it in the fridge and feed it weekly. This method is best if you bake once a week or less.
Countertop Method: You can keep your starter on the counter, but you will have to feed it every 12-24 hours. This method is ideal if you bake daily or multiple times throughout the week.
Adjust as Needed: If you need more starter, give it a bigger feeding. If you need less starter, reduce your feeding ratio.
Ferment Time: Fresh-milled flour often ferments faster than store-bought. So you may need to feed your starter sooner. If it develops a gray liquid on top (called hooch), that’s a sign your starter is hungry.
FAQs
In the early stages, yes, feeding your starter every 12 hours helps build your starter’s strength. Once it's established, you can adjust to once a day or store it in the fridge and feed it weekly.
This usually means the top layer has dried out from air exposure. To retain moisture between feedings, try using a tighter cloth or a loose-fitting lid.
Don’t worry if you miss a feeding. Feed your starter as soon as you remember, and return to your regular feeding routine. It may take a couple of feedings to bounce back, but it'll recover.
Yes, you can freeze sourdough starter for later use. It’s a great way to ensure you have a backup.
If your starter smells bad around Day 2 or 3, don’t worry. That’s normal, and it will start to smell more like sourdough after a few more feedings.
However, if it’s been more than a few days, I recommend feeding it flour from a different type of wheat berry to encourage a healthier balance of yeast and bacteria.
Yes, a fresh-milled starter adds a little nutrition. But the bulk of the nutrition will come from the bread dough itself. So, if you want the full benefits of whole-grain bread, use fresh-milled flour for both the starter and the dough.
Let's Connect!
If you tried this recipe and loved it, leave a comment or review below.
Also, don't forget to pin this post and follow Moon + Magnolia on Pinterest. You can save all my recipes on your boards and keep up with the latest happenings!
Share your creations on Instagram and tag @moon_and_magnolia!

Fresh-Milled Flour Sourdough Starter
Equipment
- Grain Mill
- Pint Jar
- Loose-fitting lid
- Spurtle optional
Ingredients
- 50 g wheat berries, (rye, hard red, or hard white)
- water
Instructions
Day 1
- Mill 50 grams of wheat berries. (If you are using cups, you will need 1/3 cup of milled flour.)50 g wheat berries
- Add the flour to a mason jar, then pour in 55 grams of water (approximately 1/4 cup). Stir well until thoroughly combined and no dry flour remains.water
- Cover the jar with a cloth secured by a rubber band, or use a loose-fitting lid. Let it sit at room temperature for 24 hours.
Day 2-5
- Transfer 50 grams of the sourdough starter into a clean jar.
- Throw the remaining starter away (the starter you throw away is called "discard").
- Add 50 grams of fresh-milled flour and 55 grams of water to the 50 grams of reserved starter. Mix thoroughly.
- Cover and allow to sit at room temperature for 24 hours. It is normal for a new starter to double around Day 2 or 3 and then slow down. That initial doubling is just a big influx of yeast and bacteria working itself out and stabilizing. Even if your starter doubles at this point, keep following the remainder of the feeding instructions.
Days 6-End
- At this point, your starter may or may not be doubling with each feeding. Either way, begin feeding it every 12 hours. Follow the same steps and measurements as before for each feeding.
Baking and Maintenance
- Once your starter doubles regularly and smells good (like sourdough), it's time to start baking, usually around Day 10-14.
- When you are ready to bake, use the amount of starter called for in the recipe. But don't forget to leave some in the jar to save as your "master starter." What's left in the jar is what you will feed and maintain for future baking.
- If you are not using your fresh-milled starter daily, I recommend storing it in the refrigerator. Feed once a week if it's in the fridge or every 12-24 hours if stored at room temperature.
Video
Notes
- You can use your discard for discard recipes like brownies or skillet cookies once your starter is fully established. Until then, continue to throw it in the trash.
- Around Day 2 or so, it’s normal for your starter to stink. That’s just the yeast and bacteria stabilizing themselves. Just hold your nose and keep feeding it. In a few days, it will start to smell like sourdough
- Do not put your discard down the drain. It can harden and eventually clog the pipes.
- I recommend using a kitchen scale. Measuring by weight (not volume) offers accuracy and consistency with each feeding.
- Different wheat berries absorb water differently. If your starter is too thick or too thin, adjust the water until it's the consistency of thick pancake batter. It may take a few feedings to dial it in.
- The lid should not be tight. The bacteria and yeast's off-gassing creates pressure that can shatter the glass if there isn't enough breathing room. Use 100% cotton secured with a rubber band or a loose-fitting lid.
- The warmer the spot, the more active the yeast and bacteria will be. Try to keep your starter in a place that is 70°-80° F. If you don't have a warm spot, a proofing box can help.
- If you’re used to feeding your starter with store-bought flour, a fresh-milled flour starter may feel slightly slick or oily. This is normal because fresh-milled flour contains more natural oils from the whole grain.
Nutrition
Nutrition information is auto-calculated and may not reflect your final product. Please verify independently if needed.


My starter is definitely ready for use, but I am coming from a zero experience with sourdough. This starter has been so helpful! But now how do I transition to getting more of it so I have enough for a recipe and enough to keep the starter going?
Hi there!
You can discard less so that way you are feeding a larger amount. Or you can feed it a 1:2:2 (1 part starter:2 parts flour:2 parts water). I hope that helps!
-Rebecca
Your instructions have been the so wonderful and the most clear for me! I started out using soft wheat berries. I am about to transition to twice a day feedings, is it ok to switch to hard berries at this point in the process? Should I “wean” my starter 😅?
I’m so glad you have had success! It’s totally fine to switch flour. You can wean it or switch cold turkey. Either will be fine. If it seems sluggish after transitioning to a new flour, just keep feeding it for a few more days! 🙂
Rebecca
My starter was very active on day two and doubled in size! Woohoo! I am now on day 10 and it has not doubled since day two. It is still bubbly and smells great but just hasn’t doubled or grown very much. Does it need to grow consistently in order for me to start using in recipes?
Very helpful notes- thank you!
Hey there!
What type of flour are you feeding it? Sometimes, introducing a new flour can help.
-Rebecca
Do you have the mockmill 100, 200, or lino? Do you love it?
Hey there!
I have the Mockmill Professional 200, and I LOVE it! Let me know if you have questions about it.
-Rebecca
Hello,
Was wondering if I could get a fresh milled starter started with a strong White flour starter?
Thank you
Yup, you can! Any wheat flour will work for starter, and you can switch up the flour as you go along. This blog post and YouTube video might help: https://moonandmagnolia.com/what-types-of-flour-can-you-feed-sourdough-starter/ and https://youtu.be/Dc-6gvLKTiE.
Hope that helps!
-Rebecca
My starter was ready in about 10 days or so. And it has been going strong since!