This post may contain affiliate links. Please read our disclosure policy.
These sourdough secrets for busy moms will help you weave scratch-made bread into your routine. From time-saving tricks to make-ahead ideas, you’ll learn how to make sourdough work for you-not the other way around.

Before we dive in, let me say this: you don't have to bake homemade bread to be a good mom.
We already do so much for our families, and whether or not you make sourdough has nothing to do with your success as a mother. You are doing a great job!
But if you have the desire (and maybe a little extra bandwidth) to start a sourdough journey and need help fitting it into your day, this post is for you.
For many mamas, making sourdough seems like something reserved for families in farmhouses or homesteads because our culture has so far removed us from the tangible experience of preparing and making food.
I remember when I first started dabbling in making no-knead sourdough, it (falsely) seemed inauthentic.
I’m a mom of one kid, and we live in the suburbs. Wouldn’t grabbing bread from the store be easier or make more sense?
Sure, it would have been easier, but that’s not what I want to do.
I desperately crave a simpler life at home for my daughter. And that includes embracing practical heirloom skills, like making sourdough, that nourish and nurture my small family right here in the suburbs.
Video – My Top Sourdough Time-Saving Tips
You can make sourdough work for your busy routine. Check out the video below for practical tips and ideas that will save you time!
Also, don’t forget to subscribe to my YouTube channel. I post new videos every week.

Get Started Making Sourdough
- If you are brand new to sourdough, the first step is to make a sourdough starter. For extra guidance, be sure to download my free sourdough stater eBook!
- Before you learn the hacks, it’s important to learn the basics. That way, you’ll know what you can and can’t tweak.
- Master one recipe or technique at a time. It can be really overwhelming to dive into the sourdough deep end. And that the last thing moms need is more overwhelm.
- Get your kids involved when you can. Kids love to help in the kitchen, and making sourdough is a great heirloom skill and family tradition to pass along.
Freeze Everything
Having frozen starter, dough, and bread ready to go means homemade bread is always just a moment away, even when I’m running between home, school, gymnastics, and everywhere in between.
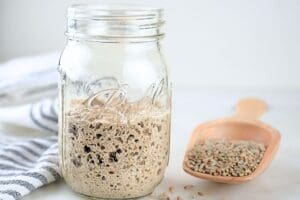
Starter: Freezing sourdough starter is one of my favorite time-saving tricks. You'll always have some ready for quick discard recipes without planning or feeding.
I freeze some of the discard from my regular feedings. Then, whenever we want something quick, like pancakes or crepes, I put the frozen starter in a sealed bag and thaw it in a bowl of warm water.
The other benefit is that if your main starter goes awry, you can just thaw the frozen one, feed it a few times, and you're back in business. You don’t have to worry about the hassle of starting over from scratch.
My YouTube tutorial on freezing starter provides all the how-tos.
Bread: When you bake, make it count. Bake an extra loaf or two, then freeze the extras. Freezing sourdough bread is simple and tastes just as good as fresh bread.
You can toast it directly from frozen or have sandwiches on homemade bread on a whim.
Dough: You can freeze sourdough bread dough and store it in the freezer for up to a month or pizza dough for up to a year. It's a simple way to enjoy fresh-from-the-oven sourdough without the weekly time commitment of making it from scratch.
Just keep in mind that you'll need to thaw and proof frozen dough before baking. It's still easier than starting from scratch each week, but I prefer freezing baked bread because it is more convenient.

Use Your Fridge to Stretch Time
The biggest reason I prefer sourdough over commercial yeast bread is its flexibility. As a mom juggling a million tasks each day, I need my baking to work around my schedule, not the other way around.
That’s where the fridge comes into play.
While sourdough dough continues fermenting in the fridge, the cold slows it down. So, putting your dough in the fridge buys you extra time and allows you to manipulate the process to fit your schedule.
- You can keep the dough in the fridge for up to 3 days. I usually bulk ferment and shape it before sticking it in the refrigerator. When it's time to bake, I just let it warm up a little at room temperature before picking up where I left off.
- If you are in the middle of the bulk fermentation but can’t let it finish (aka need to go to bed, haha!), pop the dough in the fridge. The next day, take it out and let it continue fermenting at room temperature.
- To save time, I feed my starter straight from the fridge. Watch my feeding routine on YouTube to learn more.
- If you need to take a short baking hiatus, your sourdough starter can stay in the fridge, too. Weekly feedings are best, but it can withstand months without a feeding.

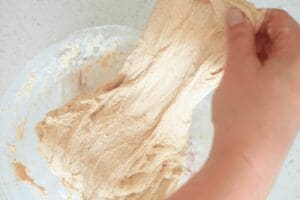
Choose Enriched Doughs
I often encourage busy mamas to stick with enriched doughs like sourdough sandwich bread, brioche rolls, and maple oatmeal bread because they need very little hands-on time.
Enriched doughs include ingredients like eggs, butter, milk, etc. These types of breads are best when made in a stand mixer to incorporate those ingredients.
But it’s not the ingredients that make these types of bread ideal for hectic schedules-it’s that enriched doughs can be made in a stand mixer and are 99% hands-off.
I just toss everything into my KitchenAid mixer, knead for 10 to 15 minutes, and get on with my day.
After bulk fermenting, I shape the dough and pop it in the fridge for a cold proof once my daughter's asleep and the house is finally quiet.
Opt for Simple Shaping
Now, I just mentioned above that I like making brioche rolls because they are easy to make in a stand mixer.
But when I’m swamped and pressed for time, I skip any sourdough recipes that require dividing and shaping.
Shaping multiple portions isn't difficult, but it does take extra time. A simple loaf of sandwich bread is much quicker to shape and is a real time-saver on busy days.
Use a Proofing Box
Some days, I need to slow things down, so I pop the dough in the fridge to slow the fermentation. Other days, I need to get the sourdough show on the road.
When I need to speed things up, I use my Brød & Taylor proofing box. It keeps the dough at a warm, steady temperature so fermentation moves along faster.
I just set it to 80°F, and my dough bulk ferments in no time. It's one of my favorite time-saving tools.
And as a side note, the Brød & Taylor proofer doubles as a slow cooker, which is amazing. One less appliance taking up space and even more ways to save time in the kitchen! Check out my proofer review to learn more about how to use it.

Bulk Prep Discard Recipes
Discard recipes are a fun and easy way to add sourdough to your cooking and baking repertoire. Plus, they ensure you don’t waste any starter from your feedings.
I like discard recipes because they skip the bulk fermentation step, though you can always bulk ferment them if you want to or have extra time.
Quick staples like sourdough pancakes, waffles, tortillas, and granola add variety to our meals without adding stress.
Most discard recipes are also perfect for batch prep and freezing. For example, crepes take just minutes to make and reheat from frozen in only 20 seconds. It doesn't get much easier than that!
And as an added bonus, I haven’t made a discard recipe yet that my little one doesn’t like.

Make a Baking Plan
Though I truly believe you can fit making sourdough into any busy, modern lifestyle, sometimes, it does take a little planning. Here are few things to keep in mind as you plan your sourdough routine:
- Discard recipes are easy to whip up in a pinch, but bread needs more time. So use discard recipes spontaneously, but schedule in your bread routine.
- Keep up with your regular sourdough starter feedings. Your starter doesn’t have to be active and bubbly to bake, but the longer it goes unfed, the more acidic is will taste.
- Carve out a time when you can make extras and freeze them.
- Make sourdough work for you. Experiment with the process and routine so that it is enjoyable, not stressful. If it feels too stressful, it won’t get done. But if you can enjoy the process, you’ll come back to it time and time again.
- Remember, there is no one correct way to make sourdough. There are endless opinions about the “right” techniques and methods. The only proper way to make sourdough is the way that works for you.

FAQs
My daughter loves helping me make bread, especially when I’m shaping it. And though adorable, it isn’t always helpful, haha. So, I give her a little bit of dough to play with while I shape the real loaf. She has fun, and I can focus for a few minutes.
Start with all-purpose or bread flour. They're predictable and easy to work with while you build confidence.
In time, you may feel inspired to experiment with milling flour at home. It’s a great way to boost the nutritional value of your homemade bread and your effort.
For rustic loaves, stretch and folds help properly develop the gluten. But enriched doughs can skip this step entirely if kneaded properly and are totally hand-off.
I have a full list of helpful tips and tools for sourdough beginners. But if you want to invest in a few tools, I’d start with a kitchen scale, a stand mixer, and/or a proofing box.
Remember, though, you don’t need these to make sourdough. So don’t feel like you can’t make homebread if you don’t have these.
Let’s Connect!
If you try any of these sourdough tips, leave a comment below-I'd love to hear how they worked for your busy schedule!
Don't forget to pin this post and follow Moon + Magnolia on Pinterest for more simple, scratch-made ideas.
And if you share your sourdough success on Instagram, tag @moon_and_magnolia so I can cheer you on!


I believe that the tortillas are even better than the bread. I don’t need to turn on the oven, and they taste better than bread. Thank you