This post may contain affiliate links. Please read our disclosure policy.
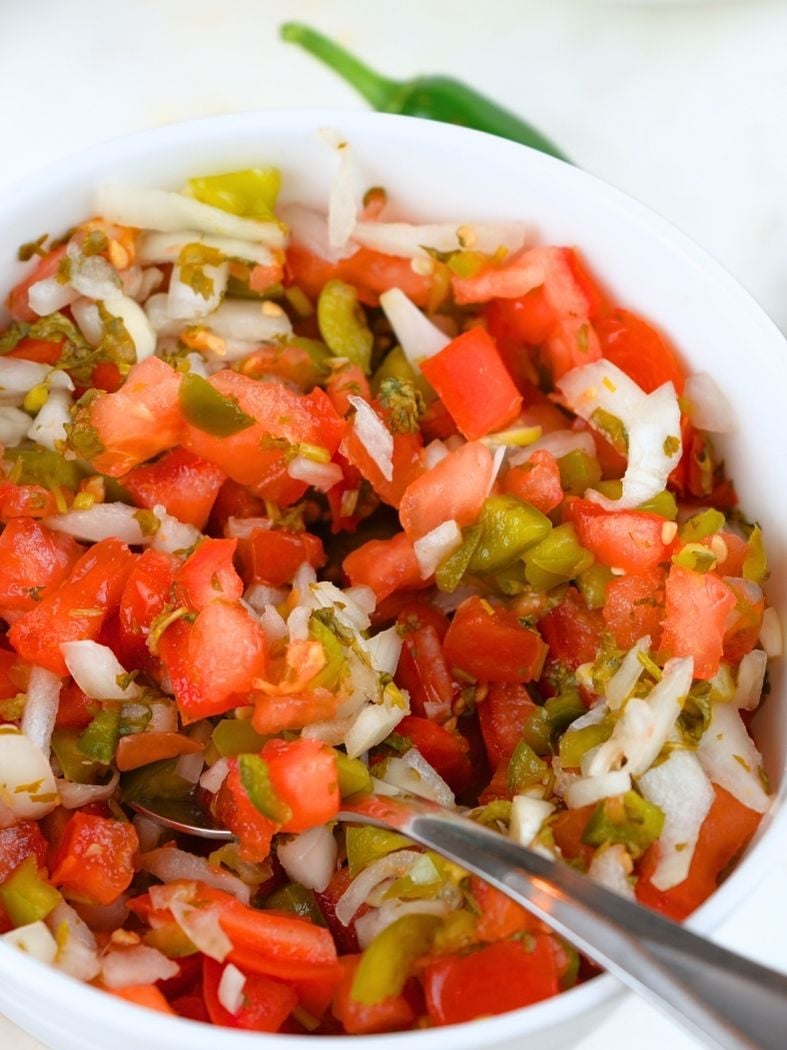
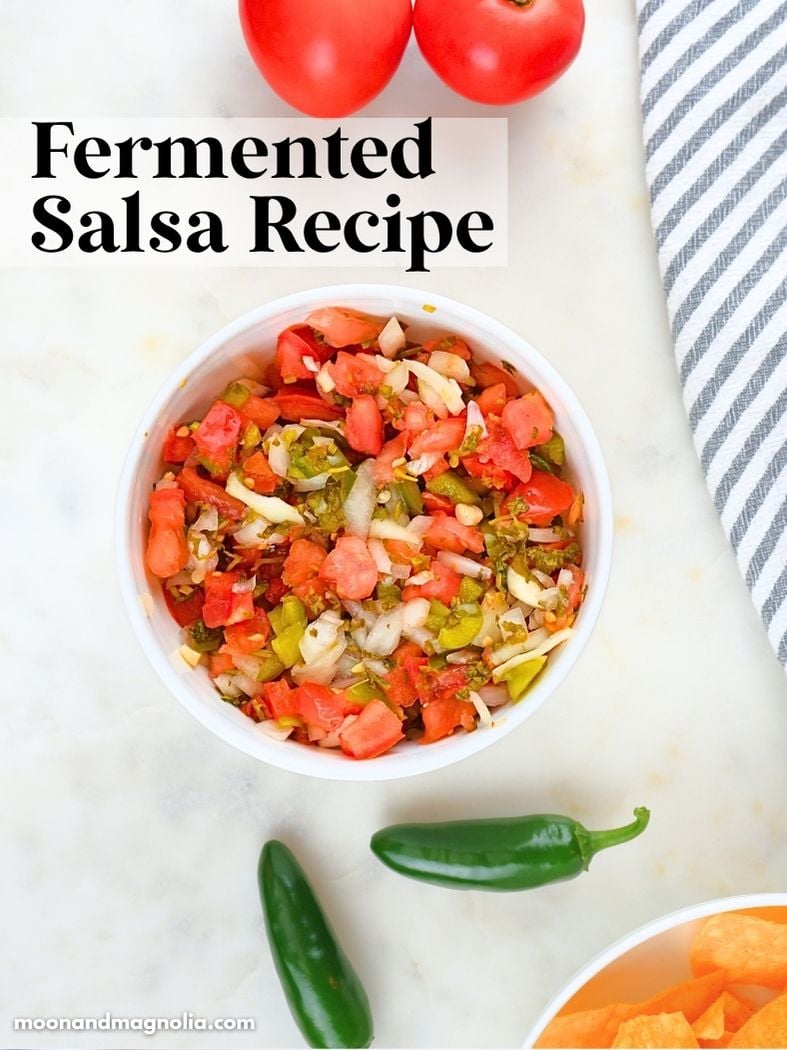
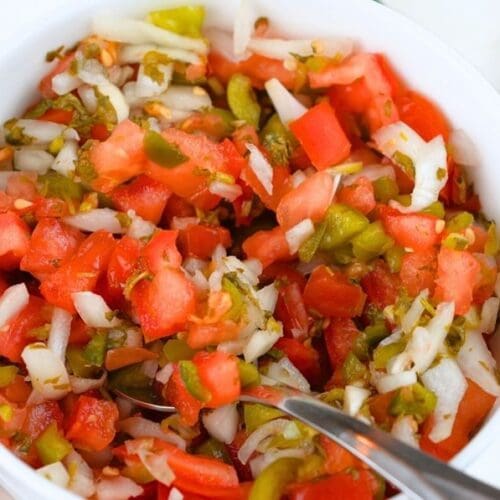
This easy fermented salsa recipe is one of the best (and most delicious) ways to preserve summer’s bounty. It’s tangy, bright, and fresh-and so good you’ll put it on everything from chips to tacos and beyond.
We've officially dubbed this “The Summer of Salsa” in our house. I don't know what's gotten into me, but I can't stop making (and eating) salsa. I've even set a goal to try a new salsa every week this summer.
Right now, this fermented salsa is the clear favorite. We're already on our fifth batch and still going strong.
Honestly, I'm not surprised we love it so much. We always keep fermented peppers and onions on hand, and this salsa brings all those flavors together, plus tomatoes, jalapeños, cilantro, and a squeeze of lime.
Not only is it delicious, but it's also incredibly easy to make. Just mix everything together and let it sit on the counter for a few days. That’s it!
It’s so much simpler than canning salsa, which requires cooking, packing, and processing.
As we head into food preservation season, I plan on canning candied jalapeños, tomatoes, and peaches. So while I’m at it, I’ll probably can some salsa, too.
But if I'm being honest, this fermented salsa is my favorite. Plus, since fermentation is a form of food preservation, it keeps in the fridge for a few months.
Ps. If you have an abundance of tomatoes this summer, I also recommend making Instant Pot sweet and sour stewed tomatoes.
Why You’ll Love This Recipe
Naturally Preserved: Lacto-fermented salsa is naturally preserved without any vinegar or heat processing.
Flavor: The tangy, bright flavor develops as it ferments, giving it more depth than store-bought or canned salsa.
Heirloom Skill: Lacto-fermentation is an old-fashioned preservation method that's easy to incorporate into a modern home.
Easy: Fermentation is one of the easiest forms of food preservation. You don’t need any fancy equipment to make fermented salsa.
Ingredients

Tomatoes: Use tomatoes with a high water content, like Beef Steak, Big Boy, Better Boy, or heirloom varieties.
Bell Pepper: I used a green bell pepper, but any color bell pepper will work.
Onions: White onion is my favorite for fermented salsa, but any onion will work in this recipe.
Jalapeños: For a mild salsa, skip the jalapeño. For a spicier salsa, add more. Removing the membranes and seeds will also reduce the heat.
Garlic: Add as much or as little garlic as you like.
Cilantro: For me, the more cilantro, the merrier! But you can leave it out or adjust the amount to suit your preferences. Use store-bought or cilantro from your herb garden.
Lime: Lemon will work in a pinch, but lime tastes better in salsa.
Salt: I used coarse kosher salt. Really, any salt will work as long as it isn’t iodized salt (it will make your salsa cloudy).
Get the full list of ingredients and measurements on the printable recipe card below.

Tools You’ll Need
Knife or Food Processor: If you prefer a chunkier salsa (akin to pico de gallo) chop the veggies by hand. If you want a thinner salsa, a food processor is better and more efficient.
Jar: This recipe is for a quart-sized jar. Make sure your weight and lid fit the jar you are using.
Weight: You’ll need a fermentation weight to hold the salsa under the brine. You can also use bagged pie weights or a folded cabbage leaf. I’ve even used a small collapsible silicone funnel, which worked great.
Lid: Masontops Pickle Pipes are my favorite because you don't need to worry about burping the jar. A regular canning lid and ring will also work, but you will have to burp it daily to release the pressure.
Step-By-Step Instructions

Step 1: Gather and prepare the ingredients. You can chop the veggies by hand, especially if you prefer a chunky salsa. Or you can use a food processor.

Step 2: In a large mixing bowl, combine the tomatoes, onion, green bell pepper, jalapeño, garlic, and cilantro.

Step 3: Squeeze in the lime juice. Stir to combine.

Step 4: Add the salt and stir to combine.

Step 5: Transfer the salsa to a quart-sized mason jar using a food-safe funnel.
Press the salsa down with a spoon as you go, packing it tightly so the natural juices rise and fully cover the mixture.
Make sure the jar is filled all the way to the top, leaving no more than 1/2 headspace.

Step 6: Place a fermentation weight on top to submerge the salsa under the brine.
If any pieces floated to the surface, use a clean spoon to remove them. This can be tedious, but solid bits exposed to air will cause mold.

Step 7: Add a fermentation lid and set the jar aside to ferment at room temperature for 2 to 3 days.
Check it a few times a day. If any bits have floated to the top, use a clean spoon to remove them. This is common, so check it regularly.

Step 8: Start tasting your salsa around Day 2. If it has the tangy flavor you like, seal it with a regular lid and move it to the fridge.
If not, continue fermenting it, tasting daily until it's to your liking.
Tips for Success
- The warmer the space, the faster the salsa will ferment. Around 68-75° F is ideal.
- When prepping the veggies, remove any bruised or discolored parts.
- A few times a day, check for solid pieces that have floated to the top. This is especially common if you finely chopped the ingredients (especially the cilantro).
- If you see mold, you will need to pitch the salsa and start again. This typically occurs only when solid pieces are exposed to air.
- Label and date your salsa before you stick it in the fridge.
How Long To Ferment Salsa
The fermentation time depends on several factors, such as the temperature in your kitchen, the amount of salt you used, the freshness of your veggies, and, of course, your personal taste.
Most of the time, fermented salsa is ready in about 2 to 5 days.
I recommend starting to taste it around Day 2. For me, it usually hits the sweet spot by Day 3, but you can let it go longer if you want a tangier flavor.
How To Store Fermented Salsa
- Once the salsa has fermented to your liking, swap out the fermentation lid with a regular one and store it in the refrigerator.
- Fermented salsa will last several months in the fridge as long as it's submerged and smells fresh.
- Even in the fridge, the salsa will continue to ferment, just at a slower pace. That means it will get tangier in time.

How To Serve Fermented Salsa
Chips: Of course, this goes without saying. Chips and salsa are a classic combo.
Tacos: I like making tacos with sourdough tortillas or fresh-milled tortillas and piling on the fermented salsa.
Eggs: Spoon some over scrambled eggs, quiche, or Instant Pot boiled eggs. One of my favorite breakfasts is egg tacos with salsa.
Skillet Meals: Top a sourdough skillet or other skillet meal with fermented salsa for an easy dinner.
Dips: For an easy dip, stir fermented salsa into a bowl of homemade cottage cheese, sour cream, or yogurt.
Flatbreads: Pile a sourdough flatbread with your favorite toppings and fermented salsa.
Rice and Beans: For super quick lunches, I like to pop open a jar of home-canned pinto beans and mix them with rice and fermented salsa. So easy!
Why Ferment Instead of Can?
Canning and fermenting each have their own benefits, and I wouldn't say one is better than the other. They're just different and both worth learning. But fermenting does offer a few unique advantages:
No Heat: Fermenting doesn’t require heat processing, so your salsa will have a brighter and fresher flavor.
Probiotics: Unlike canning, which uses heat and kills off bacteria, lacto-fermented salsa preserves the beneficial bacteria and keeps the probiotics intact.
Equipment: You don’t need any special equipment to ferment salsa. Canning, on the other hand, requires proper canning tools and supplies to do it safely.
Quick and Easy: Fermented salsa comes together in just a few minutes of hands-on time. Canning salsa isn't difficult, but it requires much more time and effort.
FAQs
Yes, a sour or tangy smell is totally normal. As long as there's no rotten, yeasty, or foul odor, it's likely just the natural fermentation at work.
Absolutely, but the natural sugars may make it ferment faster. Be sure to check it daily.
A thin white film is usually kahm yeast, which is harmless but causes a more acidic flavor. You can scoop it off, but if the taste is too sour, you’ll have to make a new batch. However, if there’s fuzzy mold, you’ll have to pitch it and start over.
Fermentation needs warmth to get started, so I don’t recommend starting it in the fridge. Once it's done fermenting at room temperature, you can move it to the refrigerator to slow the process and store it safely.
Yes! I usually make a double batch. We eat one half fresh while we wait for the other half to ferment.
Let's Connect!
If you tried this recipe and loved it, leave a comment or review below.
Also, don't forget to pin this post and follow Moon + Magnolia on Pinterest. You can save all my recipes on your boards and keep up with the latest happenings!
Share your creations on Instagram and tag @moon_and_magnolia!

Fermented Salsa Recipe
Equipment
- Knife
- Food Processor optional
- Quart-Sized Mason Jar
Ingredients
- 1 1/2 pounds tomatoes, diced
- 1/2 onion, diced
- 1 green bell pepper, diced
- 1 jalapeño, minced
- 2 garlic cloves, minced
- 1/2 cup cilantro, roughly chopped
- 1 lime
- 1 tablespoon salt
Instructions
- Gather and prepare the ingredients. You can chop the veggies by hand, especially if you prefer a chunky salsa. Or you can use a food processor.
- In a large mixing bowl, combine the tomatoes, onion, green bell pepper, jalapeño, garlic, and cilantro.1 1/2 pounds tomatoes, 1/2 onion, 1 green bell pepper, 1 jalapeño, 2 garlic cloves, 1/2 cup cilantro
- Squeeze in the lime juice. Stir to combine.1 lime
- Add the salt and stir to combine.1 tablespoon salt
- Transfer the salsa to a quart-sized mason jar using a food-safe funnel. Press the salsa down with a spoon as you go, packing it tightly so the natural juices rise and fully cover the mixture. Make sure the jar is filled all the way to the top, leaving no more than 1/2 headspace.
- Place a fermentation weight on top to submerge the salsa under the brine. If any pieces floated to the surface, use a clean spoon to remove them. This can be tedious, but solid bits exposed to air will cause mold.
- Add a fermentation lid and set the jar aside to ferment at room temperature for 2 to 3 days. Check it a few times a day. If any bits have floated to the top, use a clean spoon to remove them. This is common, so check it regularly.
- Start tasting your salsa around Day 2. If it has the tangy flavor you like, seal it with a regular lid and move it to the fridge. If not, continue fermenting it, tasting daily until it's to your liking.
Notes
- The warmer the space, the faster the salsa will ferment. Around 68-75°F is ideal.
- When prepping the veggies, remove any bruised or discolored parts.
- A few times a day, check for solid pieces that have floated to the top. This is especially common if you finely chopped the ingredients (especially the cilantro).
- Label and date your salsa before you stick it in the fridge.
Nutrition
Nutrition information is auto-calculated and may not reflect your final product. Please verify independently if needed.


I’ve been keeping a few jars of this in the fridge because I put it on EVERYTHING!