This post may contain affiliate links. Any purchases from links outside of moon + magnolia may earn a commission at no additional cost to you. Thank you for supporting my content!
I’m sharing my simple, personal process for feeding sourdough starter from the fridge-a quick, once-a-week routine that is perfect for busy bakers or those who bake less often. Learn how to feed your starter and manage discard with ease!

When it comes to caring for a sourdough starter, there's no shortage of opinions. And, honestly, most of them are right.
Some folks keep their starter on the counter, others in the fridge. Some discard, some don't. Some weigh ingredients, others eyeball it.
But the truth is, there's no single right way. What matters most is finding a routine that works for you.
For me, keeping my starter in the fridge and feeding it straight from there has been a game-changer.
It's low-maintenance, quick, and fits right into my busy days (which is exactly what I'm looking for in life, haha).
It doesn’t feel like another chore-just an easy, rewarding process that leads to warm, crusty no-knead sourdough bread for beginners, decadent sourdough donuts, and all kinds of scratch-made sourdough goodness.
If you're seeking a simple way to care for your starter, this might be just the method for you!
Ps. Check out this post to learn how to make a sourdough starter if you don’t already have one. And learn how to freeze sourdough starter, so you always have a backup.

Why Keep Your Sourdough Starter in the Fridge?
- Low-Maintenance: Keeping your starter in the fridge is the “set it and forget it” of sourdough. With just one feeding a week, it's a low-maintenance option. No daily care required!
- Slow Fermentation: The cold fridge slows fermentation to a crawl, so your starter takes about a week to metabolize the wheat instead of 12-24 hours on the counter.
- Fits Into Busy Schedules: Keeping your starter in the fridge is the best method for folks with a busy schedule because you hardly have to worry about it.
- Resilient: When refrigerated, the yeast and bacteria in the starter hibernate. So, even though feeding it weekly is ideal, your starter can stay in the fridge for many months without attention and still bounce back just fine.
Ingredients

- Established Starter: You will need an established and healthy starter. If you don’t have a starter yet, download my free sourdough starter eBook to get started (no pun intended).
- Flour: I use a 50/50 mix of whole wheat and all-purpose flour. You can use any unbleached wheat flour for starter.
- Water: I use the water from my fridge dispenser. I’ve heard that chlorinated tap water won’t work for starter, but I haven’t had experience with that. So, stick to filtered water to stay on the safe side.
Tools You May Need
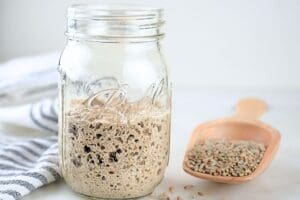
- Jars: Use a jar big enough for your starter to double (no one wants to deal with an overflowing goopy mess). I use quart-sized mason jars.
- Kitchen Scale: I use a digital waterproof kitchen scale to weigh my ingredients.
- Spurtle: A wood spurtle is a utensil made for stirring. It isn’t necessary, but it does make it easier to stir ingredients in a jar.
My Step-by-Step Process for Weekly Feedings
For my weekly feedings, as you’ll see in the step-by-step instructions below, I use 130 g of starter, flour, and water for each feeding.
This is the amount that works for my weekly baking needs. But you can feed your starter more or less depending on how much starter you need or want.
Just make sure you feed it equal parts (in grams) starter, flour, and water. So, for example, where I feed mine 130:130:130, you may feed yours 50:50:50.

Step 1: Remove the starter from the fridge.

Step 2: Transfer 130 g of sourdough starter into a clean jar. Set aside the remaining starter that’s in the “old jar.”

Step 3: Add 130 g of flour to the starter that is in the new, clean jar.
I usually use half all-purpose and half whole wheat for each feeding.

Step 4: Pour 130 g of water into the jar.

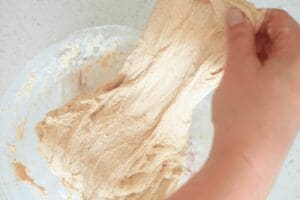
Step 5: Using a spurtle or long spoon, stir until thoroughly combined and no dry flour remains.

Step 6: Scrape the sides with a small spatula, and wipe the rim with a clean towel.

Step 7: Cover with a loose-fitting lid or a cloth cover secured with a rubber band.

Step 8: If you are baking, wait until your freshly fed starter is bubbly and active before using it. Use what you need to bake, then stash the rest in the fridge.
As long as you still have enough starter in your jar, you don’t need to feed it again (unless you want to) until your next weekly feeding.
If you are not baking, just stick your starter back in the fridge.

Step 9: Grab the original “old jar” from Step 2.
If the remaining starter (discard) is completely inactive (deflated and back to its original volume), you can transfer it to a container with an air-tight lid and store it in the fridge
If it is still bubbly, cover it with a loose-fitting lid or cloth cover secured with a rubber band.

Step 10: Repeat the feeding process weekly. Use the sourdough discard for other recipes, such as crepes, biscuits, or other treats.
Tips for Success
- Don’t Overthink It: I know it seems mysterious, but don’t overthink it. You are mixing equal parts starter, flour, and water, and popping it in the fridge. That’s it! Easy peasy.
- Weigh Your Ingredients: The 1:1 feeding ratio refers to grams, not volume. Since water weighs more than flour, feeding your starter 1 cup of each will leave you with a soupy mess.
- Use the Right Lid: For a freshly fed or bubbly, active starter, use a loose lid to allow gases to escape. A tight-fitting lid should only be used for completely inactive discard.
- Save the Discard: What’s left in the original jar is called discard, and it’s money in the bank. It can be used for discard recipes and even to thicken soups. (Ps. Here are 12 easy discard recipes to try asap!)
Video Tutorial – My Weekly Starter Routine
In this video tutorial, I share my step-by-step process for feeding my starter straight out of the fridge once a week.
Don’t forget to subscribe to my YouTube channel for more sourdough tutorials and simple living inspiration. New videos come out weekly!

How Much Starter Do You Need?
There’s a lot of chatter about how much sourdough starter you should keep, but the truth is simple: keep as much as you need.
I like to keep 390 grams in my fridge. For my baking routine, that’s enough for a boule, sourdough sandwich bread, or sourdough burger buns, with a little extra for discard recipes and testing new ideas for my blog and YouTube channel.
Your ideal amount may be more or less depending on how often you bake, and that's perfectly fine. The key is to keep what works best for you.

What to Do with Sourdough Discard
For new bakers, sourdough starter discard is one of the biggest points of confusion. But don’t let it trip you up.
Discard is simply the portion of the starter that remains unfed during your weekly routine. And importantly, don’t throw it away.
In fact, I wish there was a different name for it in the sourdough lexicon because “discard” implies that it is trash, but it isn’t trash at all.
In my kitchen, it is a vital ingredient. After all, it’s 50% flour, and I use flour for just about everything.
You can add discard to any recipe, turning what sounds like waste into something delicious.
Here are a few tips for maintaining and using your sourdough starter discard.
- Store It for Later Use: Over the course of a few feedings, I save my discard in a jar or container. When I've built up a healthy stash, I use it for quick pancakes, pizza crust, and other recipes.
- Bake with It: My favorite discard recipes include sourdough discard Pop-Tarts, sourdough cinnamon toast crunch, sourdough discard brownies, carrot cake with sourdough discard, sourdough lemon bars, and sourdough biscuits and gravy.
- Freeze It: If you are on a baking hiatus, you can freeze your starter discard for later use. It can last up to a year in the freezer without a single feeding!
- Don’t Feed It: In reality, you can feed your discard-it won’t turn into a Gremlin. But if you do, you’ll end up with a second container of active starter.

FAQs & Troubleshooting
If you want to increase your starter, feed it a 1:2:2 or 1:3:3 ratio. For example, 100 g of starter gets 200 g flour and 200 g water, or 300 g of flour and water if you want to triple it.
Another option is to skip discarding. Just weigh your total starter and feed it an equal amount of flour and water.
No, and what a relief that is! Sourdough starter is very forgiving and extremely resilient. It doesn’t matter if you are off a few grams here and there.
In fact, on lazy nights, I don’t even weigh my ingredients. I just eyeball it until it’s the right consistency.
Grey liquid on the surface of your starter is called “hooch.” It’s a byproduct of fermentation and a sign that your starter needs to be fed.
Just pour the hooch off and feed it as usual.
Definitely, I often oscillate between the fridge and counter methods. If you switch to keeping your starter on the counter, remember it has to be fed daily.
When you are ready to put it back in the refrigerator, give it a good feeding and pop it in.

Let's Connect!
If you tried this feeding routine, let me know how it went in the comments below!
Also, don't forget to pin this post and follow Moon + Magnolia on Pinterest. You can save all my recipes on your boards and keep up with the latest happenings!
Share your creations on Instagram and tag @moon_and_magnolia!
More Posts You’ll Love


How To Feed Sourdough Starter from the Fridge
Equipment
- Mason Jar
- Loose Lid or Cloth Cover with Rubber Band
Ingredients
- 130 g sourdough starter
- 130 g flour, (any unbleached wheat flour)
- 130 g water, (filtered)
Instructions
- Before you get started: For my weekly feedings, as you'll see in the step-by-step instructions below, I use 130 g of starter, flour, and water for each feeding.This is the amount that works for my weekly baking needs. But you can feed your starter more or less depending on how much starter you need or want. Just make sure you feed it equal parts (in grams) starter, flour, and water. So, for example, where I feed mine 130:130:130, you may feed yours 50:50:50.
- Remove the starter from the fridge.
- Transfer 130 g sourdough starter into a clean jar. Set aside the remaining starter that is in the "old jar."
- Add 130 g flour to the starter that is in the new, clean jar. I usually use half all-purpose and half whole wheat for each feeding.
- Pour 130 g water of water into the jar.
- Using a spurtle or long spoon, stir until thoroughly combined and no dry flour remains.
- Scrape the sides with a small spatula, and wipe the rim with a clean towel.
- Cover with a loose-fitting lid or a cloth cover secured with a rubber band.
- If you are baking: wait until your freshly fed starter is bubbly and active before using it. Use what you need to bake, then stash the rest in the fridge.As long as you still have enough starter in your jar, you don't need to feed it again (unless you want to) until your next weekly feeding.If you are not baking: just stick your starter back in the fridge.
- Grab the jar of discard (the remaining starter in the "old jar").If the remaining starter (discard) is completely inactive (deflated and back to its original volume), you can transfer it to a container with an air-tight lid and store it in the fridge.If it is still bubbly, cover it with a loose-fitting lid or cloth cover secured with a rubber band.Use the discard at your convenience to make brownies, crepes, or other discard recipes.
- Repeat the feeding process weekly. Use the sourdough discard for other recipes, such as crepes, biscuits, or other treats.
Notes
- The 1:1 feeding ratio refers to grams, not volume. Since water weighs more than flour, feeding your starter with 1 cup of each will leave you with a soupy mess.
- For a freshly fed or bubbly, active starter, use a loose lid to allow gases to escape. A tight-fitting lid should only be used for completely inactive discard.
- What’s left in the original jar is called discard, and it’s money in the bank. It can be used for discard recipes and even to thicken soups. (Ps. Here are 12 easy discard recipes to try asap!)
- I've heard that chlorinated tap water won't work for starter, but I haven't had experience with that. So, stick to filtered water to stay on the safe side.
Nutrition
Nutrition information is auto-calculated and may not reflect your final product. Please verify independently if needed.


Thank you so much, Rebecca! Just for clarity, I purchased my starter from an online resource, so I don’t really know how mature it is. I’ve been using it for 4 weeks. My only other question about putting the starter back in the fridge, is what percentage should I use to feed it? I’ve been trying different percentages, and I don’t know that it’s made a difference.
BTW, I did purchase the Brod & Taylor proofing box and it made a HUGE difference. I used it for my starter, then for the first rise. Amazing! I’ll be leaving a review for your Cranberry & Walnut Sourdough recipe. Extraordinary!!
Hi Rebecca! I hate to ask again since you’ve been so generous with your time. I’m still not fully understanding my starter. Last week my starter was amazing. I took out what your recipe called for, then tucked the leftover in the fridge. I only bake bread once a week, so it sits until I bake again. Last night, I fed it 50g/50g/50g to make another recipe of yours, and to have leftover (hopefully producing 150g). It stayed in the microwave overnight (71F, which I understand is a little cool). 12 hours later, just a little bubbling, but did not rise. I fed it again this morning, but probably didn’t do it right. I fed 50g flour, 50g water. It’s risen a little bit (and it’s been about 6 hours). When it doesn’t rise “as expected”, it totally messes up the baking schedule (ugh). Questions: 1) should I feed the leftover starter when I put it in the refrigerator, until next week’s baking? I don’t think I did last week, and it had just a little hooch last night, which was the first time for me. 2) I’m starting to feed using half whole wheat and half AP or bread flour, weighing everything. Isn’t this ideal? Doesn’t ww give it a little more boost/nutrients to eat? 3) Could my starter still be a little new? I bought it from an online source instead of making it from scratch. This is week 4. Any thoughts why my starter isn’t consistent? 4) Could my house just be too cool? I have decided to purchase the proofing box, so that will be another learning curve. 5) Could my refrigerator be too cold? I’m grasping at anything that might be the culprit.
Until I can get consistent results week after week, I’ll be scratching my head. Thank you so much for your help and advice. I really appreciate it!
Hey there!
First, how old is your starter? That can help me figure a few things out. But to answer your questions:
1. Yes, I would feed your starter before sticking it in the fridge. It will still ferment, just much more slowly in the cold temperature.
2. Yes, giving it whole wheat can offer a boost for your starter. But if it’s still acting slugging, you can give it a few feedings with 100% whole wheat. That might help jumpstart it.
3. It’s really normal for a starter to be bubbly and active when it’s first made. But then, it can take 10-14 days for it to stabilize. So it might just need more nurturing.
4. It’s hard for me to tell without seeing it, but my hunch is that it needs more feedings and needs to sit out of the fridge for many days. The fact that it’s getting a little bubbly suggests that it is trying, but needs a boost. I’d feed it whole wheat flour every 12 hours until it doubles with each feeding. Make sure you discard half first, or you will have a ton of starter.
5. It might be the cold temp, but you can freeze starter and revive it. So that’s probably unlikely. My overall hunch is that it needs more regular feedings at room temperature.
Hope that helps!
Rebecca
Like Maria (above), I’ve viewed countless videos, thumbed through several sourdough cookbooks, and googled trying to gain a better understanding of starters. I’ve baked yeasted bread for decades, but sourdough is a totally different creature! To date, I’ve made 2 successful loaves, so I’m a newbie and have a lot to learn. This post about starters clicked with me, and I’m so grateful I’ve found your blog. Looking forward to learning more as I go through your library.
Do you have any experience with Brod & Taylor Sourdough Home? It’s a little more affordable than the proofing box. I’m almost ready take the plunge, but…
Hi, Mindy!
I’m so glad it is helpful! I haven’t tried the Sourdough Home yet, but Brod & Taylor products are great. I love my proofing box and use it all of the time. I’m not sure about the versatility of the Sourdough Home, but the proofing box doubles as a slow cooker. It’s amazing! I use it just as much as a slow cooker as I do for proofing dough. 🙂
Hope that helps!
-Rebecca
This is right on the money! Simple, easy, clear instructions that have worked PERFECT for me. I’m a first timer and I shuffled through at least 20 videos. Rebecca makes it easy, non-stressful, and explained well.
I’m so glad it was helpful! Thank you so much for sharing!
-Rebecca
Keeping it in the refrigerator, do you keep a cloth on it always or do you put a lid on it? Baking once a week. Thank you.
Hey there! I usually bake once a week too, and I keep a cloth on it all of the time. 🙂
-Rebecca