This post may contain affiliate links. Please read our disclosure policy.
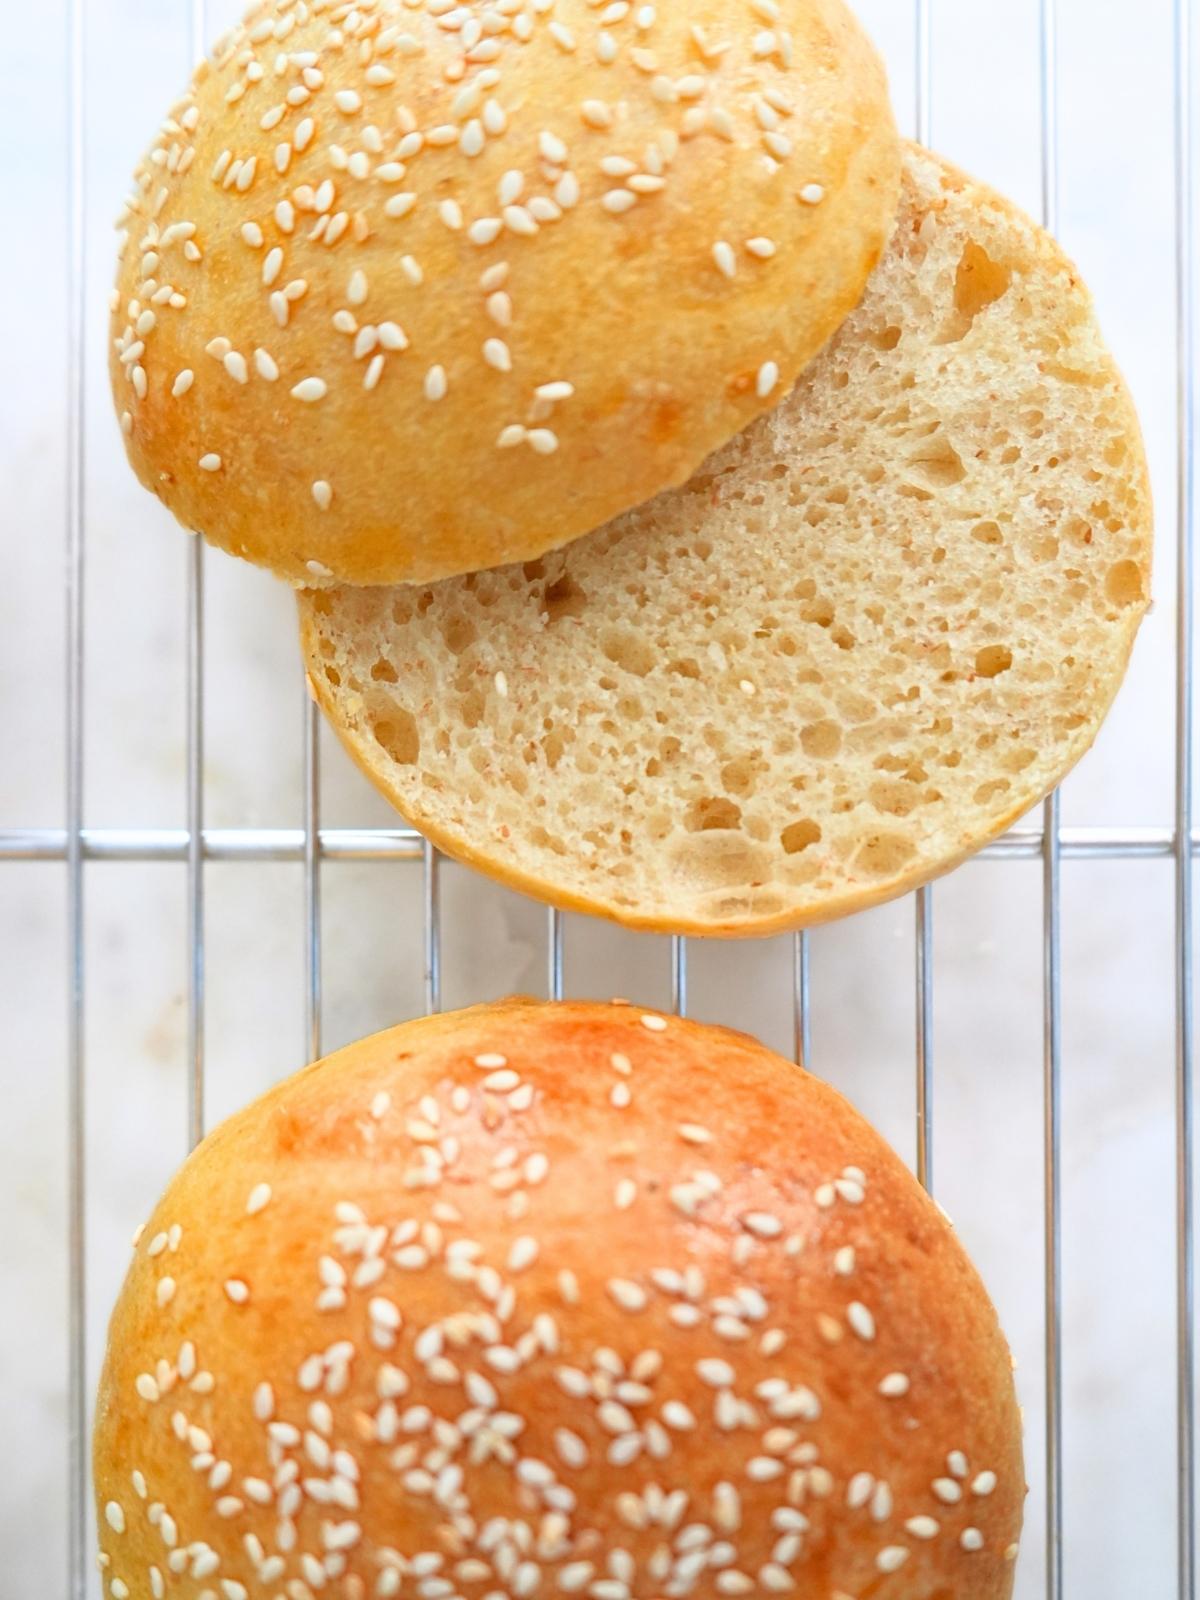
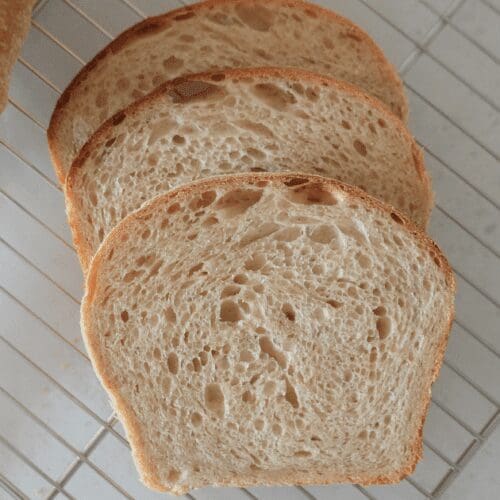
These sourdough burger buns will be the best you’ve ever had! They are soft and fluffy without being too bready with your burger. Perfect for summer cookouts, easy sloppy joes, sourdough fried chicken sandwiches, and more!
Recipe Overview: Sourdough Burger Buns
- Ready In: 10 hours, 40 minutes
- Serves: 8 buns
- Calories: 343 kcal (approximately)
- Main Ingredients: Bread flour, sourdough starter, butter, egg, and sugar
- Why You’ll Love It: These sourdough burger buns are soft and fluffy without being too bready with your burger. The buttery dough creates a tender texture, making them perfect for everything from summer cookouts to sloppy joes. Plus, they are easy to make ahead and freeze for meals down the road.
SUMMARIZE & SAVE THIS RECIPE ON
After several rounds of testing, I finally landed on a sourdough burger bun recipe that's soft and fluffy. The secret is extra butter and slightly higher hydration, which creates a tender, moist crumb.
These buns are delicious with grilled burgers with a side of beef tallow, French fries, and baked beans made with home-canned pinto beans. We also love them with homemade sloppy joes topped with lacto-fermented peppers and candied jalapeños.
Jump to:
- Recipe Overview: Sourdough Burger Buns
- Why You’ll Love This Recipe
- Video – Sourdough Burger Buns
- Key Ingredients
- How To Make Sourdough Burger Buns
- Get the FREE sourdough starter eBook!
- Tips for Success
- Serving Suggestions
- Storing and Reheating
- Sample Baker’s Schedule
- Sourdough Burger Buns FAQs
- More Sourdough Bread Recipes
- Sourdough Burger Buns
Why You’ll Love This Recipe
The Softest Buns EVER: These are the softest homemade burger buns I’ve ever had.
Simple Ingredients: These sourdough burger buns are made with simple ingredients, many of which you likely already have in your pantry.
Delicious: These buns are rich, buttery, and delicious-and so much better than store-bought.
Easy: The only hands-on time you need is for shaping the buns and adding the egg wash. The rest is completely hands-off.
Video – Sourdough Burger Buns
Check out my full YouTube tutorial for how to make these easy sourdough burger buns. And don’t forget to subscribe to my YouTube channel. New videos come out weekly!

Key Ingredients
Flour: For the softest buns, I recommend using bread flour. But all-purpose will also work. If you are converting to fresh-milled flour, use hard white wheat. (If you are new to grain milling, check out my beginner’s guide to fresh-milled flour.
Sourdough Starter: Active or inactive starter will work. Download my free starter eBook to learn more about making and caring for a sourdough starter.
Butter: Use softened, unsalted butter.
Get the full list of ingredients and measurements on the printable recipe card below.
How To Make Sourdough Burger Buns
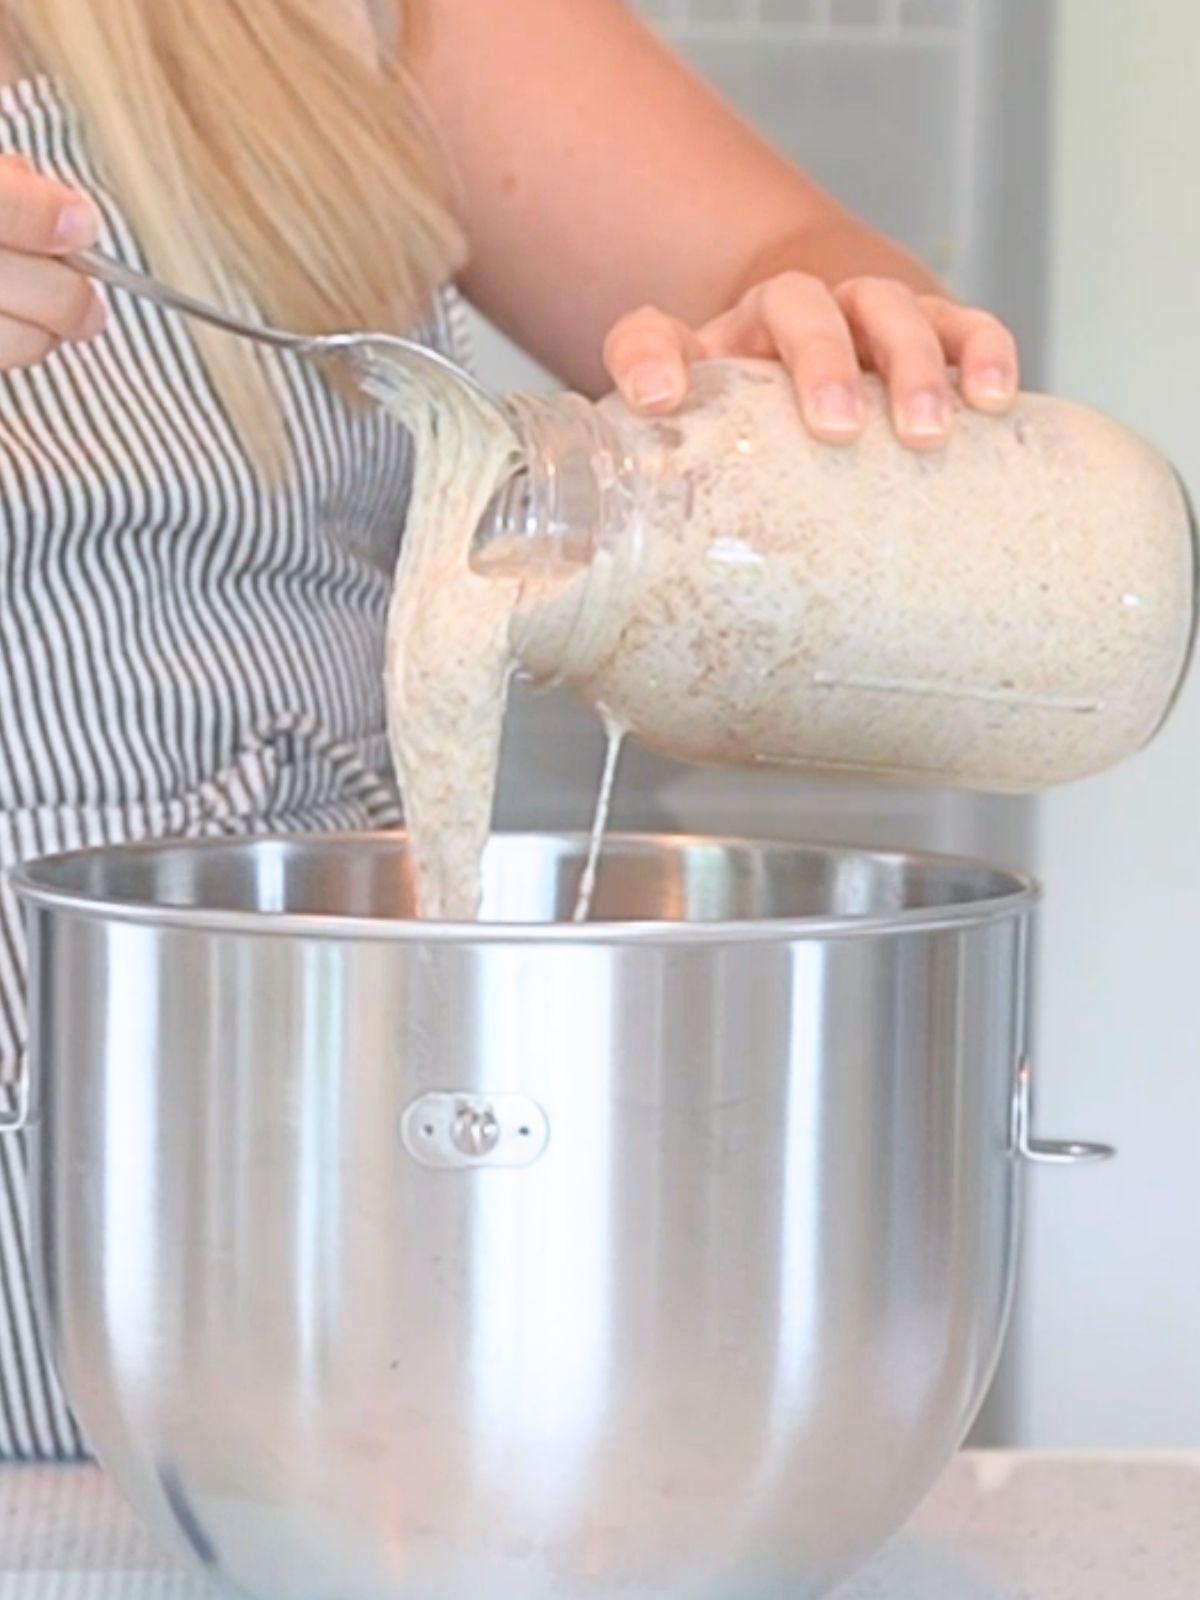
Step 1: Add all of the ingredients to a stand mixer bowl. Using the dough hook attachment, mix the ingredients until they are combined and form a shaggy dough.
Scrape the sides of the bowl if necessary. At this point, don’t worry about the dough coming together.
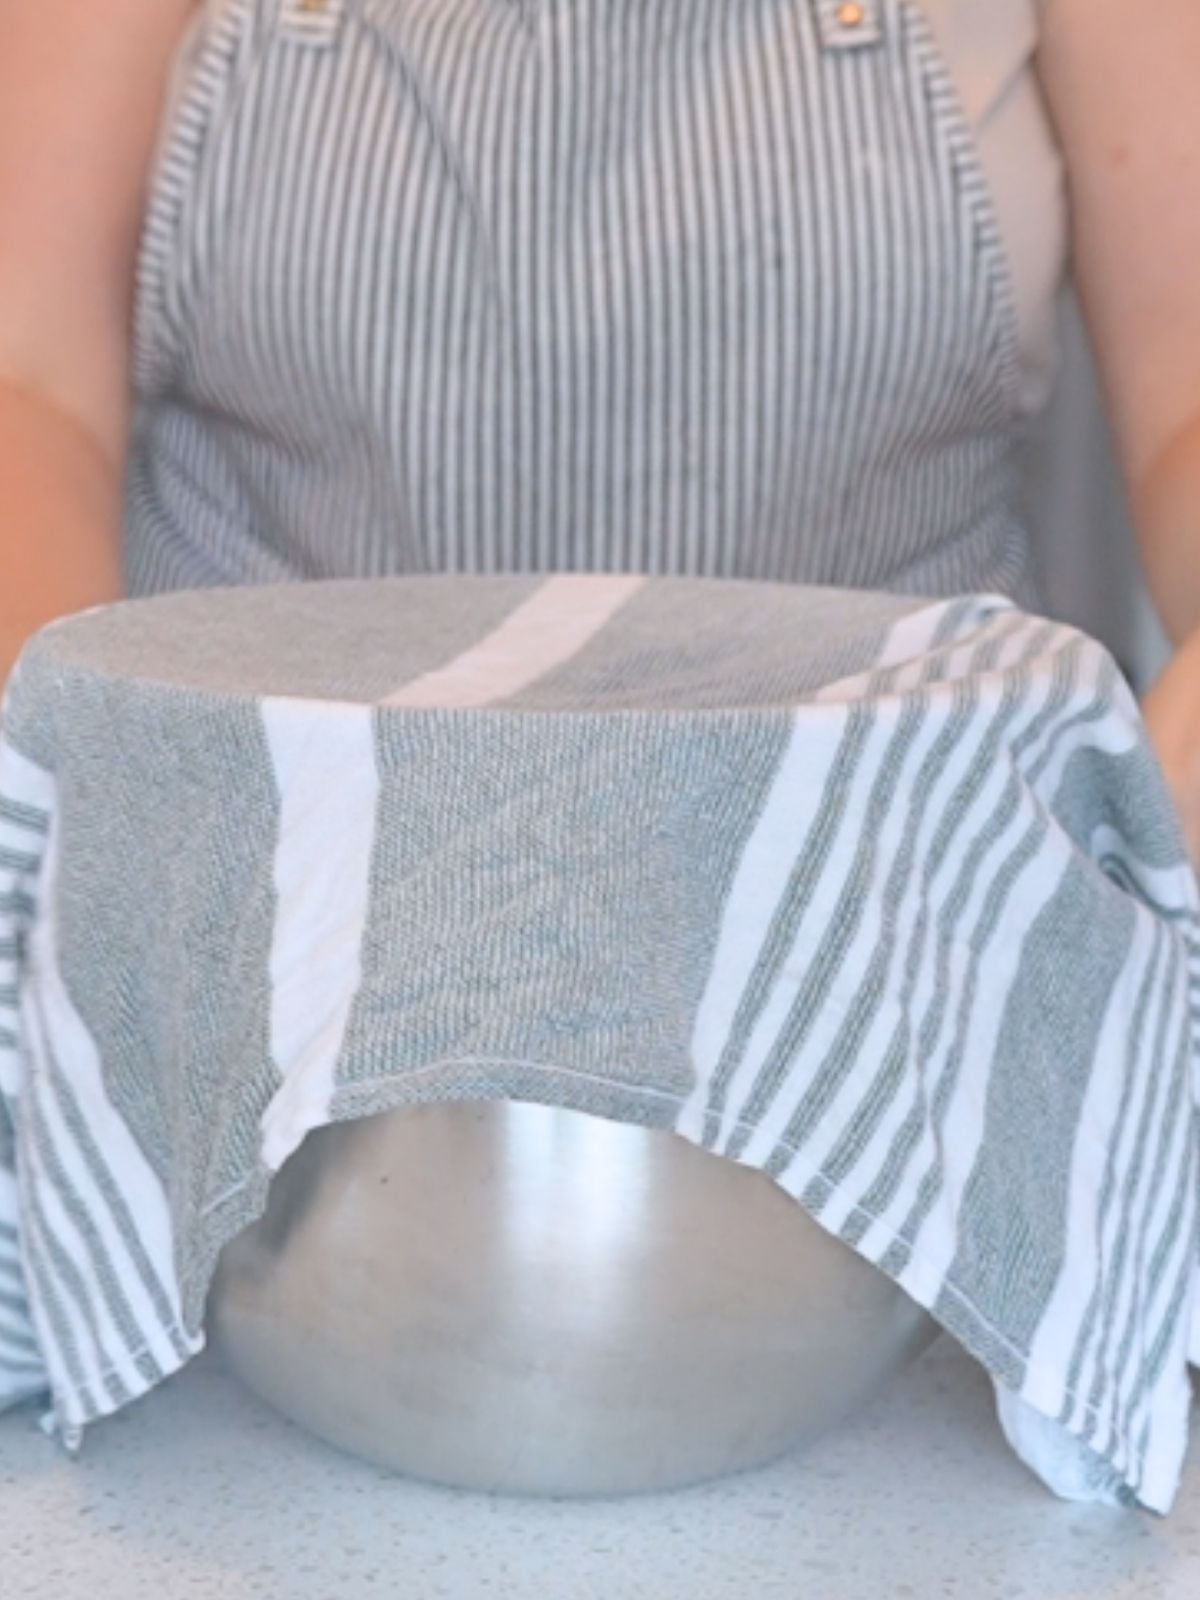
Step 2: Cover the bowl with a damp towel and let the dough rest for 30 minutes. This allows the flour to hydrate more thoroughly.
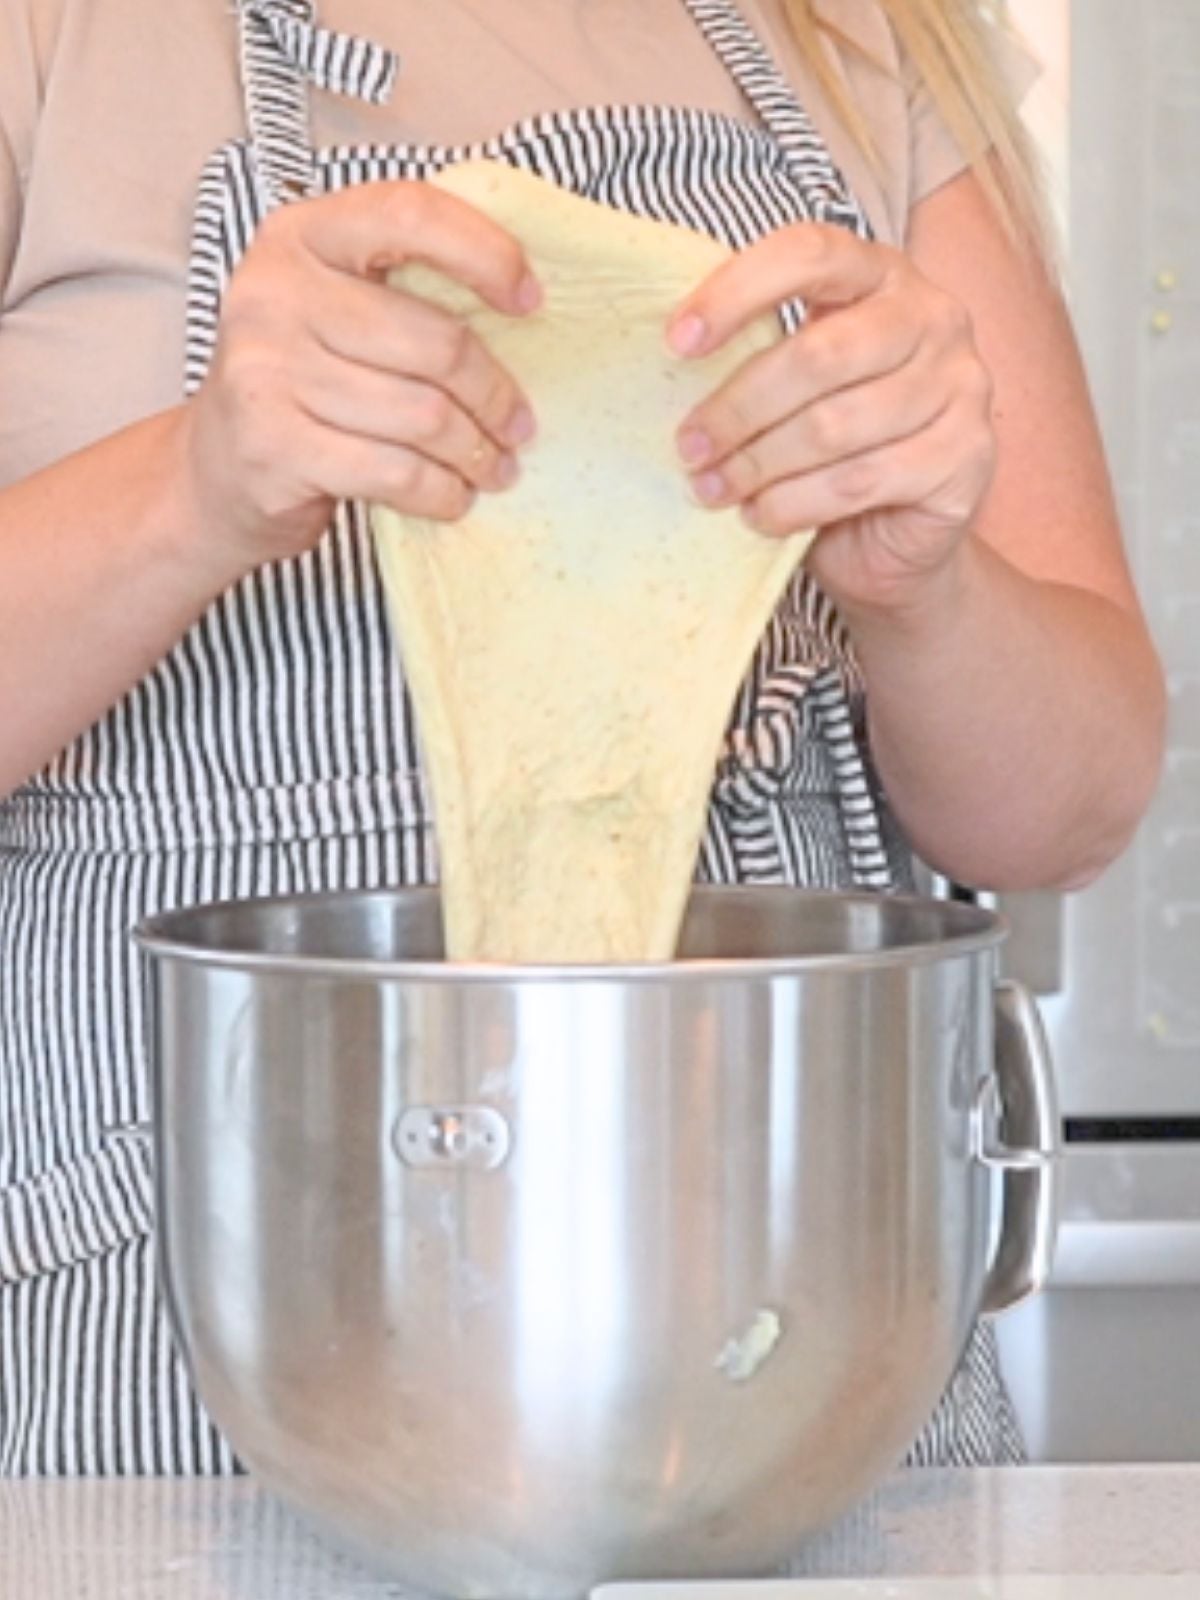
Step 3: Return the bowl to the mixer. Knead on medium speed until the dough is smooth and elastic and passes the windowpane test, about 10-12 minutes.
If the dough seems too sticky, add one tablespoon of flour at a time until it is tacky but no longer sticks to your hands.
Place the dough in an oiled bowl and cover with a damp towel, beeswax wrap, or plastic wrap. Bulk ferment until doubled, about 8-12 hours at room temperature.
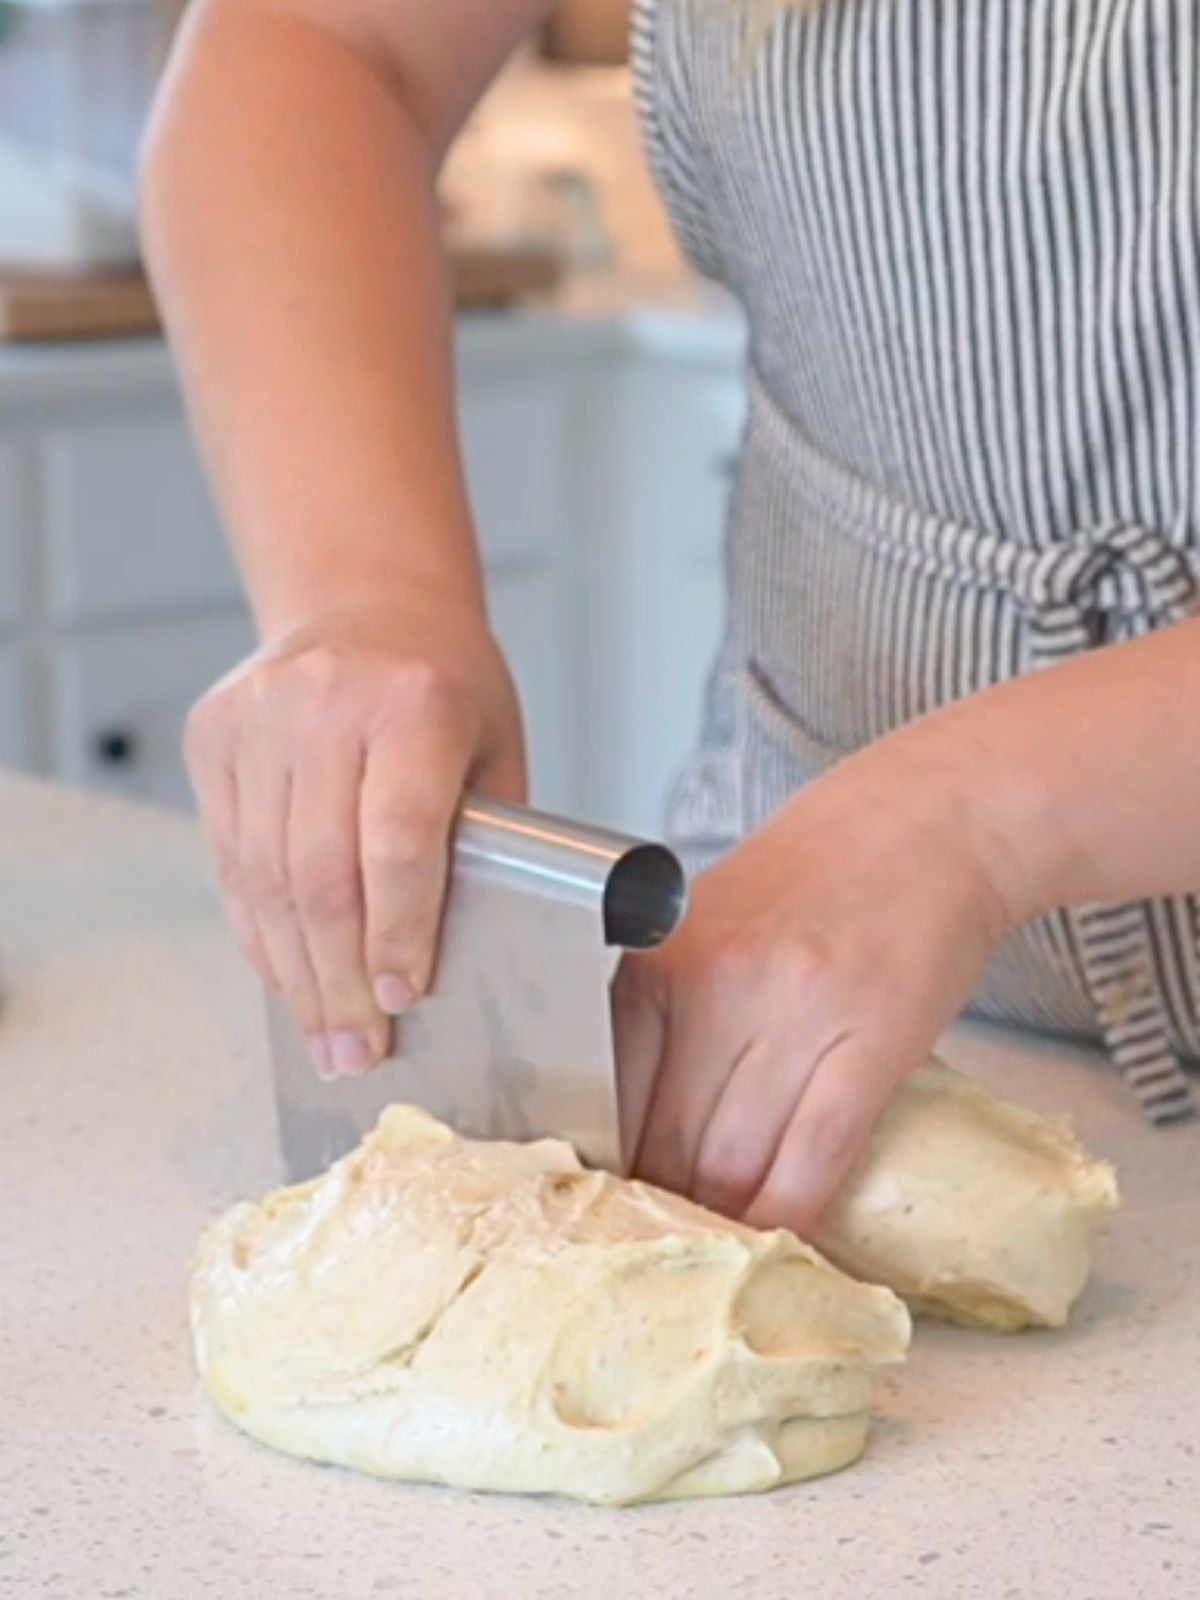
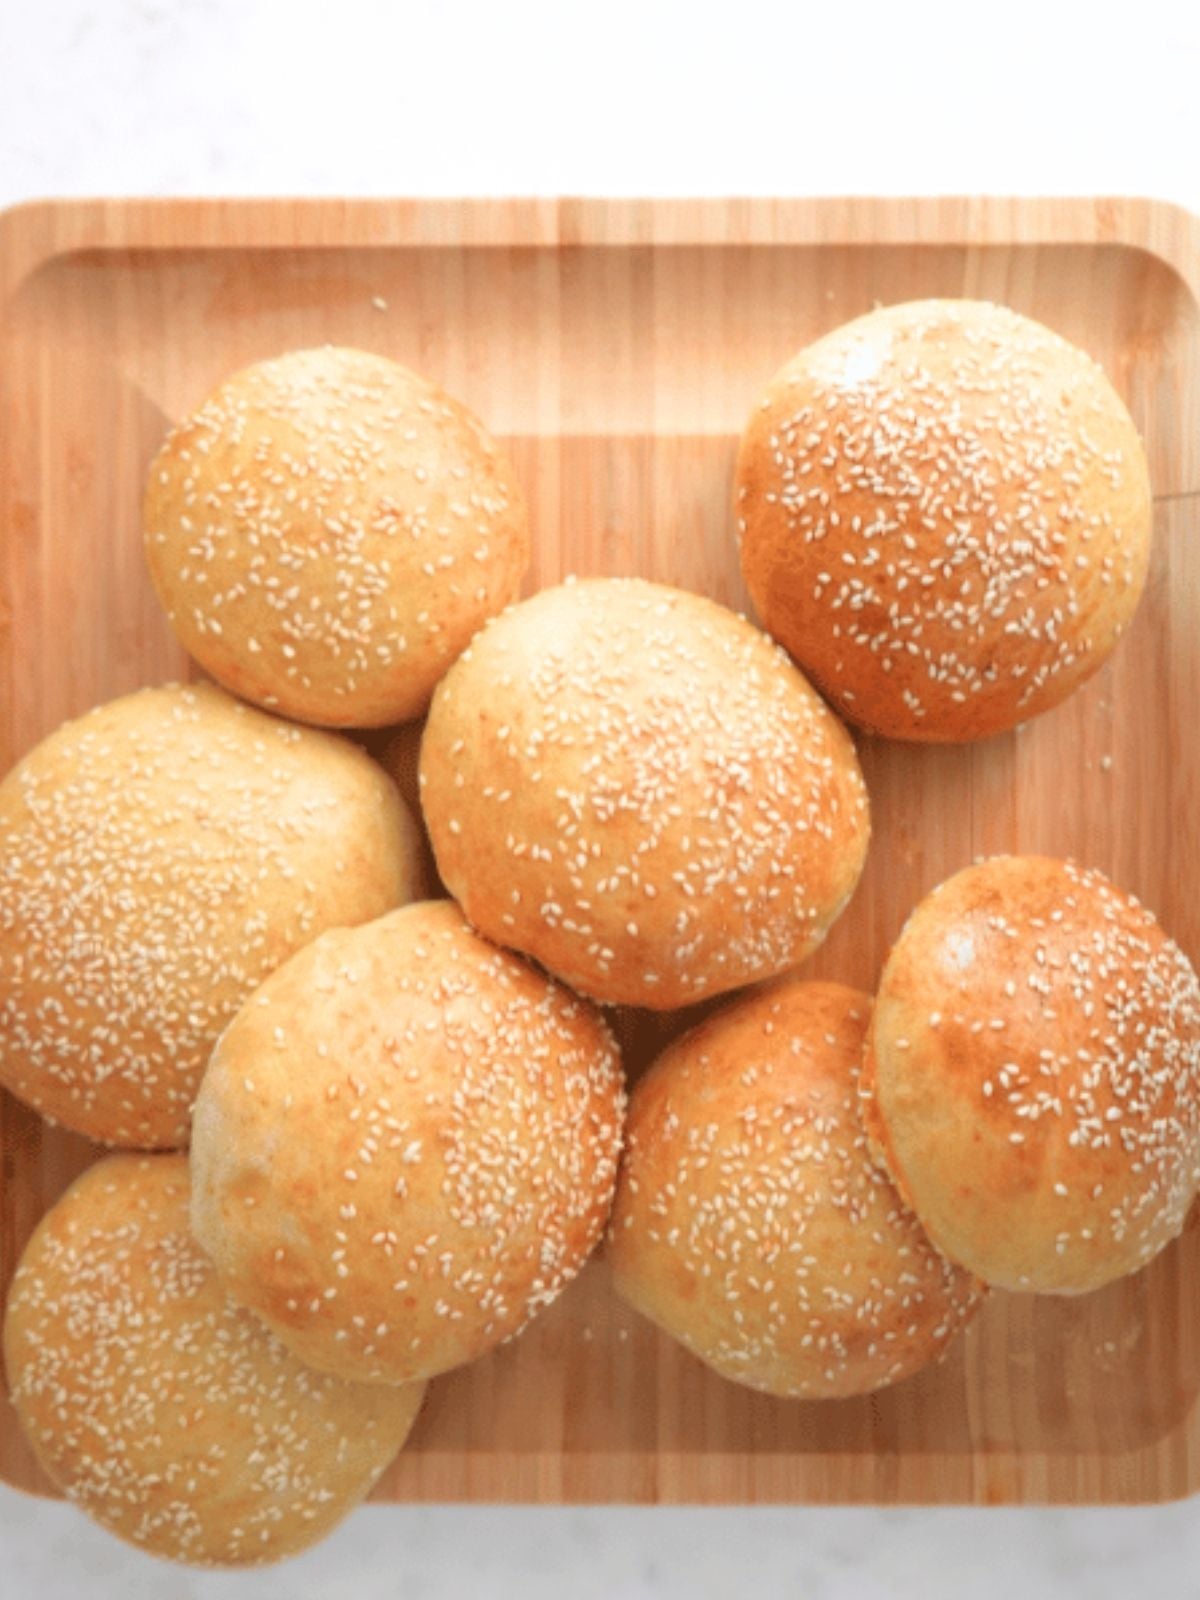
Step 4: When the dough has doubled, turn it out onto a clean countertop or work surface. Use a bench scraper to divide the dough into 8 equal portions.
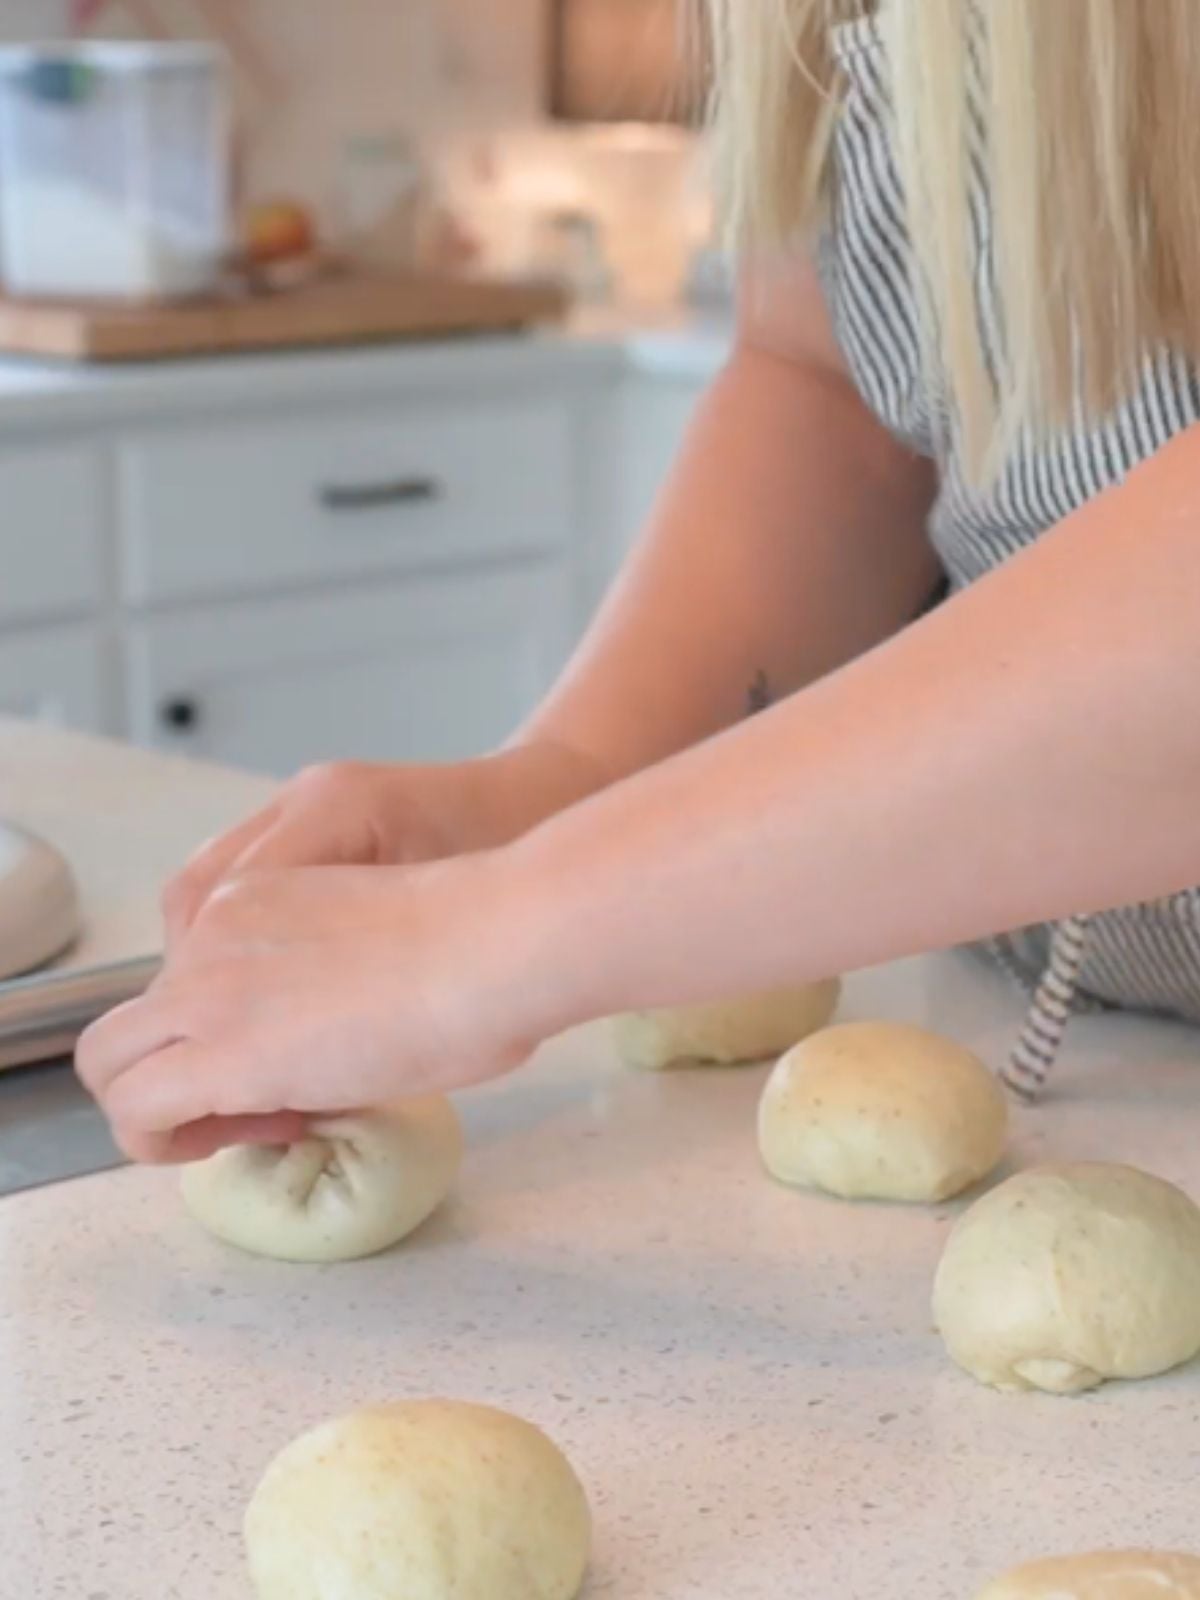
Step 5: Shape each piece of dough by folding the edges toward the center.
Turn it over seam side down and create tension by turning the dough clockwise while gently dragging it on the counter.
If you prefer a wide, flatter bun, use your fingertips to gently shape the dough into a disc.
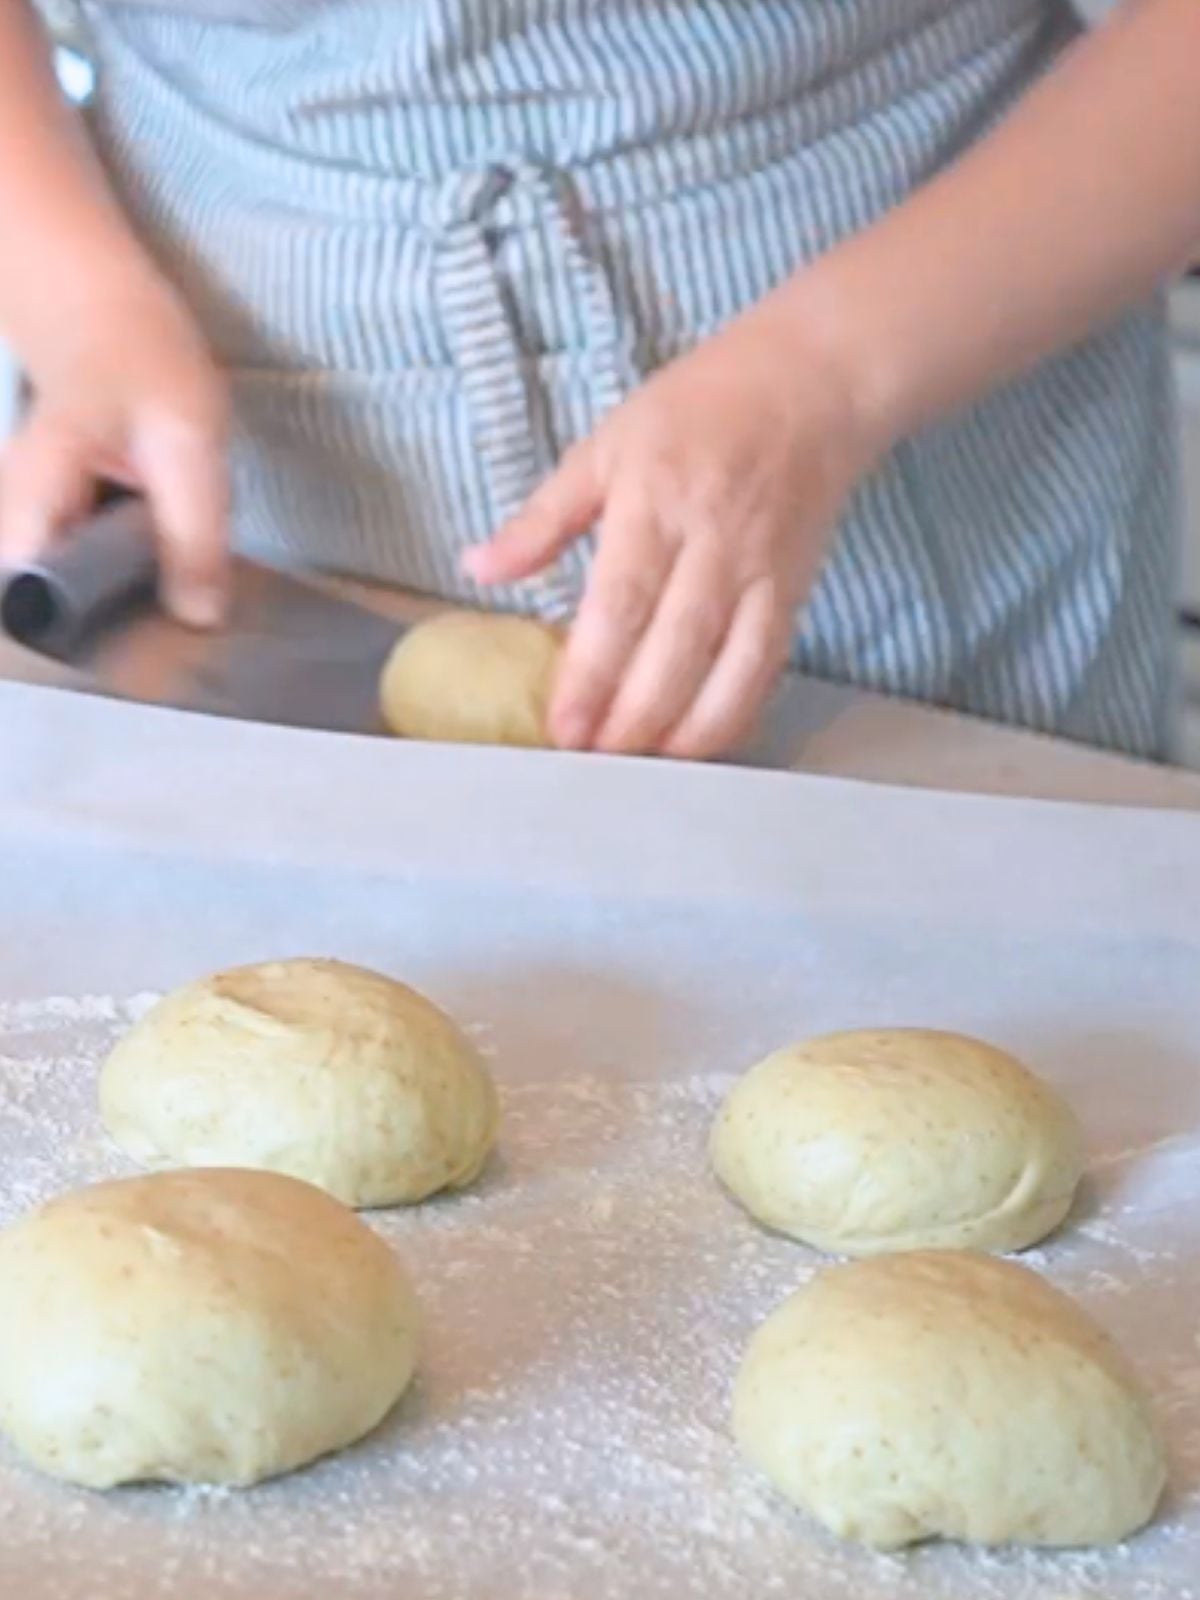
Step 6: Line a baking sheet with parchment paper and flour it generously.
Gently transfer each dough ball onto the baking sheet using your bench scraper.
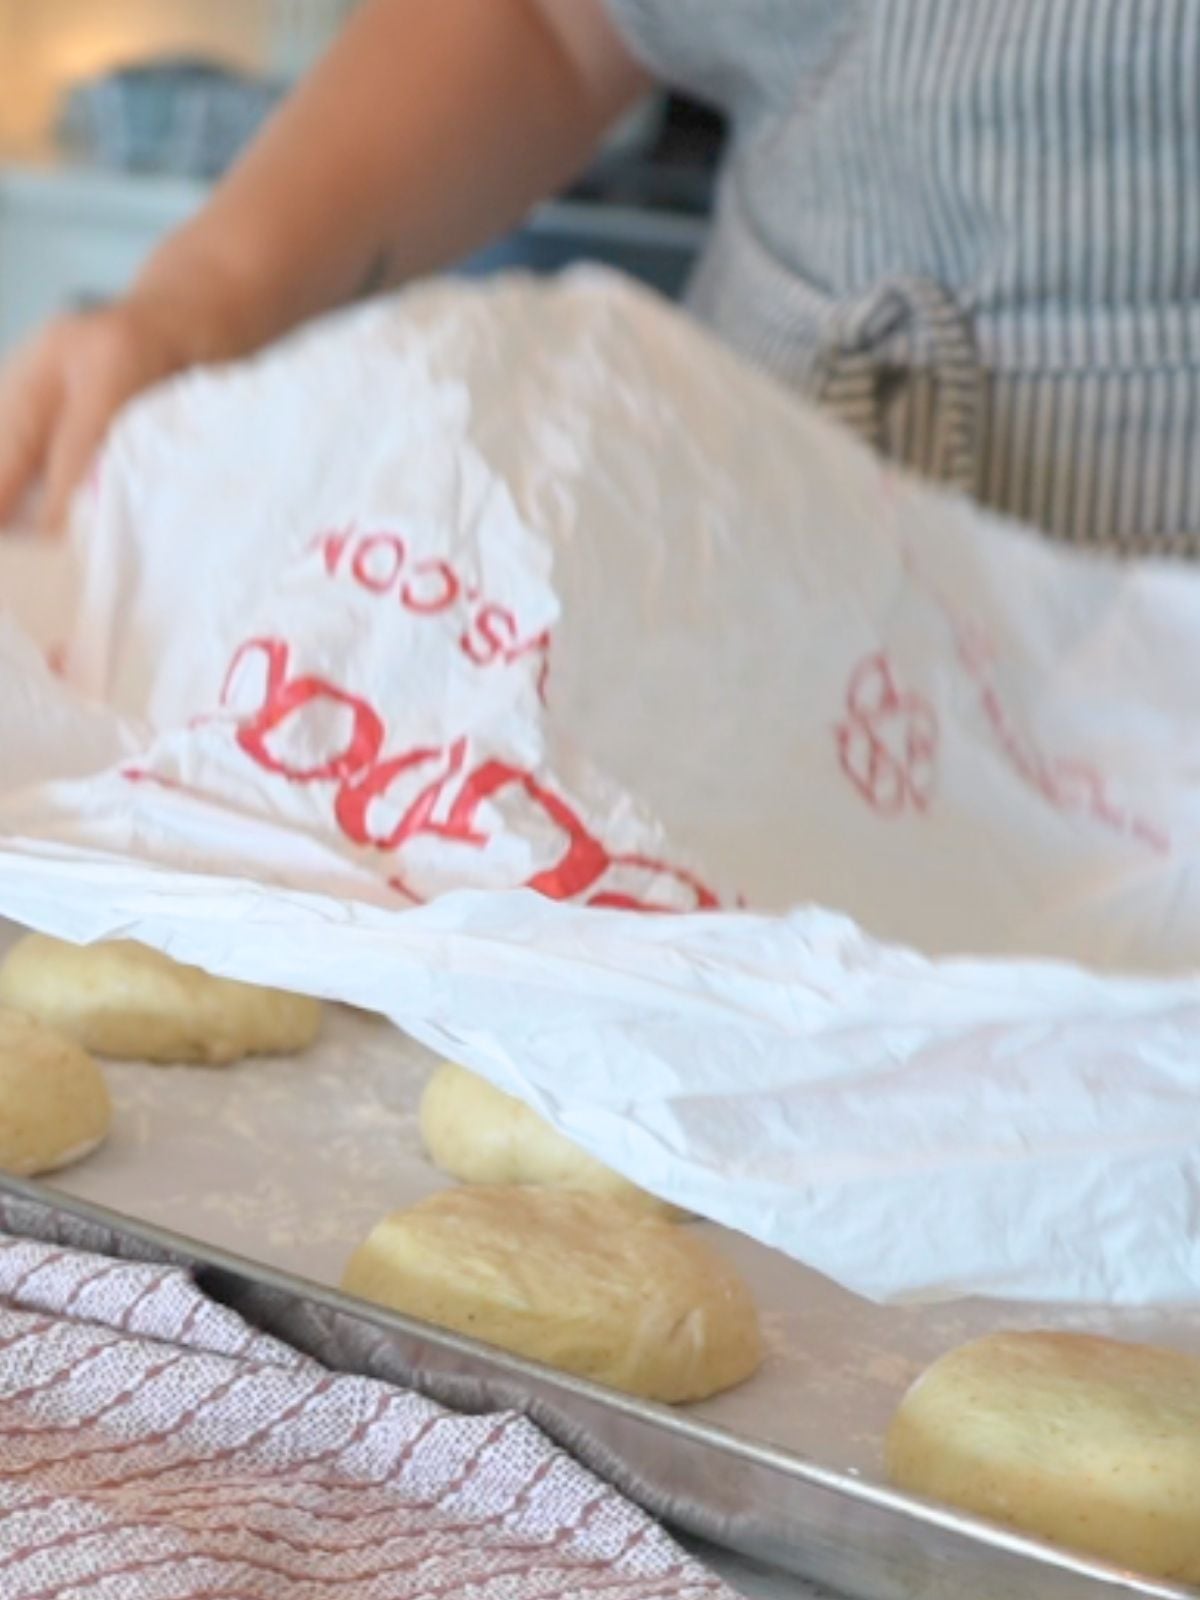
Step 7: Cover with plastic and allow to rest for a second rise until doubled, about 2-3 hours at room temperature.

Step 8: Preheat the oven to 375° F.
In a small bowl, beat the egg yolk and water. Brush a thin, even coating on the tops and sides of the buns.
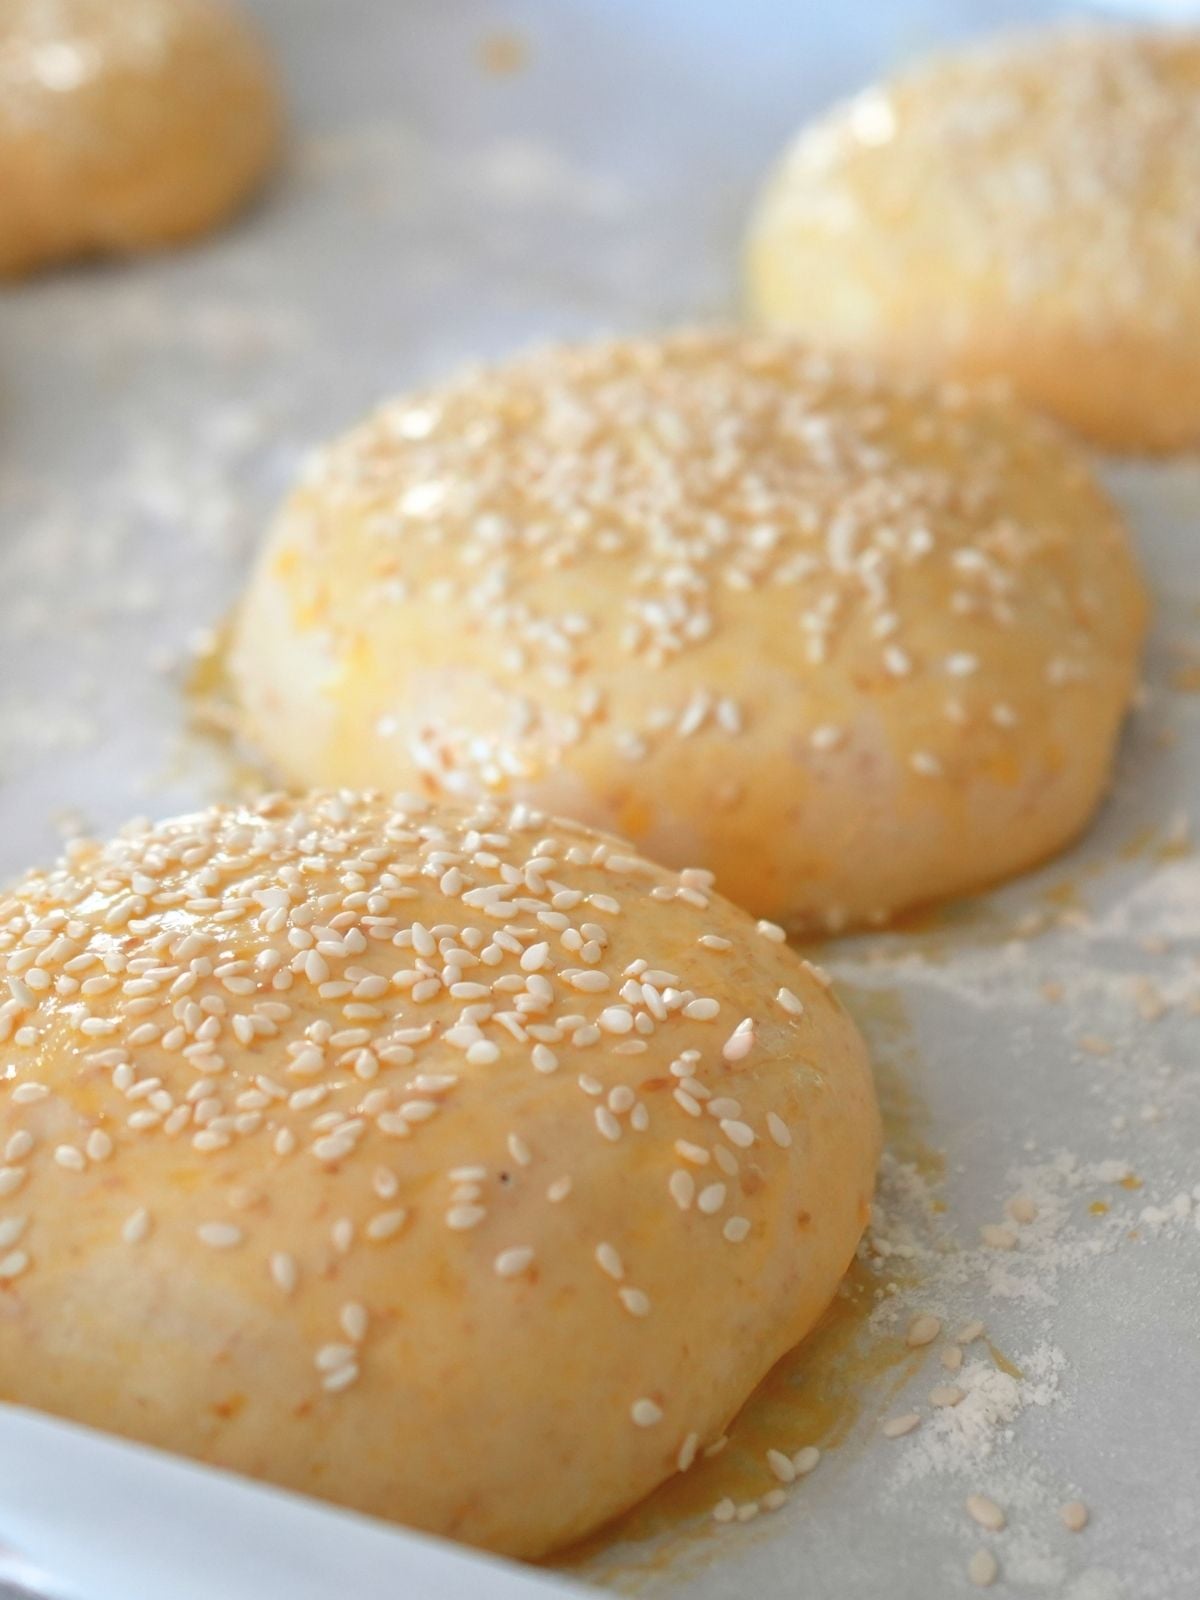
Step 9: Generously sprinkle the tops of the buns with sesame seeds, everything bagel seasoning, poppy seeds, or your other favorite toppings.
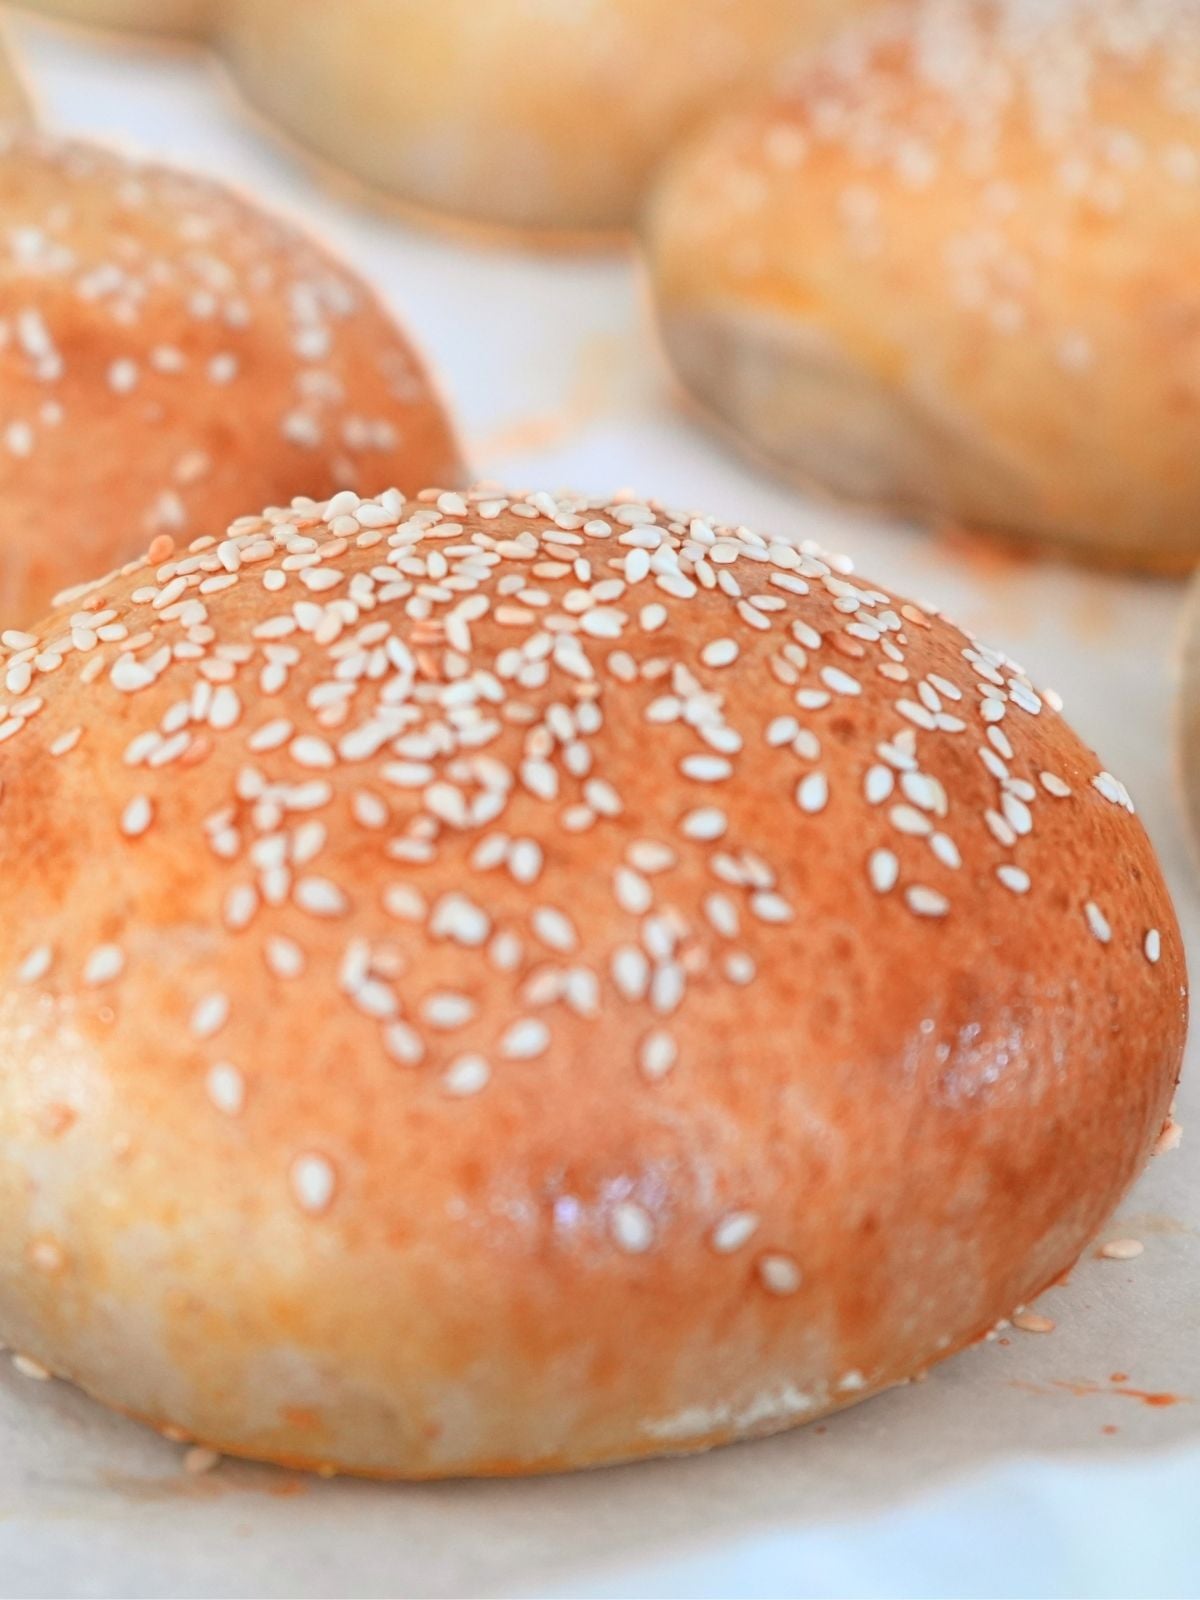
Step 10: Bake for 25-30 minutes or until golden. The internal temperature should be 190°-200° F. Serve as is or toasted.
Tips for Success
- The dough should be tacky, but it shouldn’t stick to your hands. This is a stickier dough compared to other sourdough bread recipes you might be familiar with.
- Make sure you have an active and healthy starter. If you don’t have one yet, you can learn how to make a starter so you can get started (yes, that was a sourdough pun).
- Apply the egg wash thinly and evenly so it doesn’t puddle at the base of the buns. I used to make that mistake all of the time, but using a thinner coating did the trick!
- After the second rise, the buns should look puffy and relaxed. If not, they may turn out dense.
- If you prefer a less bready bun, divide the dough into 10 or 12 pieces.
- For a more sour flavor, you can refrigerate the dough for 8 hours or overnight after the bulk fermentation.
Serving Suggestions
Classic Burgers: Pile a burger with cheese and your favorite toppings.
Sloppy Joes: Use leftover buns for easy sloppy joes on a busy night.
French Dip Sandwiches: Toast the buns and use them for slow cooker French dip sammies.
Fried Chicken Sandwich: Make a sourdough fried chicken sandwich with a dollop of French mayo and pickles.
Breakfast Sandwich: Assemble a breakfast sandwich with fluffy scrambled eggs, sausage, and cheese.
Storing and Reheating
- Once the buns are completely cool, stick them in an airtight container or ziplock bag and store them at room temperature. They'll stay fresh and soft for about 2-3 days.
- Or freeze the cooled buns on a baking sheet first, then transfer them to a freezer bag. They’ll keep well for up to 3 months.
- To reheat, I recommend toasting the buns or warming them in an oven preheated to 300° F.
Sample Baker’s Schedule
I like to start the dough the night before so it bulk ferments while I sleep. But you can also make these on the same day. Just feed your starter the night before and start on the dough first thing the next morning.
This is the general schedule I follow:
Day 1
9:00 AM: Feed your sourdough starter.
9:00 PM: Start the dough. Set aside to rest for 30 minutes.
9:30 PM: Knead the dough in a stand mixer. Set the dough aside for bulk fermentation.
The Next Day
8:00 AM: Shape the dough, then set it aside for the second rise.
10:00 AM: Brush the unbaked buns with egg wash, sprinkle with sesame seeds, and bake.
10:30 AM: Enjoy!
Sourdough Burger Buns FAQs
Technically, no, but an active starter is more efficient. A recently fed, bubbly starter has peak yeast and bacteria levels, leading to faster bulk fermentation than an inactive starter or discard. To learn more, check out my active vs. inactive starter tutorial on YouTube.
Look for the dough to be doubled(ish) in size and domed on top. This indicated that it has bulk fermented long enough and is ready for shaping and proofing.
Definitely, just start the dough before bed and continue the recipe in the morning. Keep in mind that the warmer the room, the faster it will ferment.
Yes, after the bulk ferment, you can refrigerate sourdough dough for up to 3 days. Then, when you are ready to shape and proof them, pull the dough and let it sit at room temperature for an hour or so. Then, follow the remainder of the recipe as usual.

More Sourdough Bread Recipes


If you tried this Sourdough Burger Bun recipe or any other recipe on my blog, please leave a 🌟 star rating and let me know how it went in the 📝 comments below. Thanks, y'all!


Sourdough Burger Buns
Ingredients
Dough Ingredients
- 200 g water
- 100 g sourdough starter, active and bubbly
- 25 g sugar
- 1 egg
- 8 g salt
- 450 g bread flour
- 113 g unsalted butter, softened and cubed
Egg Wash Ingredients
- 1 egg yolk
- 1 tablespoon water
- Sesame seeds, everything bagel seasoning, poppy seeds, etc. (optional)
Instructions
- Add all of the ingredients to a stand mixer bowl. Using the dough hook attachment, mix the ingredients until they are combined and form a shaggy dough. Scrape the sides of the bowl if necessary. At this point, don't worry about the dough coming together.200 g (1 cup) water, 100 g (1/2 cup) sourdough starter, 25 g (2 tablespoons) sugar, 1 egg, 8 g (1 teaspoon) salt, 450 g (3 1/12 cups) bread flour, 113 g (8 tablespoons) unsalted butter
- Cover the bowl with a damp towel and allow to rest for 30 minutes. This allows the flour to hydrate more thoroughly.
- Return the bowl to the mixer. Knead on medium speed until the dough is smooth and elastic and passes the windowpane test, about 10-12 minutes.If the dough seems too sticky, add one tablespoon of flour at a time until it is tacky but no longer sticks to your hands.
- Place the dough in an oiled bowl and cover with a damp towel, beeswax wrap, or plastic wrap. Bulk ferment until doubled, about 8-12 hours at room temperature.
- When the dough has doubled, turn it out onto a clean countertop or work surface. Use a bench scraper to divide the dough into 8 equal portions.
- Shape the dough by folding the edges toward the center. Turn it over seam side down and create tension by turning the dough clockwise while gently dragging it on the counter. If you prefer a wide, flatter bun, use your fingertips to gently shape the dough into a disc.
- Line a baking sheet with parchment paper and flour it generously. Using your bench scraper to gently transfer the dough onto the baking sheet.
- Cover with plastic and allow to rest for a second rise until doubled, about 2-3 hours at room temperature.
- Preheat the oven to 375° F.
- In a small bowl, beat the egg yolk and water. Brush a thin, even coating on the tops and sides of the buns.1 egg yolk, 1 tbsp (1 tablespoon) water
- Generously sprinkle the tops of the buns with sesame seeds, everything bagel seasoning, poppy seeds, or your other favorite toppings.Sesame seeds
- Bake for 25-30 minutes or until golden. The internal temperature should be 190°-200° F.
- Serve as is or toasted.
Video
Notes
- The dough should be tacky, but it shouldn’t stick to your hands. This is a stickier dough compared to other sourdough bread recipes you might be familiar with.
- Make sure you have an active and healthy starter. If you don’t have one yet, you can learn how to make a starter so you can get started (yes, that was a sourdough pun).
- Apply the egg wash thinly and evenly so it doesn’t puddle at the base of the buns. I used to make that mistake all of the time, but using a thinner coating did the trick!
- After the second rise, the buns should look puffy and relaxed. If not, they may turn out dense.
- If you prefer a less bready bun, divide the dough into 10 or 12 pieces.
- For a more sour flavor, you can refrigerate the dough for 8 hours or overnight after the bulk fermentation.
Nutrition
Nutrition information is auto-calculated and may not reflect your final product. Please verify independently if needed.


Hello! Can I use this same recipe to make hot dog buns?
Definitely, you’ll just need to divide and shape accordingly. 🙂
-Rebecca
Would this possibly work with either WW or AP Einkorn flour?
Definitely! You might need to adjust the hydration. But otherwise, it’s the same.
-Rebecca
Would I be able to increase the starter amount to get a bit of a quicker rise? I’m looking get these made and bulk fermented before I go to bed, it’s too warm where I live now to let things BF over night. But I’m wondering if it’s too tight of a time frame with 100 g of starter.
Thanks for your opinion
Hey there! Increasing the starter can help it rise a little faster. But I’ve always found that increasing the temperature works best. If I’m in a hurry, I use a proofing box and set it to 83°F.
I hope that helps!
-Rebecca
may i use all whole wheat flour? also can i omit the butter?
Hey there! You can definitely use whole wheat, but you may need to add a little extra water. I haven’t tried this without butter, and I haven’t tested it with other fats. But the fat makes the buns tender, so I would recommend swapping coconut oil for the butter.
Hope that helps!
-Rebecca
What can I use instead of the butter? Is another oil ok- like olive, avacado or coconut oil or can I just leave it out?
Hey there! I haven’t tried this with anything other than butter, but I imagine coconut oil would work. I wouldn’t leave it out because the fat makes the buns soft and adds to dough’s overall hydration.
Hope that helps!
-Rebecca
This is our go-to for cookouts, sloppy joes, and more. We LOVE them!
Can I do folds /coils vs knead via mixer? If so, do I need to do till I see the “window pane”?
Yes, you can skip the mixer and use stretch and folds or coil folds to build strength in your sourdough pizza dough. Do about three to five sets during the first couple of hours of bulk fermentation. You don’t need a perfect windowpane, just a dough that feels smooth, stretchy, and easy to work with.
-Rebecca
I am new to sourdough baking and am still learning! These hamburger buns turned out awesome!
I’m so glad you enjoyed them! Happy baking!