This post may contain affiliate links. Please read our disclosure policy.
Learn how to easily convert all-purpose to fresh-milled flour in any recipe. I’m sharing a simple 3-step conversion process and a free printable chart to help you confidently work with fresh-milled flour.

One of the most common questions I get about fresh-milled flour is: “How do I substitute it for all-purpose?”
Good news-it's an easy swap!
Some people claim fresh-milled flour is “totally different,” but in my experience, that isn’t the case.
Since I started milling flour at home, I've successfully converted many of my favorite recipes from all-purpose to fresh-milled flour.
From same-day sourdough bread to pizza dough to cheddar drop biscuits and einkorn cookies, it’s been an easy and fun way to add more nutrition to what I serve my family.
And I’m here to share the fresh-milled love.
In this post, I'll walk you through a simple 3-step process for converting all-purpose to fresh-milled flour.
Plus, I've included a free printable conversion chart that’s perfect for sticking on the fridge or inside your pantry as a cute and quick fresh-milled flour conversion cheat sheet.

The Benefits of Using Fresh-Milled Flour
Nutrition: Fresh-milled flour includes all three parts of the wheat berry-endosperm, germ, and bran-making it 100% whole grain and packed with nutrition.
Flavor: Baked goods with fresh-milled flour are more flavorful, and you can mix wheat varieties to craft your own unique flavor profiles.
Wheat Varieties: When you mill your own flour, you can use wheat varieties that are not available in most conventional grocery stores.
Shelf-Life: Wheat berries can last for years when stored properly, while all-purpose flour typically lasts only 6-12 months.
Fun: Milling your own flour is fun! It’s a great way to get creative in the kitchen.
Tools You Will Need
Grain Mill: To mill flour, you will need a grain mill. I use a Mockmill 200 Professional. Popular brands also include Nutrimill and KoMo.
Digital Scale: As I mentioned above, for the best results when converting from all-purpose to fresh-milled flour, I recommend using a waterproof kitchen scale.
Measuring Cups and Spoons: If you don’t have a kitchen scale, you can measure the ingredients by volume. Just keep in mind that it may not be as accurate or repeatable.
Step-by-Step Instructions
1. Use Weight, Not Volume

Now, if you’re in the US like me, switching to grams might feel daunting, but once you do, you’ll never go back.
Fresh-milled flour’s texture can make volume measurements unreliable due to variations in grind coarseness or how it settles in the cup.
But 100 grams of wheat berries always equals 100 grams of fresh-milled flour. Weighing eliminates the guesswork and ensures great results every time!
2. Use the Correct Type of Wheat

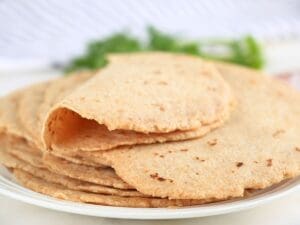
- Soft Wheat is used for baked goods that don’t need gluten development. I primarily use it for recipes like skillet cookies, lemon bars, or strawberry cake, for example.
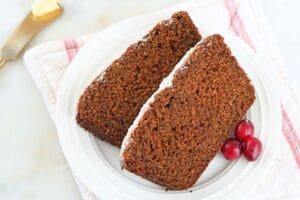
- Hard Wheat is used for recipes that require gluten strength, such as sourdough maple sandwich bread, donuts, or cranberry walnut bread.
3. Adjust for the Type of Wheat

The type of wheat you use determines how to adjust your recipe:
- Soft Wheat: Soft wheat has less protein and more moisture, so increase the flour by 1/4 cup (30 g) per cup of all-purpose flour. For example, if a recipe calls for 2 cups (240 g), use 2 1/2 cups (300 g).
- Hard Wheat: Hard wheat has more protein and less moisture. So you can use it at a 1:1 ratio, but you’ll need to increase the liquid slightly in most recipes (more about that below).
Printable Fresh-Milled Flour Conversion Chart
This fresh-milled flour chart breaks down the general conversions you need when converting from all-purpose flour to fresh-milled flour.

Grab the FREE printable version here:
Video – Fresh-Milled Flour Starter Guide
Check out my fresh-milled flour guide on YouTube. This video has everything you need to help you feel confident switching to fresh-milled flour.
Don’t forget to subscribe to my YouTube channel. New videos come out weekly!

Tips for Converting Recipes
- When transitioning to fresh-milled flour, start with a 50/50 mix of all-purpose and fresh-milled flour. This helps you notice the differences. Gradually increase the fresh-milled flour each time you bake.
- Pay close attention to the quality of the dough or batter. Depending on the wheat and recipe, you may need to add a little more or less flour and liquid.
- Bread dough made with fresh-milled flour often needs extra kneading. Aim for a smooth, slightly tacky dough that passes the windowpane test.
- If using a stand mixer to knead fresh-milled bread dough, start with the paddle attachment to combine the ingredients, then switch to the dough hook for kneading. This brings the dough together more efficiently.
- You’re probably sick of hearing me say this, but it’s still true. Weighing your ingredients is the easiest way to use fresh-milled flour.
Tips for Specific Recipes
Bread Recipes

Use these tips for recipes such as sourdough bread, sandwich bread, burger buns, and other breads that need gluten development.
- Use hard wheat varieties like hard red, hard white, or kamut.
- Use a 1:1 ratio when substituting fresh-milled hard wheat for all-purpose flour.
- Increase the hydration by about 5% (adjust as needed).
- Let the liquid and flour autolyze for 30-45 minutes before kneading. This allows the flour to absorb the liquid.
- Knead the dough longer. Most dough made with fresh-milled flour requires more kneading for proper gluten development.
- Anticipate a tighter crumb. Most bread made with fresh-milled flour is a little more dense than bread made with all-purpose.
Pastry, Quick Bread, and Cookie Recipes

These tips are for recipes that don’t need gluten development, such as sourdough brownies, apple cinnamon bread, and carrot cake.
- Use soft wheat varieties.
- Increase the amount by 1/4 cup (30 g) per cup called for in the recipe.
- For a lighter baked good, sift the flour to remove the bran and germ (keep in mind this will remove most of the nutrition).
- Fresh-milled flour can have a nuttier, earthier flavor that might overpower delicate pastries. Increase sugar slightly in recipes where sweetness is key.
Pasta Recipes

- Seminola or durum wheat is an ideal choice for making homemade pasta. I love making fresh-milled pasta on a gnocchi board.
- For a smoother texture, sift the flour before using.
- Let the dough rest for 30-60 minutes after kneading. This helps hydrate the flour fully and allows the gluten to relax.
- Fresh-milled flour is “thirstier,” so you may need to use an extra egg or a splash of water/oil to achieve a workable dough.
- Fresh-milled flour pasta may not store as well due to the oils in the germ. Cook it right away or freeze it for later use.
Video – Fresh-Milled Flour Sourdough
Making fresh-milled flour sourdough has a little learning curve. But with a few tips and tricks, you can make amazing sourdough with freshly milled flour.
Check out this YouTube video for my top tips:

FAQs
Fresh-milled flour oxidizes quickly, so it’s best to mill it just before use. If milling in advance, store it in a moisture-resistant container in the fridge or freezer to maintain freshness. I freeze any extra flour in a freezer-safe bag for later use.
Generally, you can bake at the same temperature and time when using fresh-milled flour. If you added more liquid, you may need to increase the time by a few minutes.
Sifting fresh-milled flour creates lighter, fluffier baked goods but removes the most nutritious parts. Personally, I do not sift my freshly milled flour.
Baked goods with fresh-milled flour are often slightly denser. When using hard wheat, adding a little extra liquid can create a lighter texture.

Let's Connect!
If you have questions about milling grains or switching to fresh-milled flour, leave them in the comments! Or, if you have milling tips, share them below.
Also, don't forget to pin this post and follow Moon + Magnolia on Pinterest. You can save all my recipes on your boards and keep up with the latest happenings!
Share your creations on Instagram and tag @moon_and_magnolia!
More Posts You’ll Love
- How To Convert Any Yeast Bread Recipe to Sourdough
- How To Add Sourdough Discard to Any Recipe (Grams & Cups Explained!)
- How To Make a Sourdough Starter - Beginner's Guide
- How Long Can Sourdough Dough Stay in the Fridge?
- 5 Old-Fashioned Ways to Save Money That Still Work Today
- 12 Irresistible & Easy Sourdough Discard Recipes


Your tips in here have been immensely helpful. I am just starting down this road and have been disappointed with my bread do far as I wasn’t able to find any help prior to running across your page
I’m so glad it’s been helpful!
-Rebecca