This post may contain affiliate links. Any purchases from links outside of moon + magnolia may earn a commission at no additional cost to you. Thank you for supporting my content!
Learn how to mill your own flour at home with this beginner’s guide. It's easier than most people think and can take your homemade bread’s flavor and nutrition to the next level.
I’ll walk you through all the steps from choosing a mill, selecting and storing grains, making fresh-milled flour, baking adjustments, and more.

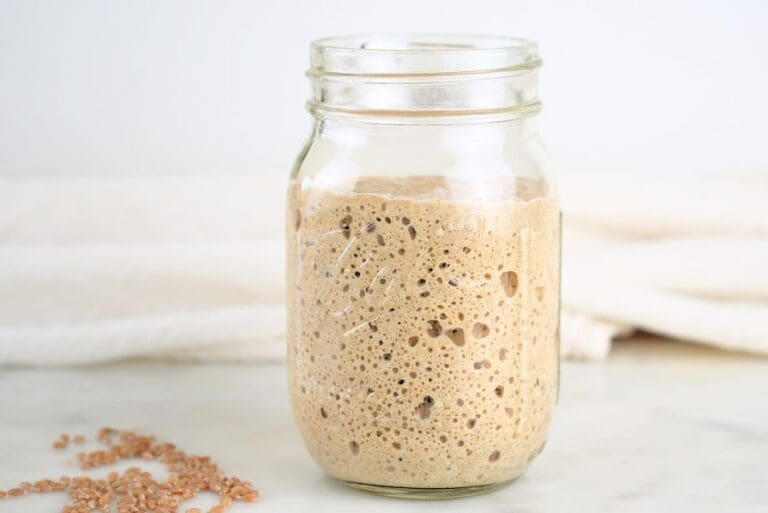
You know how it goes-it begins with making a sourdough starter. Before long, you’re baking the best bread you've ever had. And then, somehow, you're milling your own flour.
A farm next, maybe? (I'm kidding…mostly!)
But seriously, I started milling my own flour in 2024 because I wanted to give my family the most nourishing food possible.
When you mill whole wheat berries into flour, it is 100% whole grain nutrition. And using it to make bread means you can provide your family with nutritious breads and baked goods.
I know what you're thinking: baking homemade bread is already a lot. Who has time to mill flour too?
Here's the thing-it's actually super simple! Milling your own flour takes just a minute or two, and the difference in flavor and nutrition makes it so worth it.
If you are interested in milling your own flour or just beginning your grain mill journey, this post is for you!
I’m sharing everything you need to know to learn how to mill your own flour at home.

What Is Fresh-Milled Flour?
Fresh-milled flour is just what it sounds like-flour made from grain that's been freshly milled.
Typically, this means it's been ground within a day or so of being used, but the timing can vary depending on your preferences.
For my baking purposes, I consider “fresh-milled flour” flour that has been milled a few minutes before baking.
Fresh-milled flour might also be called “green flour” or “home-milled flour.” Regardless of the name, it all refers to the same thing: grains that have been recently milled.

The Benefits of Milling Your Own Flour at Home
Fresh-milled flour has many benefits over store-bought flour:
- Nutritional Benefits: Fresh-milled flour retains the whole wheat berry-bran, germ, and endosperm-offering true 100% whole-grain nutrition.
- Grain Variety: You can make flour with various grains that are unavailable in most grocery stores. Plus, you can mill rice, corn, quinoa, oats, and more.
- Flavor: Fresh-milled flour has earthy, complex flavors you can't get with store-bought flour. You can also create your own flour blends to create unique flavor profiles.
- Cost Effective: Bulk wheat berries are usually cheaper than pre-milled flour, saving you money. And it’s much more affordable to mill your own specialty flours like einkorn or spelt than it is to buy it pre-ground.
- Shelf-Life: When properly stored, wheat berries can last many years, whereas store-bought flour has a 6-12 month shelf life.
- Fun: If you are a grain and bread nerd like me, milling your own flour is fun. If milling flour brings you joy, that’s reason enough!
Types of Grain Mills
- Electric Mills: Electric mills are the most convenient. They are the “plug-and-play” versions of mills. The most popular brands include Nutrimill, Mockmill, and KoMo. There are also stand mixer attachments made for milling flour. (Note: I use the Mockmill Professional 200).
- Hand Mills: Hand mills are helpful because they don’t require electricity. They're compact and affordable but require some muscle to operate.
- Convertible Mills: These versatile mills allow you to switch between electric power and manual hand-cranking. Often, you have to purchase a separate motor for this type of mill.
- Alternative Mills: You can use appliances like a coffee grinder, high-powered blender, or food processor to mill smaller quantities of flour. While they aren't as efficient or consistent as dedicated mills, they can work in a pinch.

Grain Mill Features to Consider
- Price: Grain mills can range in price. Manual mills start at around $50 USD on Amazon, while electric mills range from $100 for a stand mixer attachment to over $1,000 for high-end mills.
- Grind Settings: Opt for a mill with a fine grind and adjustable settings for a variety of textures, from coarse to extra fine.
- Grind Styles: Mills use impact, burr, or stone grinders. Some grind styles can make the flour too hot, reducing its nutritional value.
- Durability: Check the specs, including warranty, motor quality, and wattage, to ensure the mill can handle your needs.
- Maintenance: Some mills, like the Mockmill, can be repaired at small machine shops. Others may not have repair options, so consider long-term usability.
- Capacity and Speed: Evaluate the hopper capacity and grinding speed. Remember, slower speeds may lead to hotter flour, which can affect quality.
Video – My Mockmill Unboxing
In this video, I share my initial thoughts and review about my Mockmill 200 Professional. (Spoiler alert: I love it).

How To Mill Your Own Flour at Home
The most important thing to know about how to mill flour at home is to follow the manufacturer’s instructions.
In general, though, most grain mills have similar steps:

Step 1: Weigh or measure the wheat berries (I recommend weighing in grams for accuracy).

Step 2: Adjust the coarseness. Usually, the lower the number, the finer the flour.

Step 3: Place a bowl under the spout or dispenser.

Step 4: Turn on the mill. Many mills require the mill to be on BEFORE adding the grains.

Step 5: Add the wheat berries to the hopper.

Step 6: Let the mill do its thing!
Choosing the Correct Flour Coarseness
Fine flour works best for recipes that call for all-purpose, bread, or whole wheat flour.
With that in mind, for most recipes, I keep my Mockmill on the finest setting because I primarily bake sourdough bread, sandwich bread, and discard recipes.
I’ve heard some home bakers say that to create a finer flour, they remill their flour in the Mockmill (not all mills can do this).
But I’ve heard mixed reviews about the results. Some swear by it. Others have said it has gummed up their machine.
For me, keeping it on the finest setting has been perfect for all my recipes, so I haven't needed to experiment.
If you need a coarser flour, you can easily adjust the settings. Coarser flour is great for cornbread or adding texture to bread.

When Should You Sift Fresh-Milled Flour?
Sifting, also known as “bolting,” involves using a mesh screen or strainer to separate the endosperm (the light, fluffy part of the flour) from the bran and germ.
This process creates a lighter flour similar to all-purpose flour. However, there's a trade-off.
Sifting removes the bran and germ, which are the most nutrient-dense parts of the grain. This means you're losing much of the nutritional value fresh-milled flour offers.
Really, it's up to you if you want to sift your fresh-milled flour or not.
If your goal is to maximize nutrition in your baked goods, skipping the sifting might be the better option.

How To Bake with Fresh-Milled Flour
There is a little bit of a learning curve when using fresh-milled flour. But there are a few tips and tricks that can make the transition easier.
Really, the baking process doesn’t change much. However, understanding which types of wheat to use and how to use them is key.
Soft Wheat
Soft wheat is ideal for baked goods that don't rely on gluten strength, such as cookies, cakes, pastries, and sweet breads, because its lower protein and high moisture content creates a lighter texture.
RECIPE ADJUSTMENTS
Hydration: Because of soft wheat’s high moisture content, you’ll likely need to add 1/4 cup more fresh-milled soft wheat per cup of flour in the recipe.
So if the recipe calls for 2 cups of all-purpose, you’ll need approximately 2 1/2 cups of fresh-milled soft wheat.

Hard Wheat
Hard wheat is the go-to choice for recipes that require gluten development, which is most bread recipes.
I use this for burger buns, donuts, and fresh-milled sourdough pullman bread, for example.
RECIPE ADJUSTMENTS
Hydration: Hard wheat has less moisture content than store-bought flours, so it typically requires more hydration.
Increase the liquid in your recipe by 5-10% to compensate.
You can add more water, honey, eggs, or other liquid ingredients. It may take a bit of experimenting, but as long as you're adding hydration, you're on the right track.
Autolyzing: Hard wheat benefits from autolyzing-a process where you mix the fresh-milled flour with water and let it sit for 30-45 minutes.
When you first add the water to fresh-milled flour, it seems too soupy. But after 30 minutes or so, the texture changes.
Autolyzing helps the flour fully hydrate and gives you a better sense of your dough's consistency. So this step can significantly improve the quality and structure of your bread.
Adapting to Fresh-Milled Flour
- Experiment with Flour: Wheat berries vary in flavor and texture, so experiment to find your favorite combinations. Currently, my go-to blend for bread is 50% kamut and 50% hard white wheat.
- Yield: For accuracy, it is easier to weigh your weight berries in grams. 100 g of wheat berries yields 100 g of flour. But cups aren’t as accurate. In general, 1 cup of wheat berries yields about 2 cups of flour. However, that may vary depending of the type of grain.
- Increase Incrementally: If you're adjusting to the flavor of fresh-milled flour, start gradually. A 50/50 mix of all-purpose and fresh-milled flour is a great balance.
- Adjust the Hydration: As I mentioned in the How to Bake with Fresh-Milled Flour section, fresh-milled flour requires different hydration levels. So make adjustments in the hydration as needed.
- Expect Differences: Fresh-milled flour and all-purpose flour are different products, so expect some variation in your baked goods. But with a few adjustments, fresh-milled baked goods can be just as delicious or better!
- Know What Dough Should Feel Like: Fresh-milled flour feels a bit different to work with, but good dough should still have the same qualities. Pay attention to the look and feel, just like you would with all-purpose flour.
Video – Guide To Baking with Fresh-Milled Flour
Check out my Fresh-Milled Flour Starter Guide on YouTube for my top tips when transitioning to baking with fresh flour.
Also, don’t forget to subscribe to my YouTube channel. New simple living videos come out weekly!

How To Store Fresh-Milled Flour
Fresh-milled flour oxidizes quickly, losing its nutritional value, so I generally recommend milling your flour right before use for the best results.
If you prefer milling in advance, store the flour in a moisture-resistant container in the fridge or freezer to preserve its freshness.
When I have extra fresh-milled flour, I keep it in a freezer-safe bag and pop it in the freezer until I'm ready to use it.
Types of Grains & Characteristics
- Hard Wheat: Hard wheat is used for baked goods that need gluten strength, such as bread.
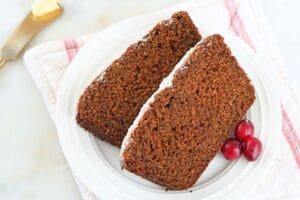
- Soft Wheat: Soft white wheat is best for cookies, cakes, and other pastries that don’t need gluten development. I used soft white for sourdough lavender London Fog cookies, brownies, and apple cinnamon bread.
- Einkorn and Ancient Grains: Ancient grains have been mostly unchanged over hundreds (and sometimes thousands) of years. Ancient grain flours can be very costly, but it is significantly cheaper to mill them at home.
- Color: The color of wheat can indicate its flavor. Red wheat has an earthy, nutty flavor, while white wheat is milder.
- Seasons: If the wheat you purchase notes a season (hard white winter wheat, for example), that tells you what season the wheat was planted. This can affect the wheat’s flavor and texture.
- Corn: Most mills can grind dent corn into cornmeal or even grits. Some mills, like the Mockmill, cannot grind popcorn. So check your manufacturer’s instructions.
- Oats and Rice: You can mill whole oats and rice into a oat flour using a grain mill. This is great for making gluten-free flour.

Where To Buy Grains
- Azure Standard: If you have an Azure Standard drop nearby, that’s great a way to access quality grains. I just got 25 lbs of rye berries in my first Azure drop, and it was great!
- Amish Communities: If you live near an Amish community, check to see if they sell grains. Often, they sell grains and other high-quality foods at good prices.
- Small Farms: I love supporting small farms when I can! There are many family farms that grow and sell wheat berries and grains. I had a great experience with Grains from the Plains.
- Natural Foods Stores: Many natural food stores have bulk bins of wheat berries. Though convenient, they tend to be a little more expensive and have limited options.
- Jovial and Thrive Market: I haven’t not purchased from Jovial and Thrive Market, but they are popular options for buying wheat berries.
- Amazon: When I first started buying wheat berries, I got them from Amazon because you can get them in small bags. This is a great way to try different grains without committing to large quantities. I recommend Palouse Brand, Grand Teton, and Bob’s Red Mill.

How To Store Grains
Properly storing grains is key to maintaining their freshness and extending their shelf life. But if you're like me and have limited pantry space, it can feel challenging to figure out how to store them effectively.
I live in a standard suburban neighborhood just a few feet above sea level. So, I don’t have a big pantry, cellar, or basement. Having these limitations, though, has helped me figure out the best ways to store whole grains:
Storage Requirements
No matter your storage space, you should always make sure you store your grains with these methods:
- Buckets: Food-safe buckets are a popular choice for storing whole grains. You can find them online at places like Azure Standard or Amazon, or locally at stores like Tractor Supply or Sam's Club.
- Air-Tight Seal: Always use buckets with an airtight seal to preserve freshness and keep pests like weevils and moths out.
- Dry Place: Store your grains in a cool, dry location to prevent spoilage and extend their shelf life.

Small Space Storage Ideas
- Be Selective: Focus on the essential grains you use and enjoy the most. If you have space for only one, hard white wheat is a versatile option that works for almost any recipe.
- Use 2.5-Gallon Buckets: For small pantries, 2.5-gallon food-safe buckets are a great solution. They fit on standard shelves and can easily be stashed in cabinets.
- Keep Extra Grains in Another Closet: If you buy in bulk but can't fit everything in your pantry, transfer a small amount to a container for daily use and store the rest in a food-safe bucket in an extra closet. Refill as needed.
- Buy Small Before Buying in Bulk: When trying new grains, start with small bags to see if you like them. While this might cost more upfront, it prevents you from being stuck with 50 lbs of a grain you can't store or don't enjoy.
More Fresh-Milled Inspiration!
Check out my growing library of fresh-milled flour recipes and tutorials:

FAQs & Troubleshooting
Depending on the model, investing in a grain mill can be pricey, but there are options to fit most budgets.
Buying whole grains in bulk is cost-effective. Over time, the savings and the quality of fresh-milled flour will make the investment worthwhile.
There are several factors to consider when choosing the right grain mill. I recommend starting with your budget. Decide how much you can spend, then determine the best mill within that price range.
Different mills have unique cleaning requirements, so it's important to follow the manufacturer's instructions for proper care and maintenance.
A grassy flavor in your flour is often a sign that the oil in the wheat has oxidized. To avoid this, use your freshly milled flour immediately after milling and store any extra in an airtight container in the freezer.
In some cases, the grassy taste might come from the wheat variety itself. Experiment with different types of wheat to find the flavor that you and your family enjoy the most.
Yes, whole grains can make sourdough bread taste more sour. If you prefer a milder flavor, try my same-day fresh-milled sourdough recipe. This recipe skips the cold proof, resulting in a less sour flavor.
No, washing the wheat berries can lead to mold growth and sprouting. Keep them as dry as possible.

Let's Connect!
If you have questions about milling grains, leave them in the comments! Or if you have milling tips, share them below.
Also, don't forget to pin this post and follow Moon + Magnolia on Pinterest. You can save all my recipes on your boards and keep up with the latest happenings!
Share your creations on Instagram and tag @moon_and_magnolia!
More Posts You’ll Love
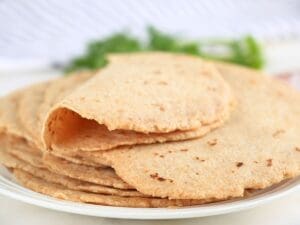
- Fresh-Milled Einkorn Sourdough Bread Recipe
- How To Convert All-Purpose to Fresh-Milled Flour
- Easiest Pizza Dough with Fresh-Milled Flour - No-Yeast Recipe
- What Types of Flour Can You Feed Sourdough Starter?
- My Favorite Kitchen Tools for Scratch Cooking (2024)
- The Most Delicious Einkorn Chocolate Chip Cookies
- Simple Einkorn Cheddar Drop Biscuits - Quick Recipe
- Practical Tips for Creating a Simple Life at Home