This post may contain affiliate links. Please read our disclosure policy.
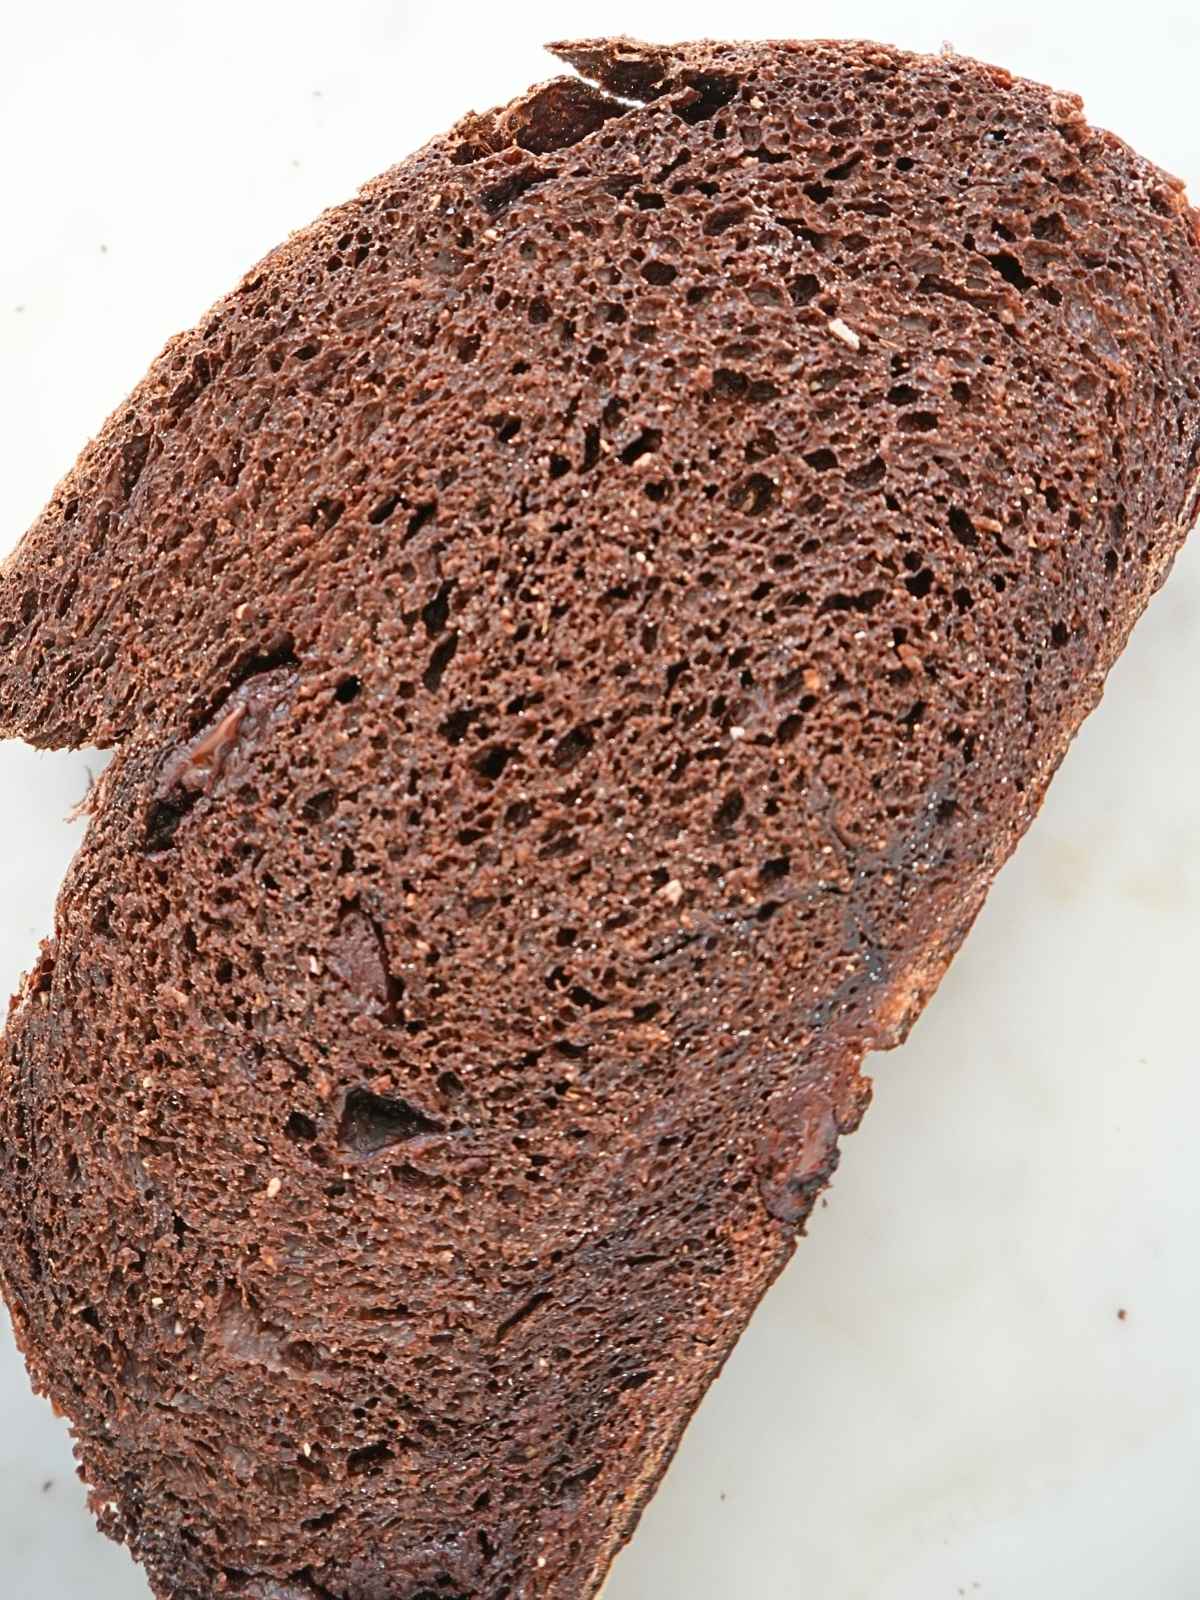
This artisan chocolate sourdough bread is crusty on the outside, warm and chewy on the inside, and filled with gooey chocolate. It’s made with my beginner’s no-knead sourdough recipe with added cocoa, brown sugar, and chocolate chips. It’s hands-off and simple, and beyond delicious.
Recipe Overview: Chocolate Sourdough Bread
- Ready In: 22 hours, 35 minutes (mostly hands-off)
- Serves: 12 slices
- Calories: 194 kcal (approximately)
- Main Ingredients: All-purpose flour, whole wheat flour, cocoa powder, brown sugar, chocolate chips, sourdough starter
- Why You’ll Love It: Chocolate sourdough bread is a decadent twist on the classic boule, with a crisp crust, chewy crumb, and pockets of gooey chocolate in every slice, making it just as perfect for breakfast and snacks as it is for dessert.
SUMMARIZE & SAVE THIS RECIPE ON
Chocolate sourdough bread is one of my favorites. It has a crusty exterior, a chewy, chocolatey interior, and pockets of melted chocolate throughout.
This recipe is adapted from my no-knead sourdough bread. So if you are familiar with making traditional sourdough bread, this chocolate sourdough will be comfortable territory for you.
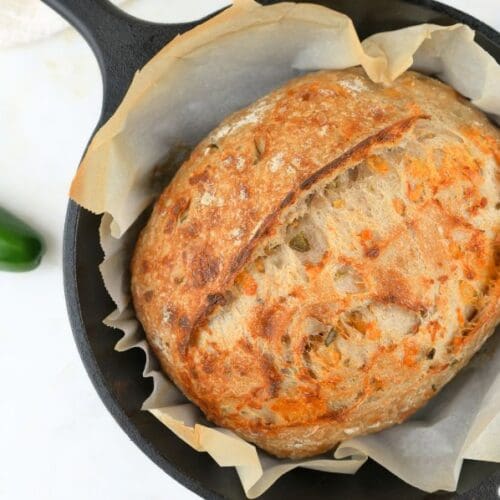
If you love sourdough with inclusions, you’ll also love my sourdough cheddar jalapeño bread.
This recipe was adapted from Farmhouse on Boone’s chocolate sourdough recipe.
Jump to:
- Recipe Overview: Chocolate Sourdough Bread
- Why You’ll Love This Recipe
- Key Ingredients
- Variations
- How to Make Chocolate Sourdough Bread
- Get the FREE sourdough starter eBook!
- Tips for Success
- Serving Suggestions
- Storing & Freezing
- Chocolate Sourdough Bread FAQs
- More Sourdough Bread Recipes
- Chocolate Sourdough Bread
Why You’ll Love This Recipe
Versatile Uses: Just because this is chocolate bread doesn’t mean it is only for dessert. It makes delicious sourdough toast for breakfast, and it’s also great for peanut butter and jelly sandwiches.
Healthy: This chocolate sourdough bread uses just 50 grams of brown sugar, far less than most chocolate baked goods. Combined with fermented sourdough grains, it makes a more balanced option for dessert-like treats.
Tight Crumb: This sourdough bread naturally has a tighter crumb, meaning smaller holes. That makes it ideal for slathering with butter, canned strawberry jam, Instant Pot apple butter, and other toppings.
Key Ingredients
Flour: You will need all-purpose and whole wheat flour.
Brown Sugar: I used dark brown sugar, but light brown will also work.
Cocoa Powder: Any high-quality, unsweetened cocoa powder will work.
Sourdough Starter: Active sourdough starter is ideal. Inactive will work, but it will take longer for your dough to ferment.
Chocolate Chips: I prefer dark chocolate chips, but use your favorite.
Get the full list of ingredients and measurements on the printable recipe card below.
Variations
Fresh-Milled: For a fresh-milled variation, use my half fresh-milled sourdough bread or same-day fresh-milled sourdough recipe as the base dough.
Chocolate Orange: Add orange zest to the dough for a citrusy twist.
Cinnamon Chocolate: Add a sprinkle of cinnamon to the dough.
How to Make Chocolate Sourdough Bread
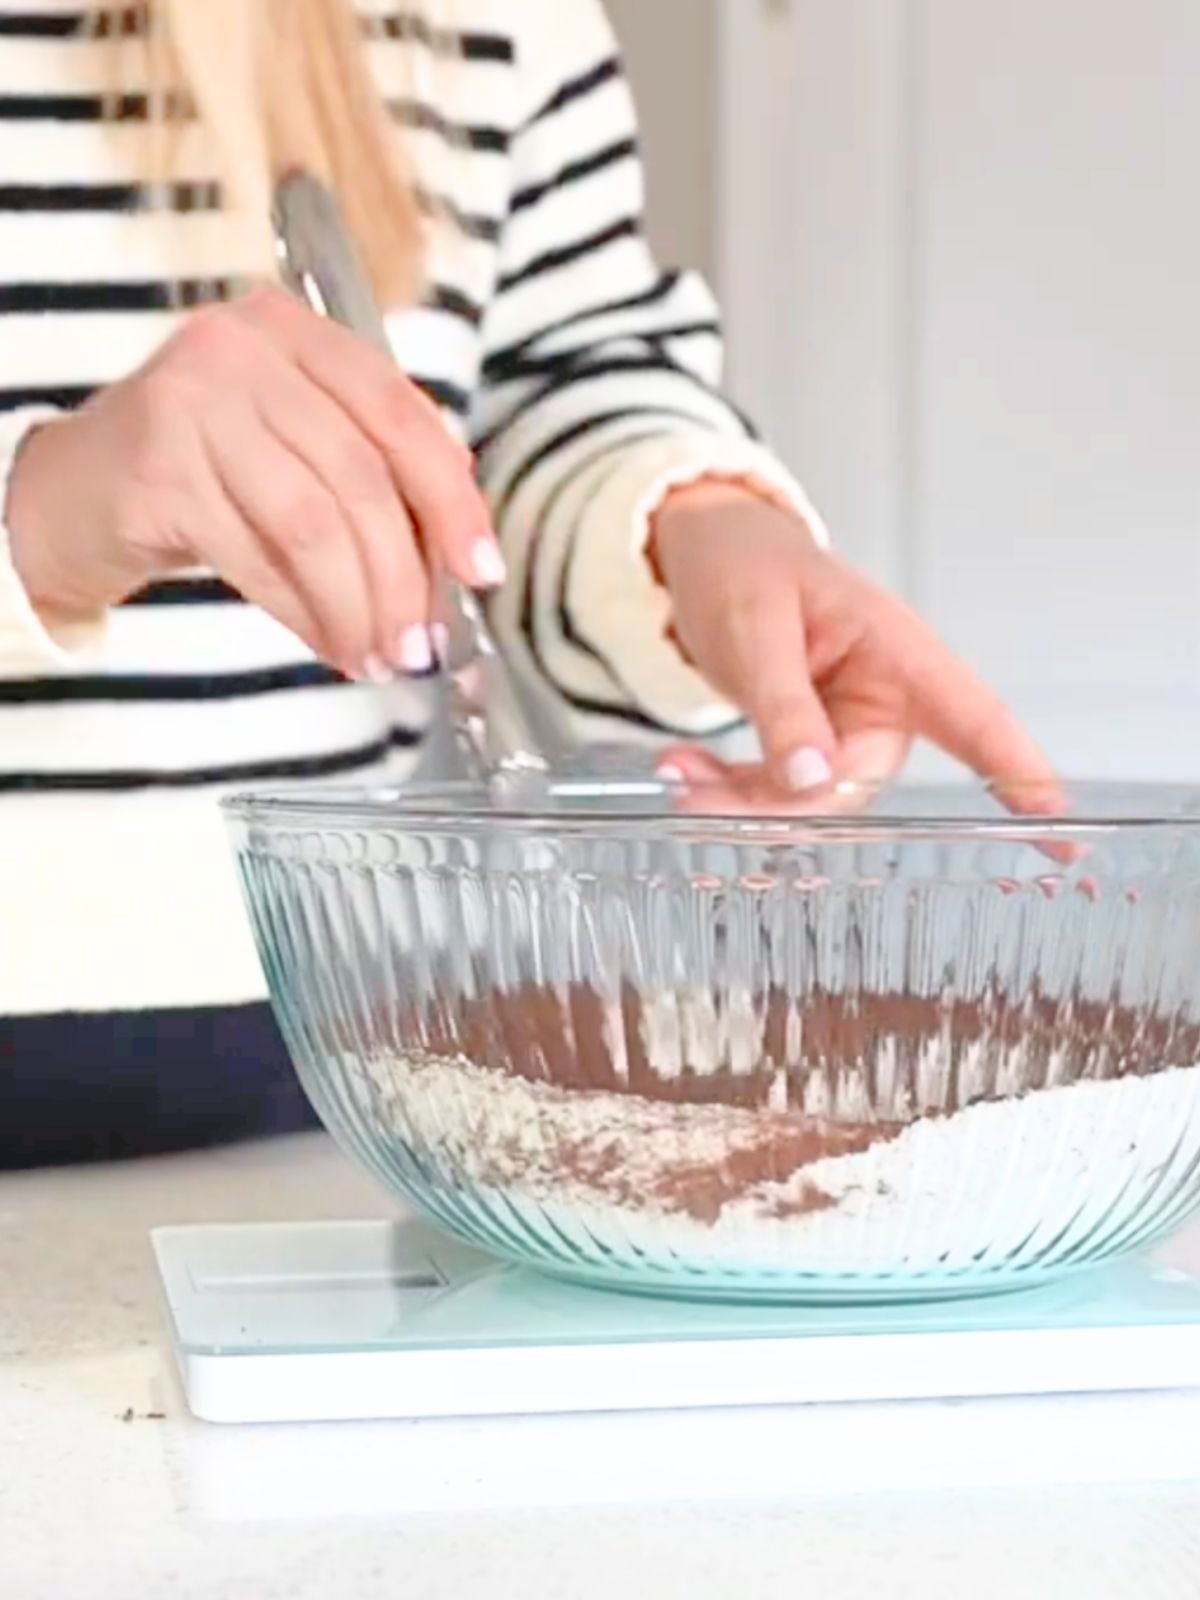
Step 1: In a large bowl, whisk together all dry ingredients except the salt and chocolate chips.
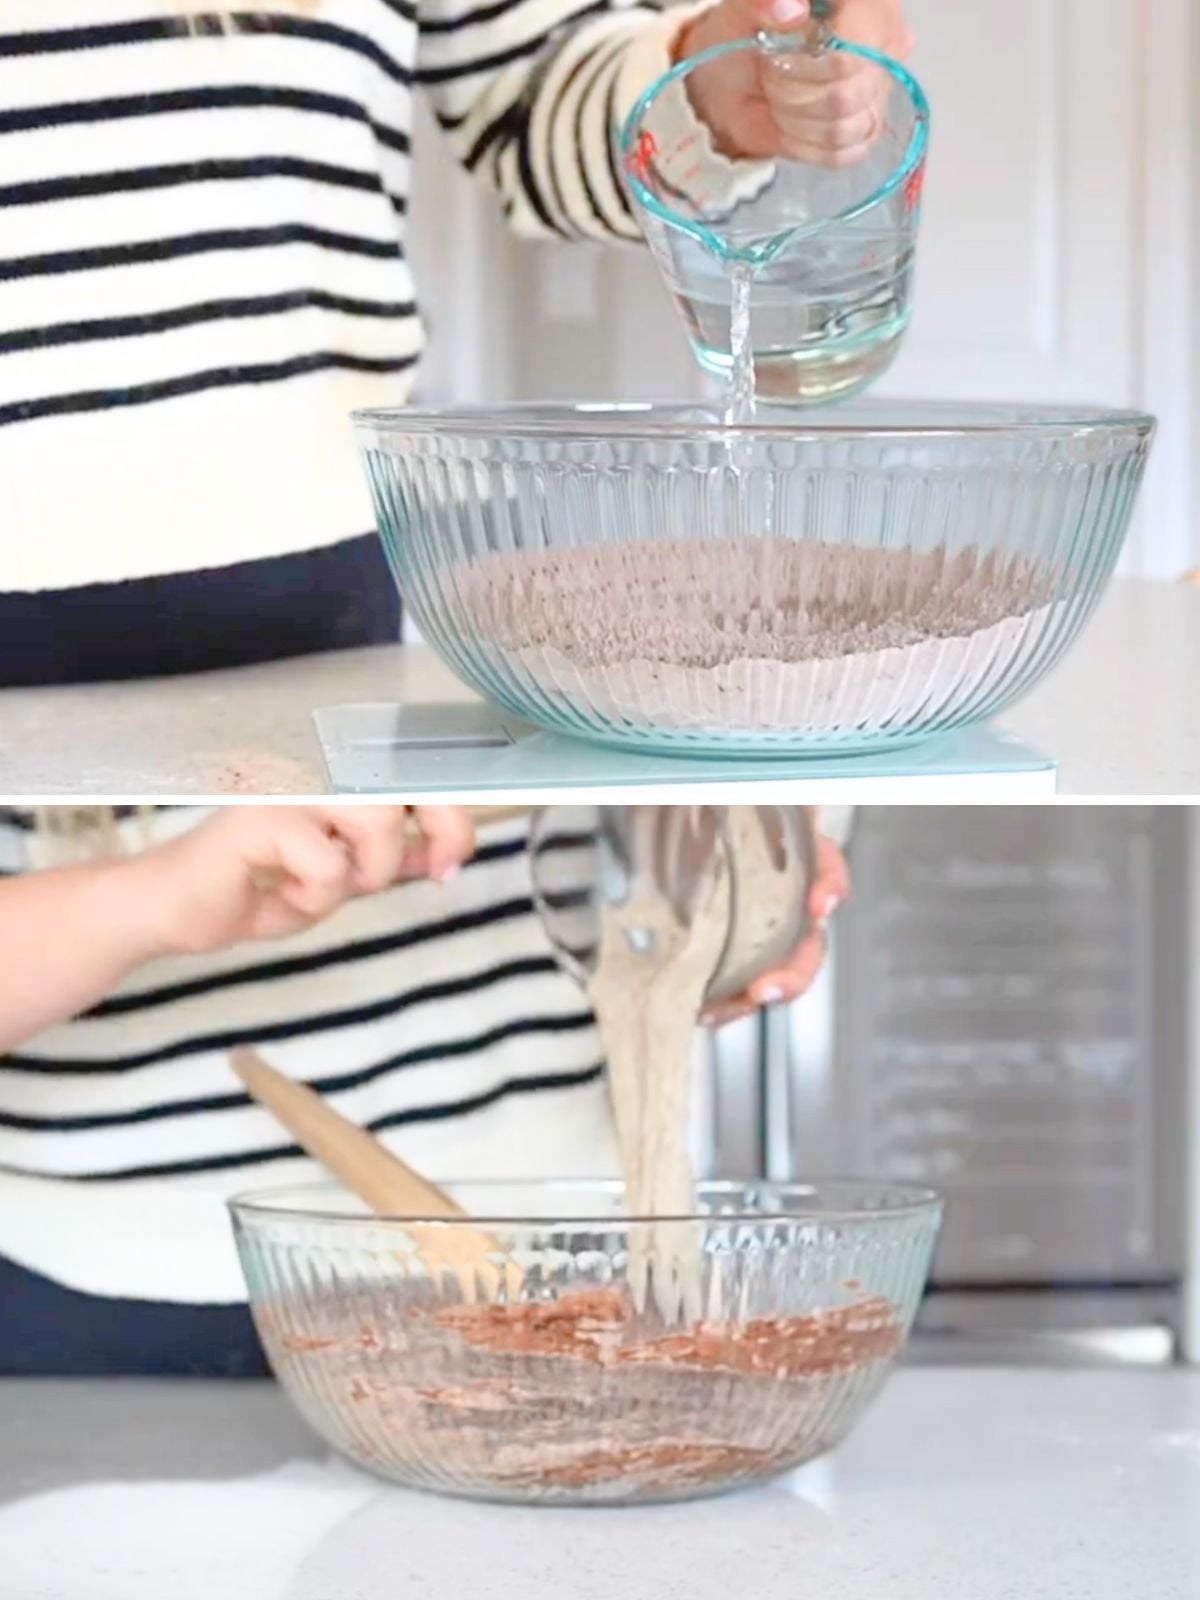
Step 2: Pour water and starter over the combined dry ingredients, and mix well.
I like to use a Danish dough whisk for this. But your hands will also work just fine.
Cover and allow to rest for 30 minutes.
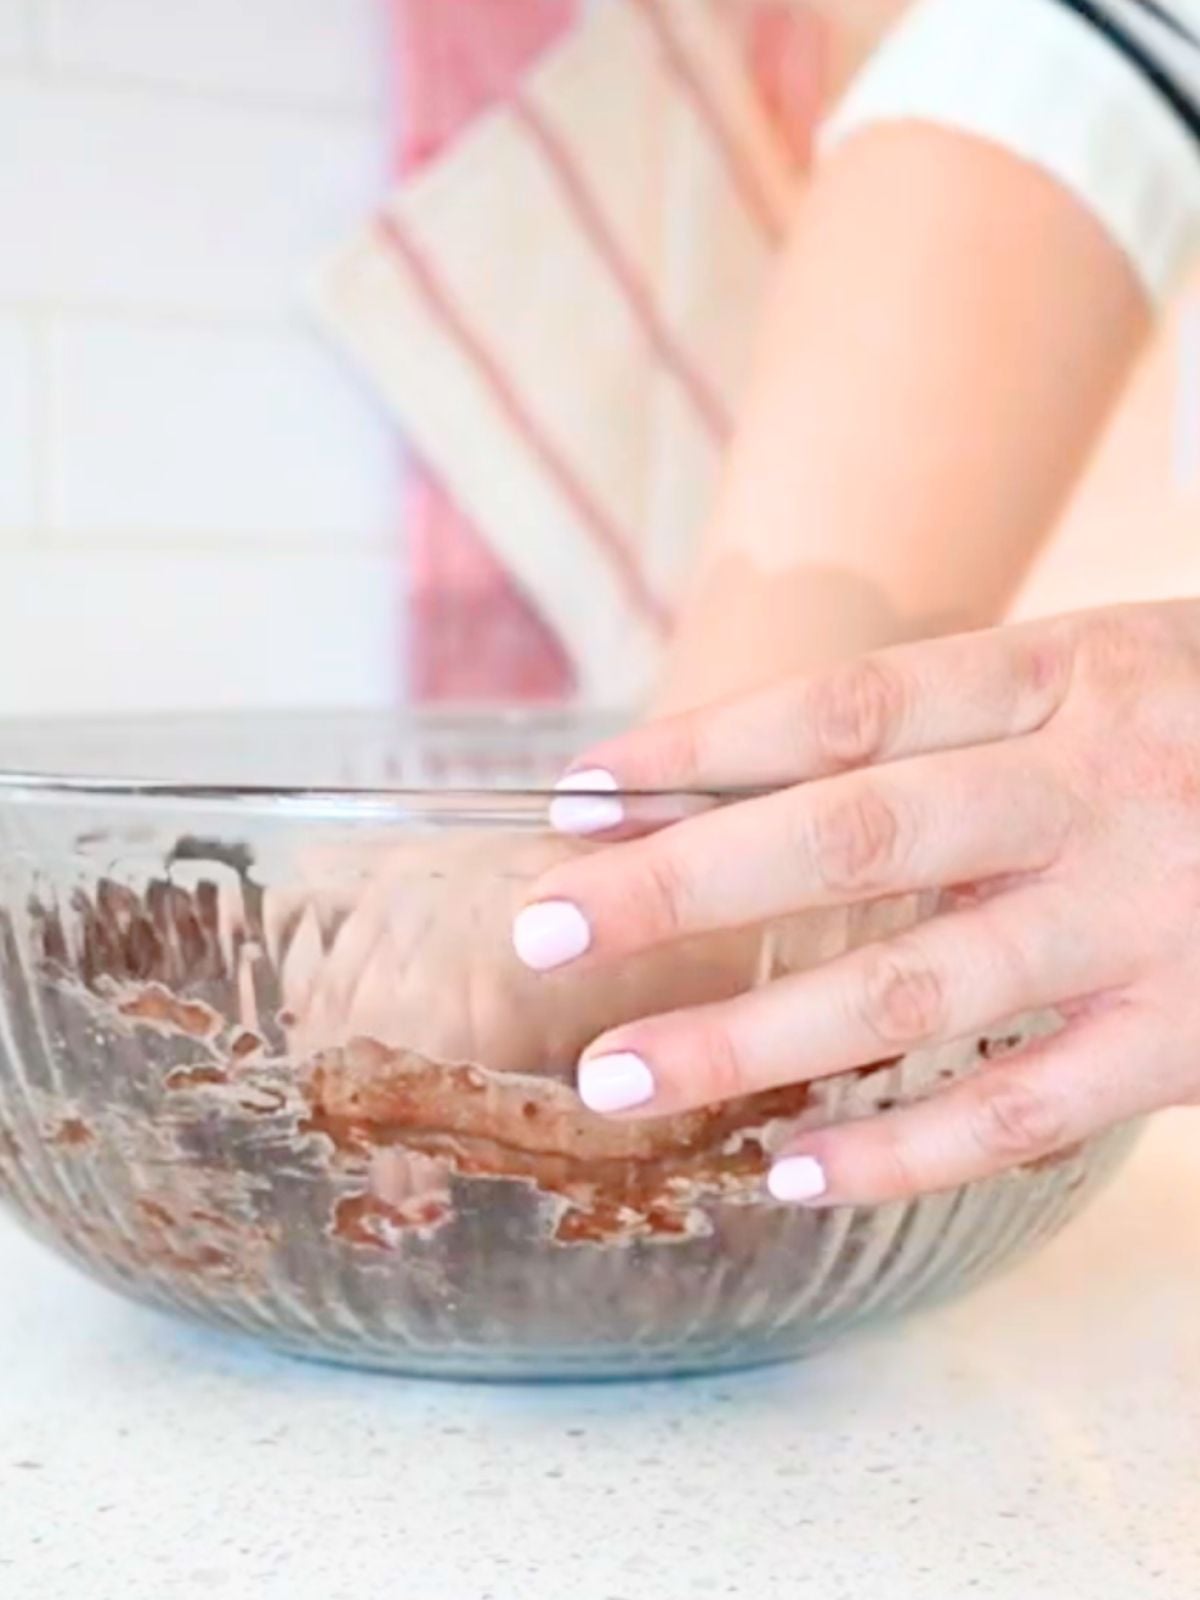
Step 3: Add salt and mix by hand for about 5 minutes. The dough should come together and be fully combined.
Cover with a damp towel or place in a proofing box with a water tray.
Allow to rest, again, for 30 minutes.
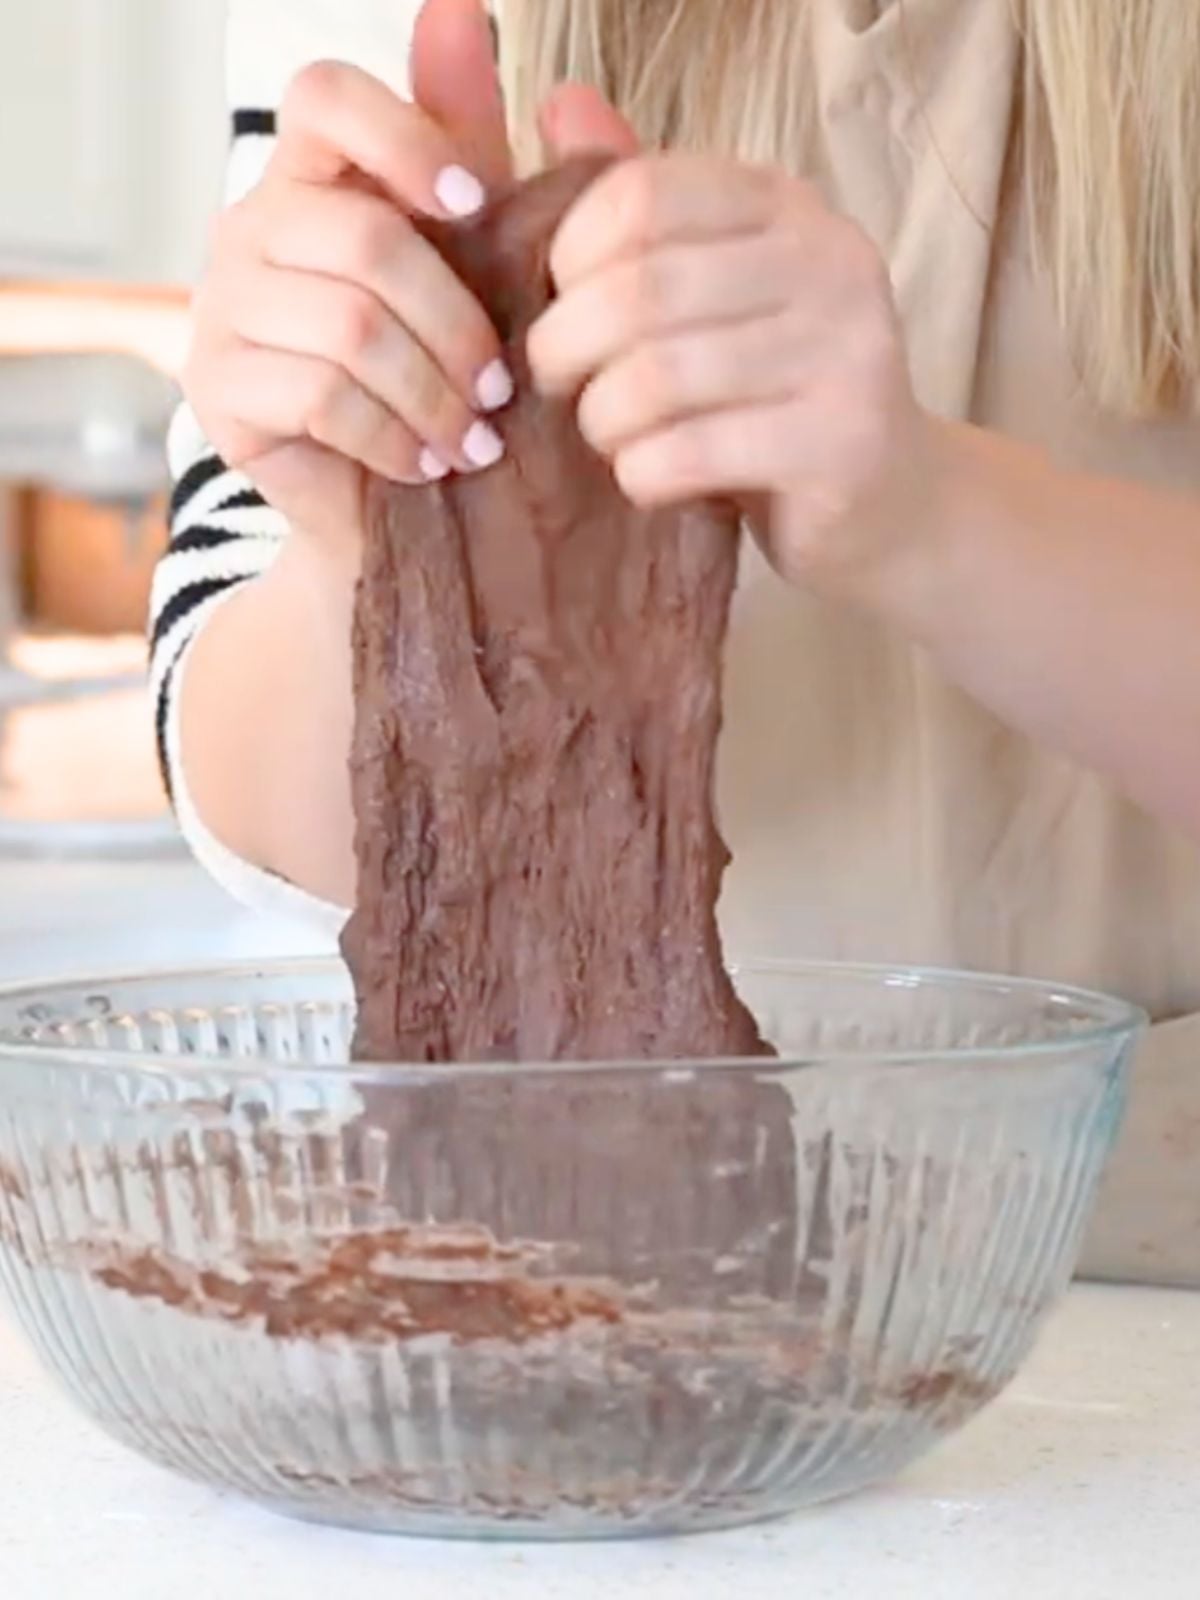
Step 4: Begin the first round of stretch and folds. This will be a stiffer dough than a traditional sourdough. So don’t be alarmed. Do the best you can to stretch the dough without tearing it.
For each round, complete four stretch and folds. Stretch and fold for a total of three rounds with 15 minutes between rounds.
Cover the dough with a damp towel or keep it in a proofing box between rounds.
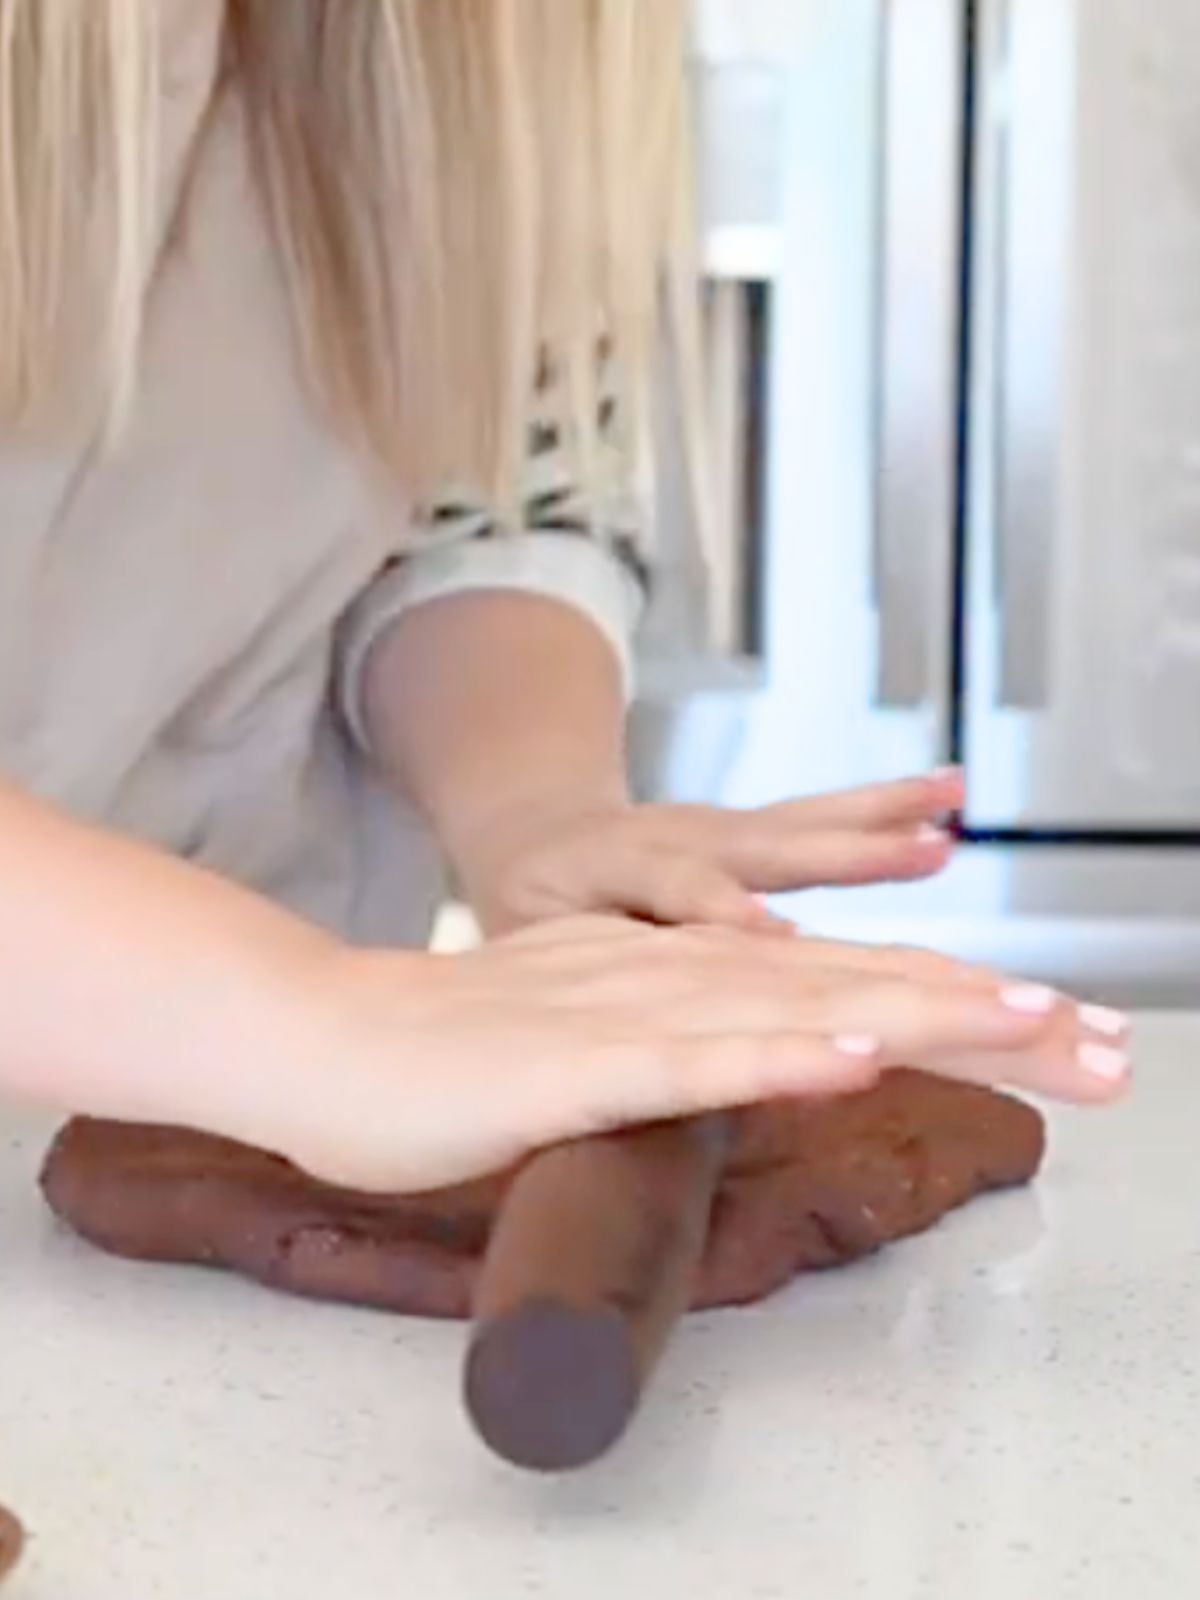
Step 5: After completing three stretch-and-fold rounds, remove the dough from the bowl. Gently roll it into a thick rectangle-ish shape.
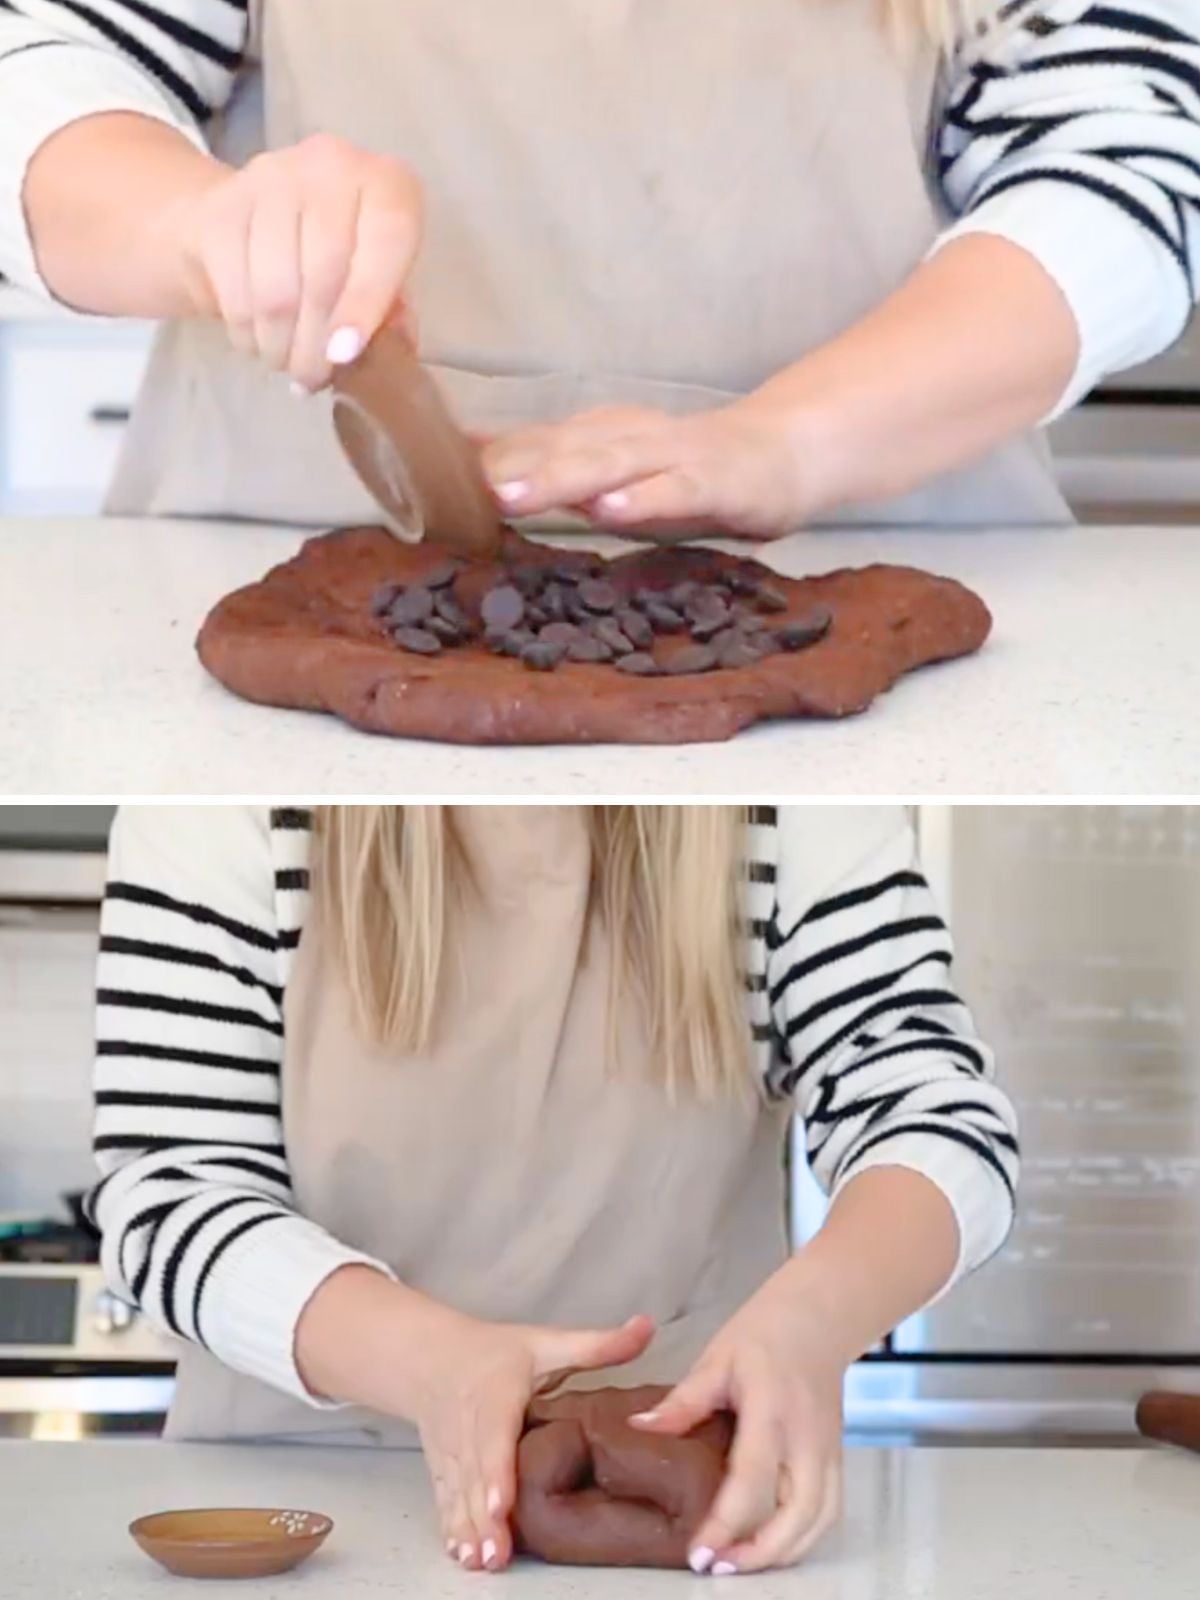
Step 6: Add the chocolate chips on top of the dough.
Fold the left and right sides over the chocolate chips. Then, fold the top and bottom edges over. Pinch the dough together to prevent the chocolate chips from falling out.
Place the dough back in the bowl.
Step 7: Resume the stretch and folds. This time, do three rounds again, but with 30 minutes between each round. Cover the dough with a damp towel or keep it in a proofing box between rounds.
After the stretch-and-fold process is complete, allow the dough to bulk ferment until doubled and domed on top (in my 70-degree kitchen, this takes about 6 hours).
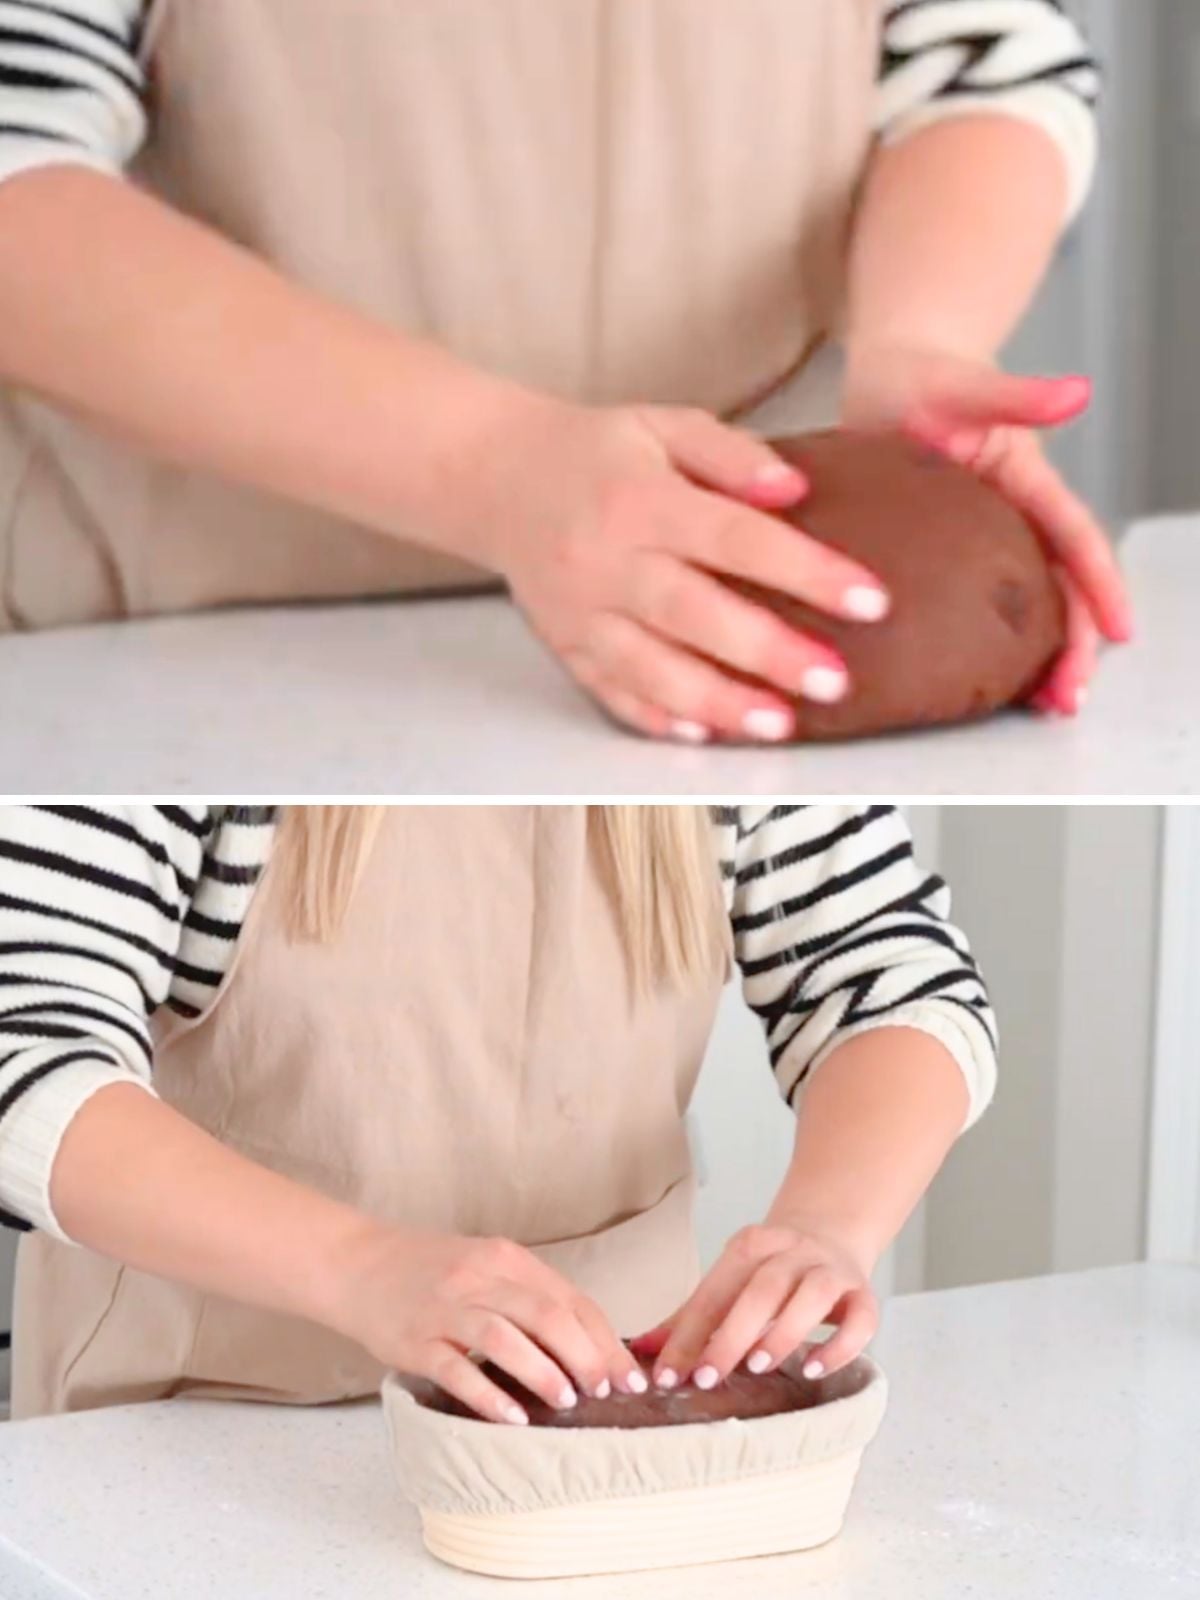
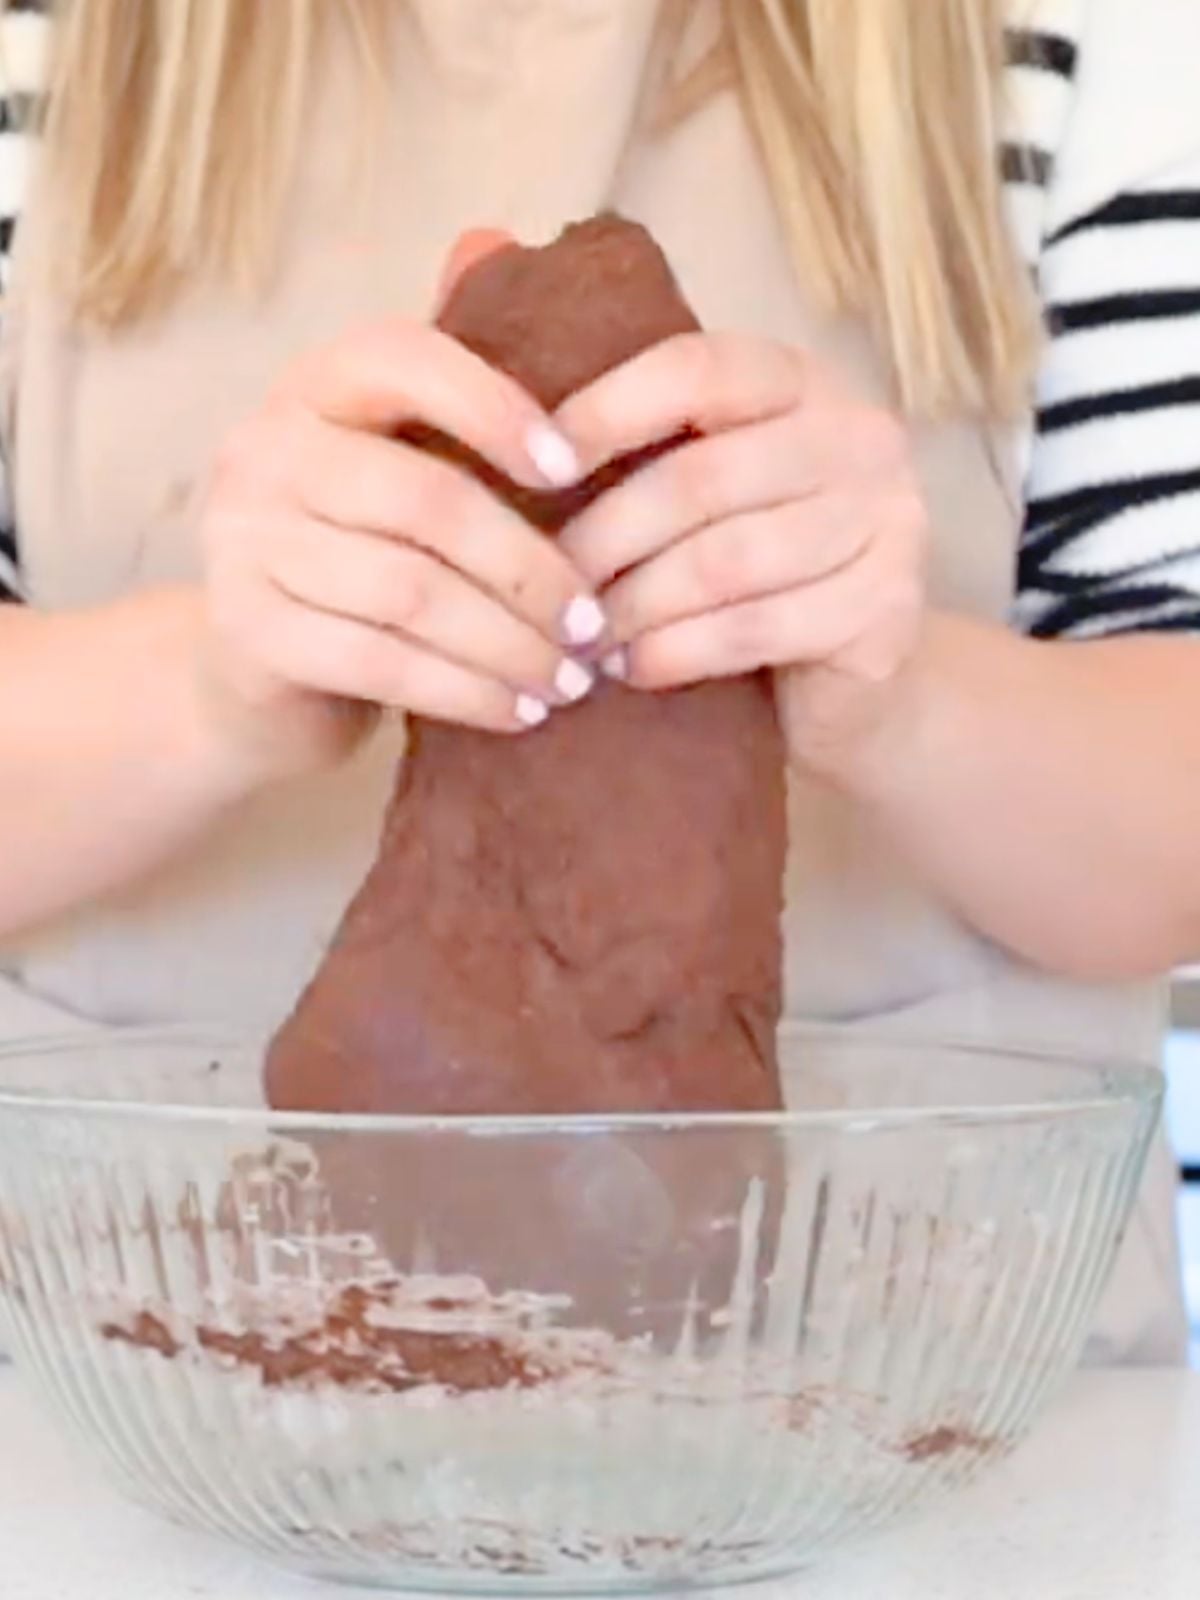
Step 8: Once the dough has doubled, turn it out onto a clean, dry counter.
Shape the dough by twisting it clockwise to create tension.
Place upside down into a floured banneton basket. Gently pinch the left and right sides together. Then, pinch the top and bottom together. This creates tension and a nice seam.
Cover with plastic (I usually use a plastic shopping bag). Place in fridge for 12-15 hours.
Step 9: The next day, preheat a Dutch oven with a lid to 425°F for 20 minutes.
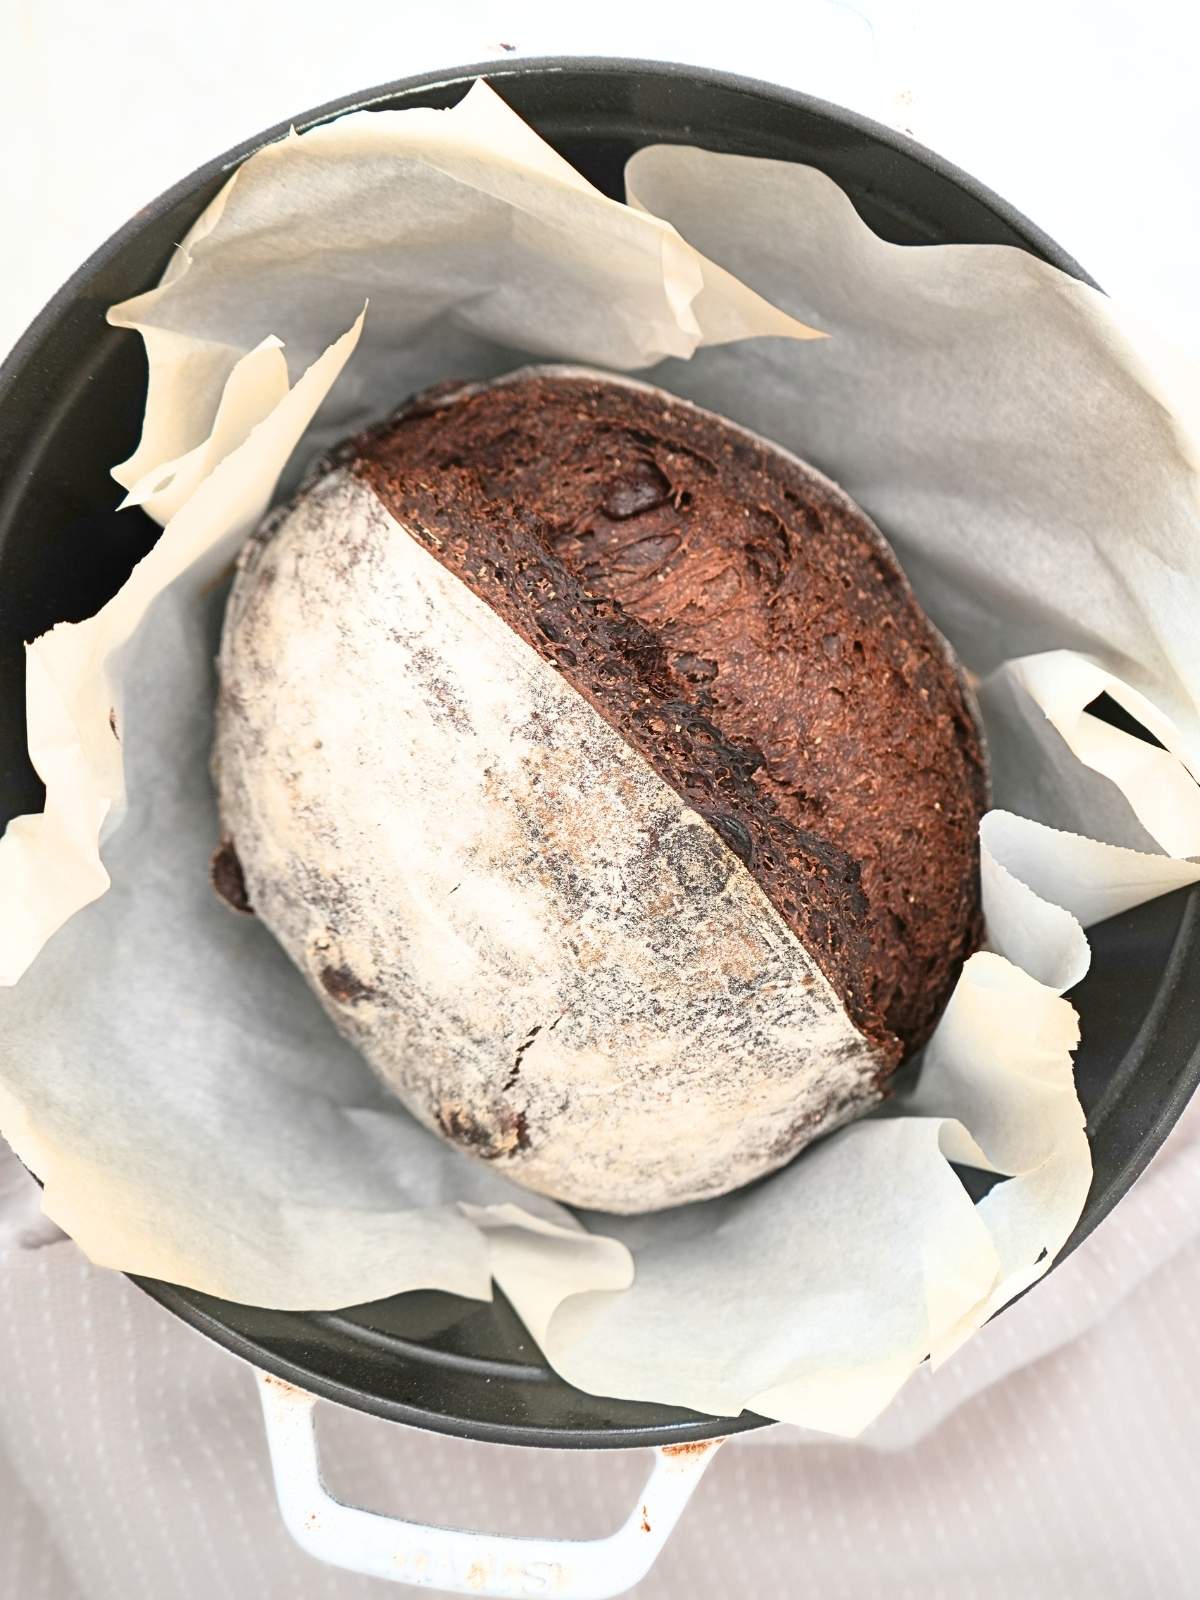
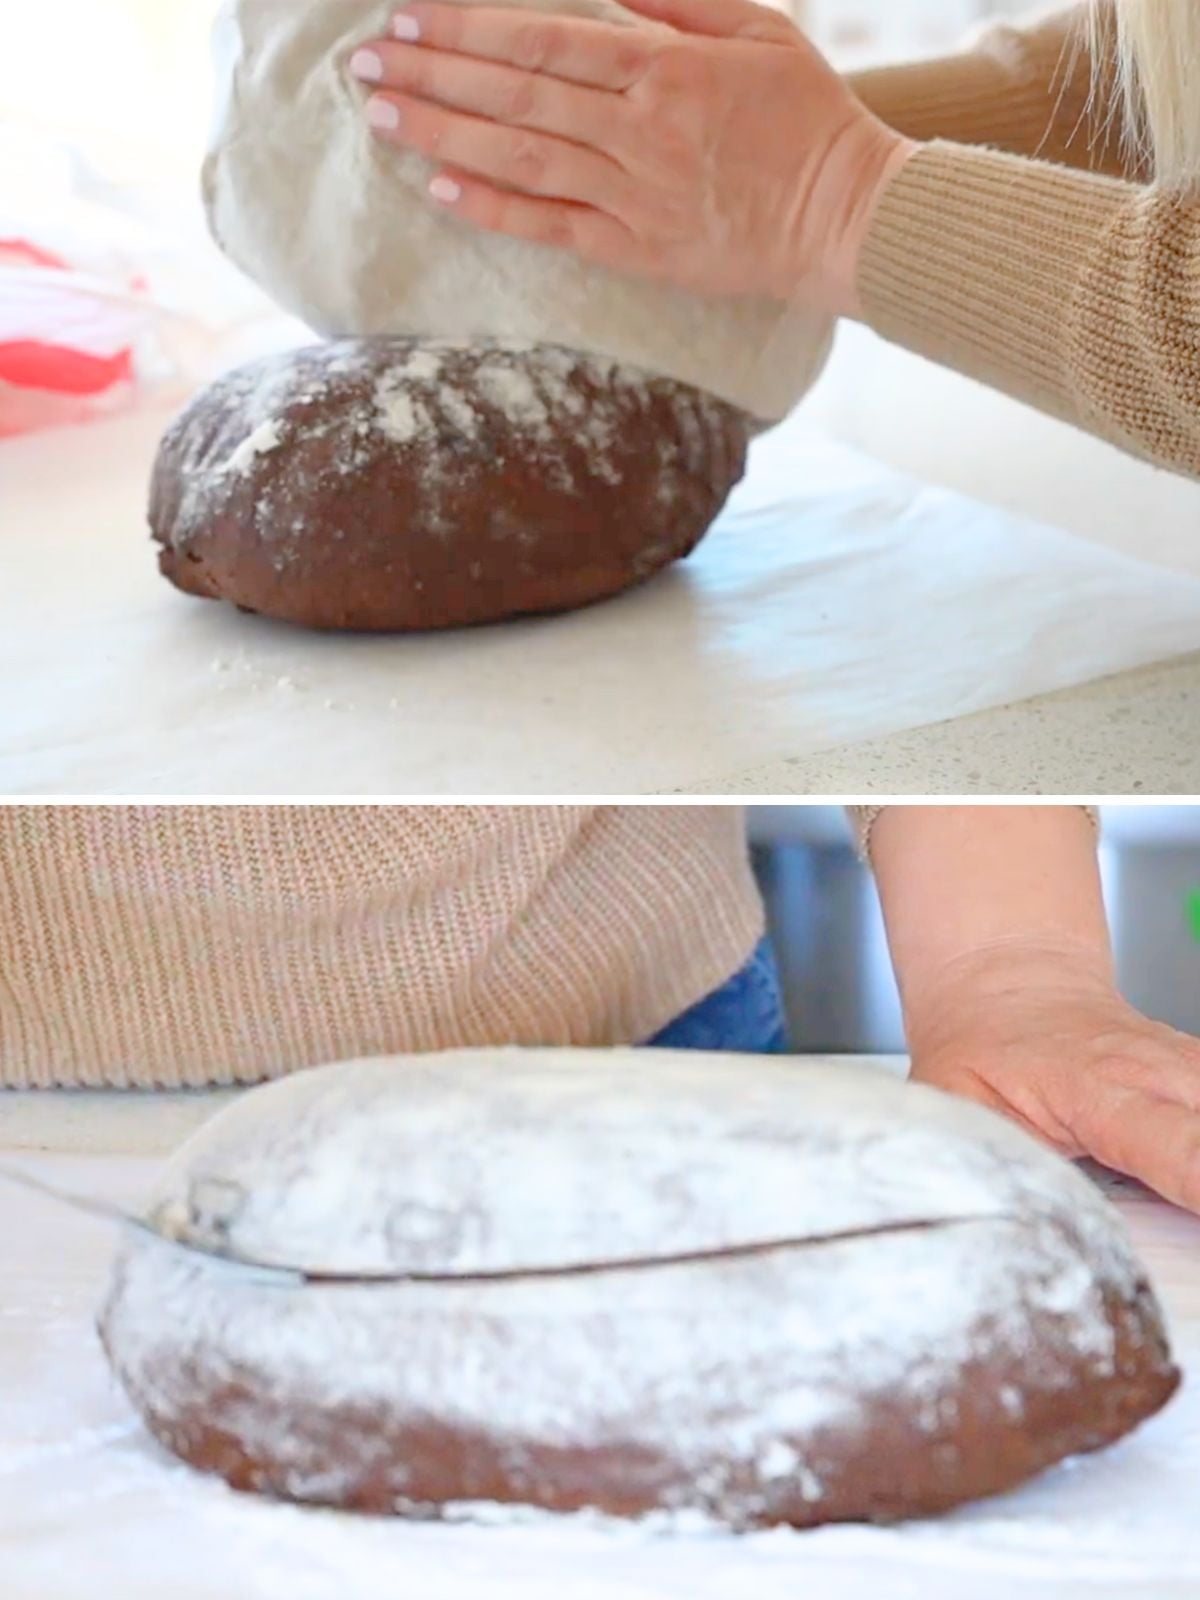
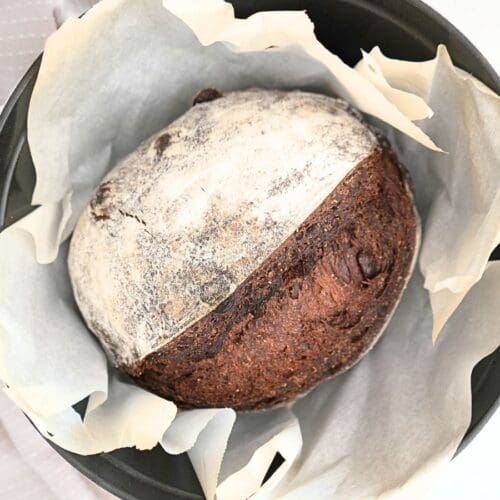
Once preheated, turn out the cold dough onto a piece of parchment paper. Flour the top of the dough and score.
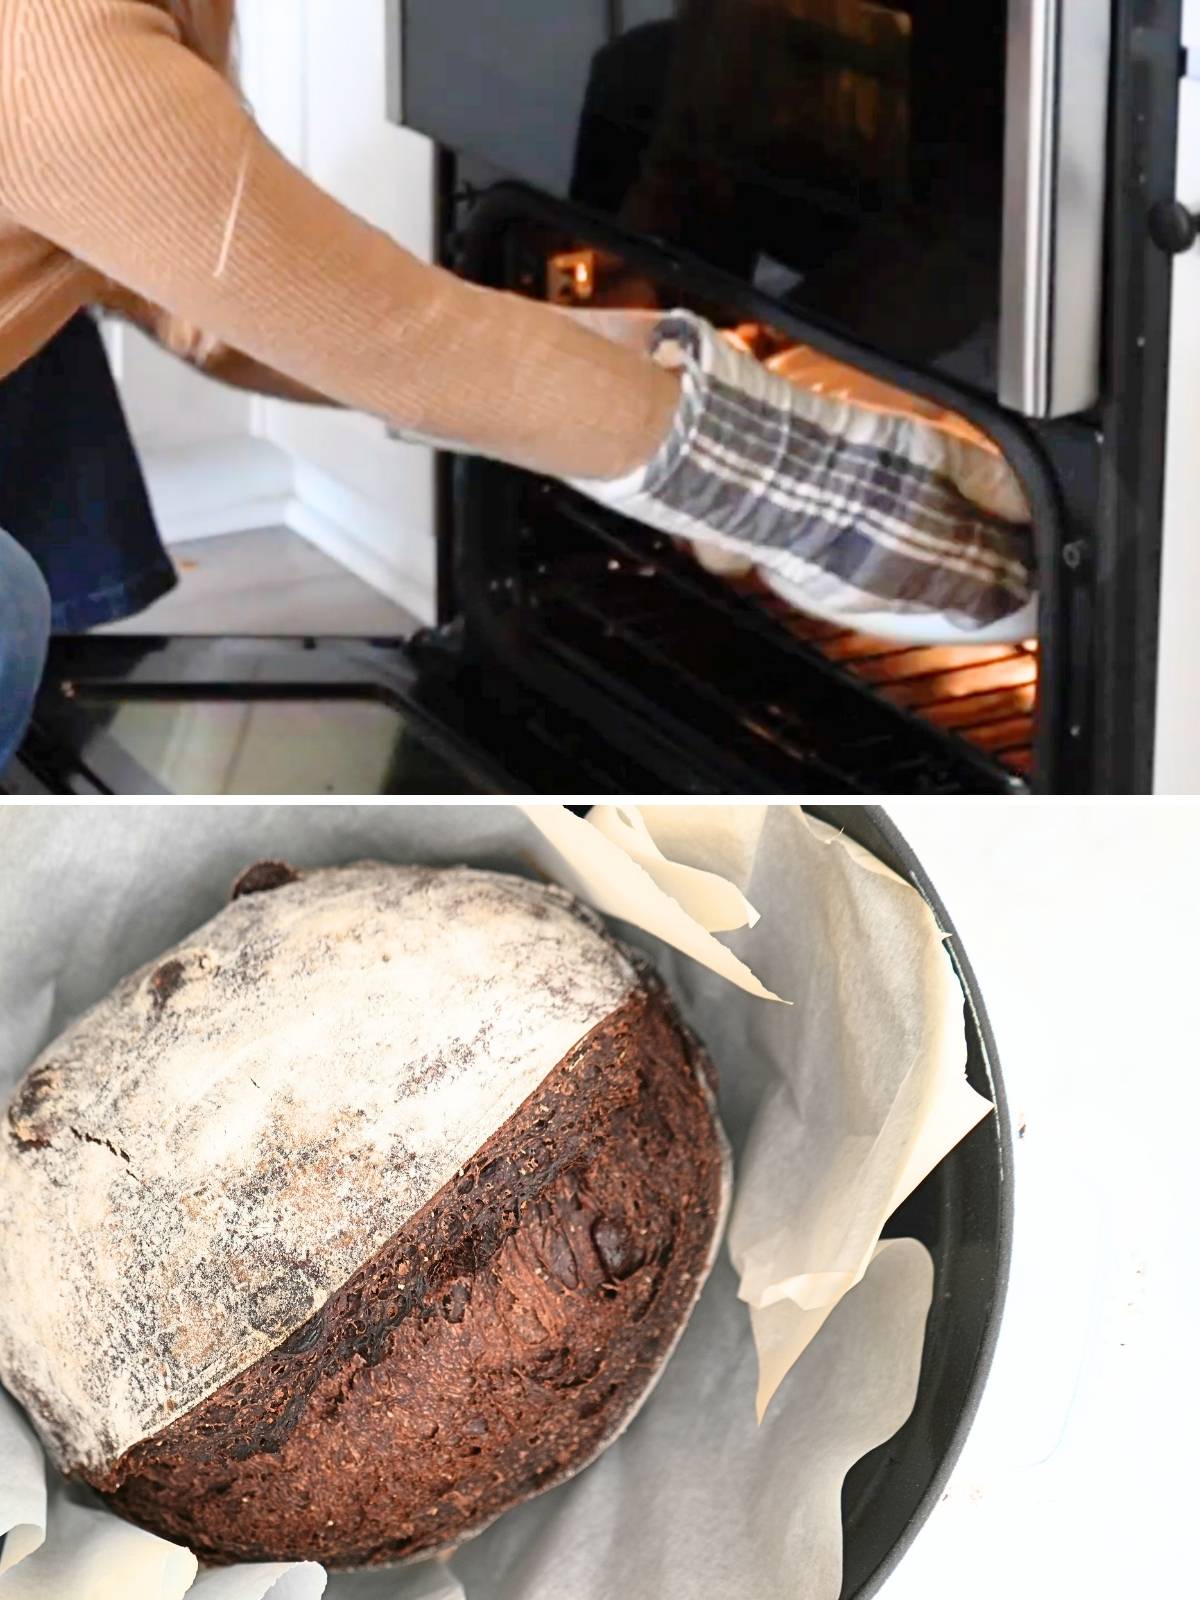
Step 10: Keep the dough on the parchment paper, and place it inside the hot Dutch oven.
Bake at 425°F for 20 minutes with the lid on.
Remove the lid and bake at 425°F for 30 minutes. The bread is done when it reaches an internal temperature of 200-205°F.
Transfer to a wire rack and allow to cool to room temperature before slicing.
Tips for Success
- For the most accurate and repeatable results, I recommend using a kitchen scale and weighing in grams.
- Watch the dough, not the clock. How long it takes for your dough to ferment depends on the ingredients, the strength of your starter, and the temperature.
- Use an active, bubbly starter since the cocoa and sugar can slightly slow fermentation.
- The dough will be stiffer than regular no-knead dough, so don’t worry if the stretch and folds aren’t as stretchy.
- If you do not have a Dutch oven, place a skillet filled with water on the bottom rack and preheat it with the oven. Keep the skillet in the oven and bake the dough on the rack above to create steam for a better rise and crust.
Serving Suggestions
Toast: This bread makes excellent sourdough toast. I love it with a schmear of cream cheese and a drizzle of honey.
French Toast: Use thick slices to make French toast. Serve with berries, molasses syrup, and a dusting of powdered sugar.
Coffee: Pair with coffee with a splash of vanilla and brown sugar coffee creamer.
Sandwiches: This make a great peanut butter and banana sandwich or a peanut butter sandwich with canned strawberry jam.
Storing & Freezing
- Store leftover bread wrapped in a towel for up to 1 day.
- If you need to store it longer, place it in a bread bag or a zip-top bag for 2-3 days. Keep in mind the crust will soften when stored in a bag.
- You can also freeze sourdough bread! Freeze a whole loaf or slices for up to 3 months. Make sure it's wrapped tightly and sealed in an air-tight container or bag.
Chocolate Sourdough Bread FAQs
Yes, but it isn’t dessert-level sweet. It’s lightly sweetened with chocolately flavor, but it isn’t overwhelmingly sweet.
No, it tastes more like a chocolate-flavored artisan bread than a soft brownie.
Unsweetened cocoa powder works best, with Dutch processed cocoa offering a smoother, less bitter flavor.
Yes, cocoa powder can slightly slow fermentation, so rise times may be longer. Remember, watch the dough, not the clock.
More Sourdough Bread Recipes
If you tried this Chocolate Sourdough Bread recipe or any other recipe on my blog, please leave a 🌟 star rating and let me know how it went in the 📝 comments below. Thanks, y'all!

Chocolate Sourdough Bread
Ingredients
- 375 g all-purpose flour
- 100 g whole wheat flour
- 10 g salt
- 50 g brown sugar
- 50 g cocoa powder, unsweetened
- 100 g sourdough starter, active and bubbly
- 335 g water
- 1/4 cup chocolate chips
Instructions
- Mix Dry Ingredients. In a large bowl, whisk together all dry ingredients except the salt and chocolate chips.375 g (3 cups) all-purpose flour, 100 g (3/4 cup) whole wheat flour, 50 g (1/4 cup) brown sugar, 50 g (1/2 cup) cocoa powder
- Add Water and Starter. Pour water and starter over the combined dry ingredients, and mix well. I like to use a Danish dough whisk for this. But your hands will also work just fine. Cover and allow to rest for 30 minutes.335 g (1 1/2 cups) water, 100 g (1/2 cup) sourdough starter
- Add Salt and Mix. Add salt and mix by hand for about 5 minutes. The dough should come together and be fully combined. Cover with a damp towel or place in a proofing box with a water tray. Allow to rest, again, for 30 minutes.10 g (1 1/2 tsp) salt
- Stretch and Folds. Begin the first round of stretch and folds. This will be a stiffer dough than a traditional sourdough. So don't be alarmed. Do the best you can to stretch the dough without tearing it.For each "round," complete four stretch and folds. Stretch and fold for a total of three rounds with 15 minutes between rounds.Cover the dough with a damp towel or keep it in a proofing box between rounds.
- Roll the Dough. After completing three stretch-and-fold rounds, remove the dough from the bowl. Gently roll it into a thick rectangle-ish shape.
- Add Chocolate Chips. Add the chocolate chips on top of the dough. Fold the left and right sides over the chocolate chips. Then, fold the top and bottom edges over. Pinch the dough together to prevent the chocolate chips from falling out. Place the dough back in the bowl.1/4 cup chocolate chips
- Continue Stretch and Folds. Resume the stretch and folds. This time, do three rounds again, but with 30 minutes between each round. Cover the dough with a damp towel or keep it in a proofing box between rounds.
- Bulk Ferment. After the stretch-and-fold process is complete, allow the dough to bulk ferment until doubled and domed on top (in my 70-degree kitchen, this takes about 6 hours).
- Shape the Dough. Once the dough has doubled, turn it out onto a clean, dry counter. Shape the dough by twisting it clockwise to create tension.
- Cold Proof. Place upside down into a floured banneton basket. Gently pinch the left and right sides together. Then, pinch the top and bottom together. This creates tension and a nice seam.Cover with plastic (I usually use a plastic shopping bag). Place in fridge for 12-15 hours.
- Preheat the Oven. The next day, preheat a Dutch oven with a lid to 425°F for 20 minutes.
- Flour and Score. Once preheated, turn out the cold dough onto a piece of parchment paper. Flour the top of the dough and score.
- Bake. Keep the dough on the parchment paper, and place it inside the hot Dutch oven. Bake at 425°F for 20 minutes with the lid on. Remove the lid and bake at 425°F for 30 minutes. The bread is done when it reaches an internal temperature of 200-205°F.
- Cool and Enjoy! Transfer to a wire rack and allow to cool to room temperature before slicing.
Notes
- For the most accurate and repeatable results, I recommend using a kitchen scale and weighing in grams.
- Watch the dough, not the clock. How long it takes for your dough to ferment depends on the ingredients, the strength of your starter, and the temperature.
- Use an active, bubbly starter since the cocoa and sugar can slightly slow fermentation.
- The dough will be stiffer than regular no-knead dough, so don't worry if the stretch and folds aren't as stretchy.
- If you do not have a Dutch oven, place a skillet filled with water on the bottom rack and preheat it with the oven. Keep the skillet in the oven and bake the dough on the rack above to create steam for a better rise and crust.
Nutrition
Nutrition information is auto-calculated and may not reflect your final product. Please verify independently if needed.


This is such a fun take on sourdough bread. It makes excellent toast!
It was delicious! This was my first time baking with active starter and the recipe was easy to follow and the end result was amazing. It’s a hit in our household!
I’m so glad you enjoyed!
-Rebecca