
This post may contain affiliate links. Please read our disclosure policy.
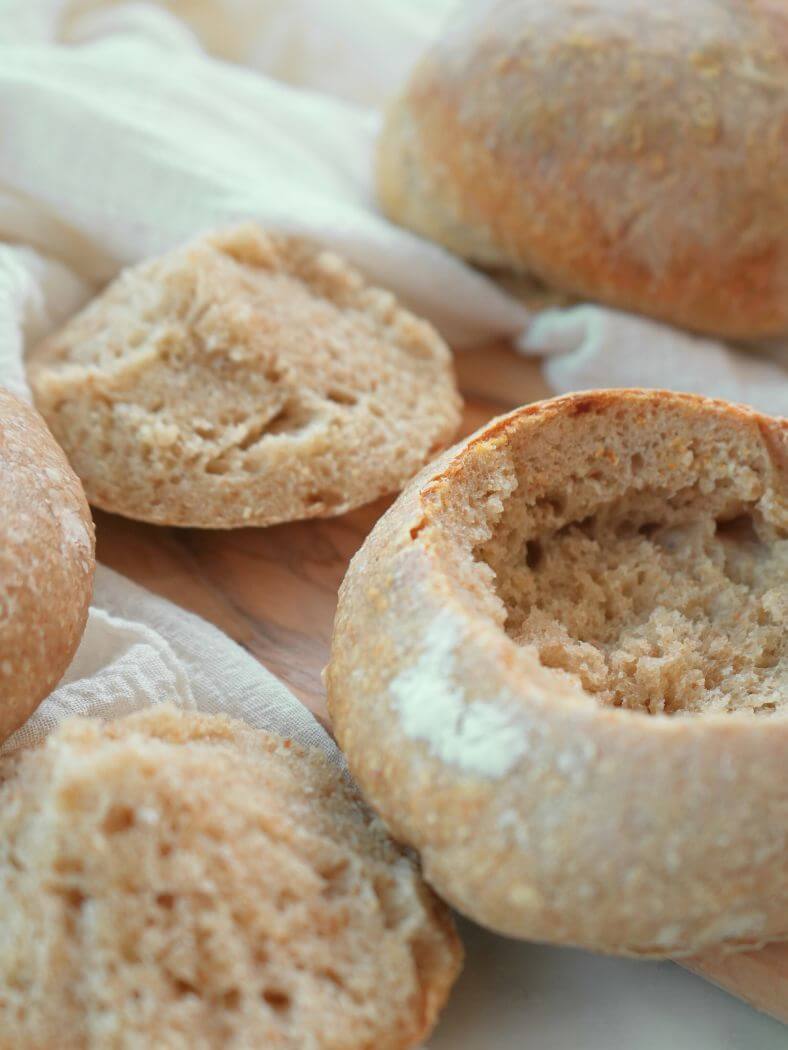
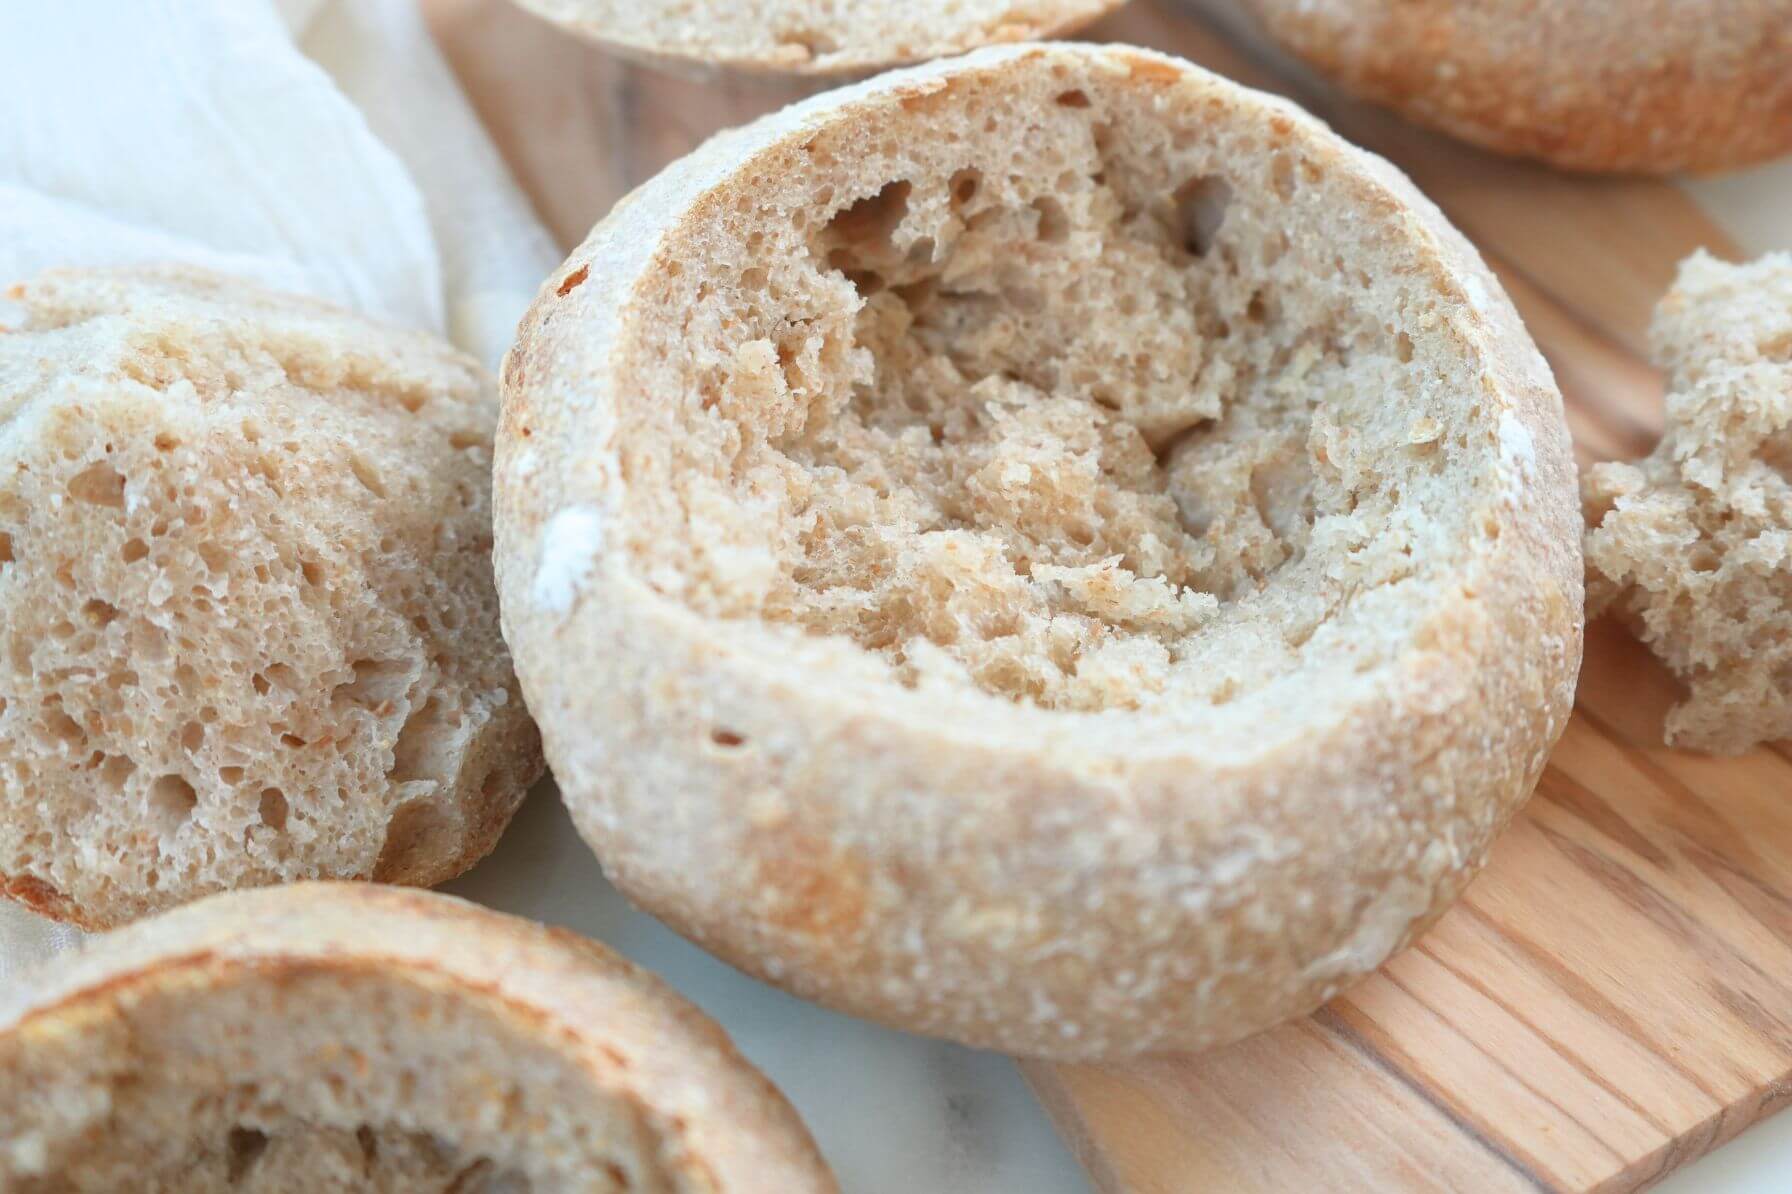
Homemade sourdough bread bowls are perfect for serving your favorite soups and stews. Open baked with steam, they are crusty on the outside and chewy on the inside. Fill with your favorite soups or stews for the ultimate cozy comfort food.

Table of Contents
Years ago, a friend gifted me a small jar of sourdough starter. At the time, I didn’t know much about baking with it, but I knew exactly what I wanted to try first: homemade sourdough bread bowls.
That very first attempt was far from perfect, but to me, those bread bowls were incredible. Now, with years of sourdough baking behind me, I’ve dialed in the recipe and process.
These sourdough bread bowls are surprisingly easy to make and are perfect for serving hearty meals, like Cuban Garbanzo stew, chicken corn chowder, and even creamy spinach dip.
This recipe uses my no-knead sourdough bread as the base, with a slightly different baking method. Instead of baking in a Dutch oven, you add water to the oven to create steam and get that signature crusty exterior with a soft, chewy center.
If you’re new to baking sourdough, don’t worry! This method is beginner-friendly and delivers delicious results. Once you try these crusty sourdough bread bowls, you’ll want to fill them with everything from soup to dip to chili.

Why You’ll Love Sourdough Bread Bowls
Cozy and Comforting: Sourdough bread bowls filled with hot soup are the perfect comfort food for fall and winter.
No Fancy Equipment: This sourdough bread bowl recipe is made for the minimalist kitchen. You don’t need a stand mixer or a Dutch oven. You just need a mixing bowl and a few small bowls for cold proofing. That’s it!
Crowd Pleaser: Everyone loves a bread bowl, especially kids. I always make a few extra small ones for my three-year-old.
Make Ahead Friendly: Make and refrigerate the dough for up to 3 days. Or you can bake a large batch and freeze them. Check out my Souroudgh for Busy Moms post for more time-saving tips.
Ingredients & Substitutions

Flour: You will need all-purpose and whole wheat flour for this recipe. You can use 100% all-purpose if you prefer.
Starter: You can use a “regular” or fresh-milled sourdough starter.
Water: Use room temperature or cool water.
Salt: I prefer kosher salt, but any salt will do.
Get the full list of ingredients and measurements on the printable recipe card below.
Tools You Will Need
Kitchen Scale: A kitchen scale makes this sourdough bread bowl recipe (and all baking recipes) consistent and repeatable.
Bench Scraper: A bench scraper makes dividing and transferring the dough easier.
Small bowls: I used cereal bowls for cold proofing the dough. Any small bowl with tall sides will work.
Towels – These dishtowels are the perfect size for cold-proofing sourdough bread bowl dough, but any small tea towel will do.
Baking Dish: To create steam, use a baking dish or cast iron skillet that is oven-safe to at least 450° F.
Baking Sheet: I used my regular cookie sheet to make sourdough bread bowls. A baking stone will also work.
Lame: I used a bread lame for scoring sourdough, but a razor will also work
Step-by-Step Instructions

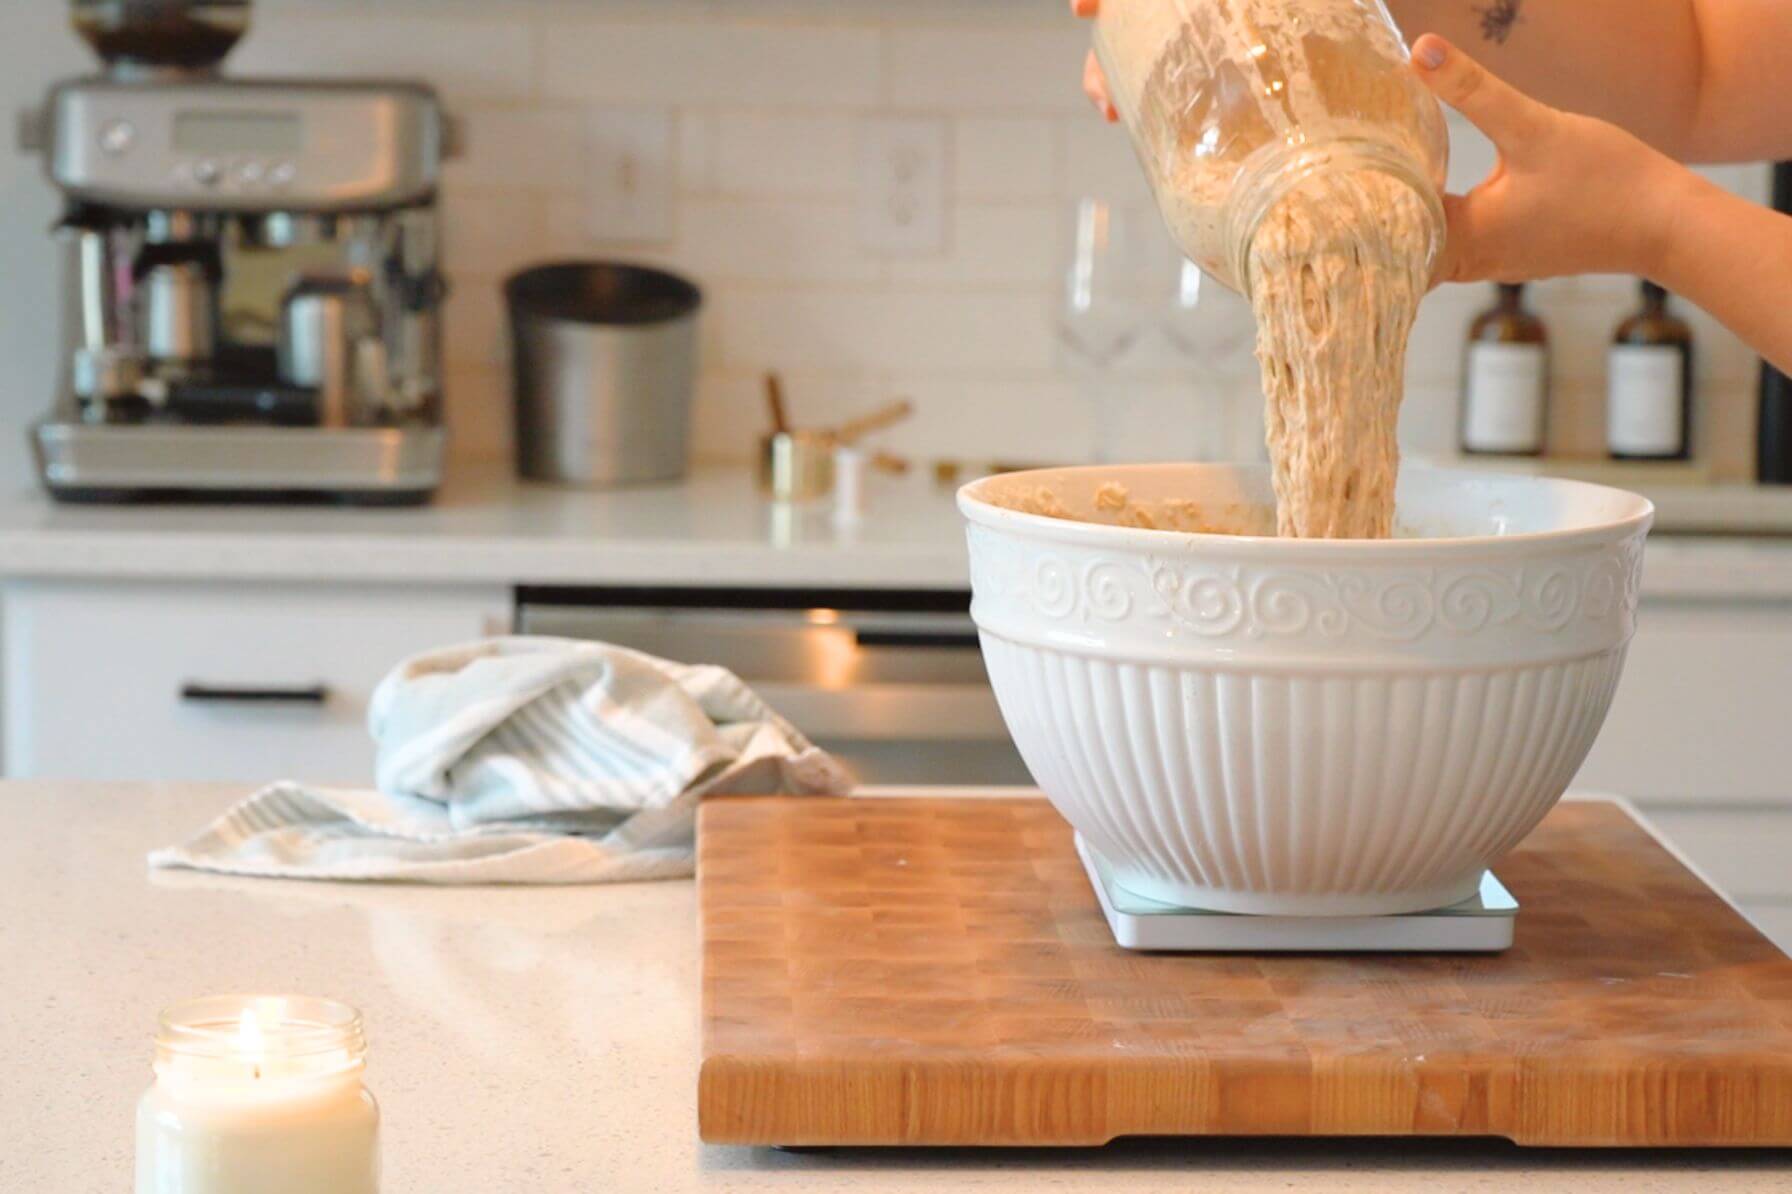
Step 1: In a large bowl, combine the all-purpose flour, whole wheat flour, and water. Mix either with your hands or a Danish dough whisk until combined.
Cover with a damp towel and allow to sit for 30 minutes.
Step 2: Add sourdough starter and salt to the flour mixture.
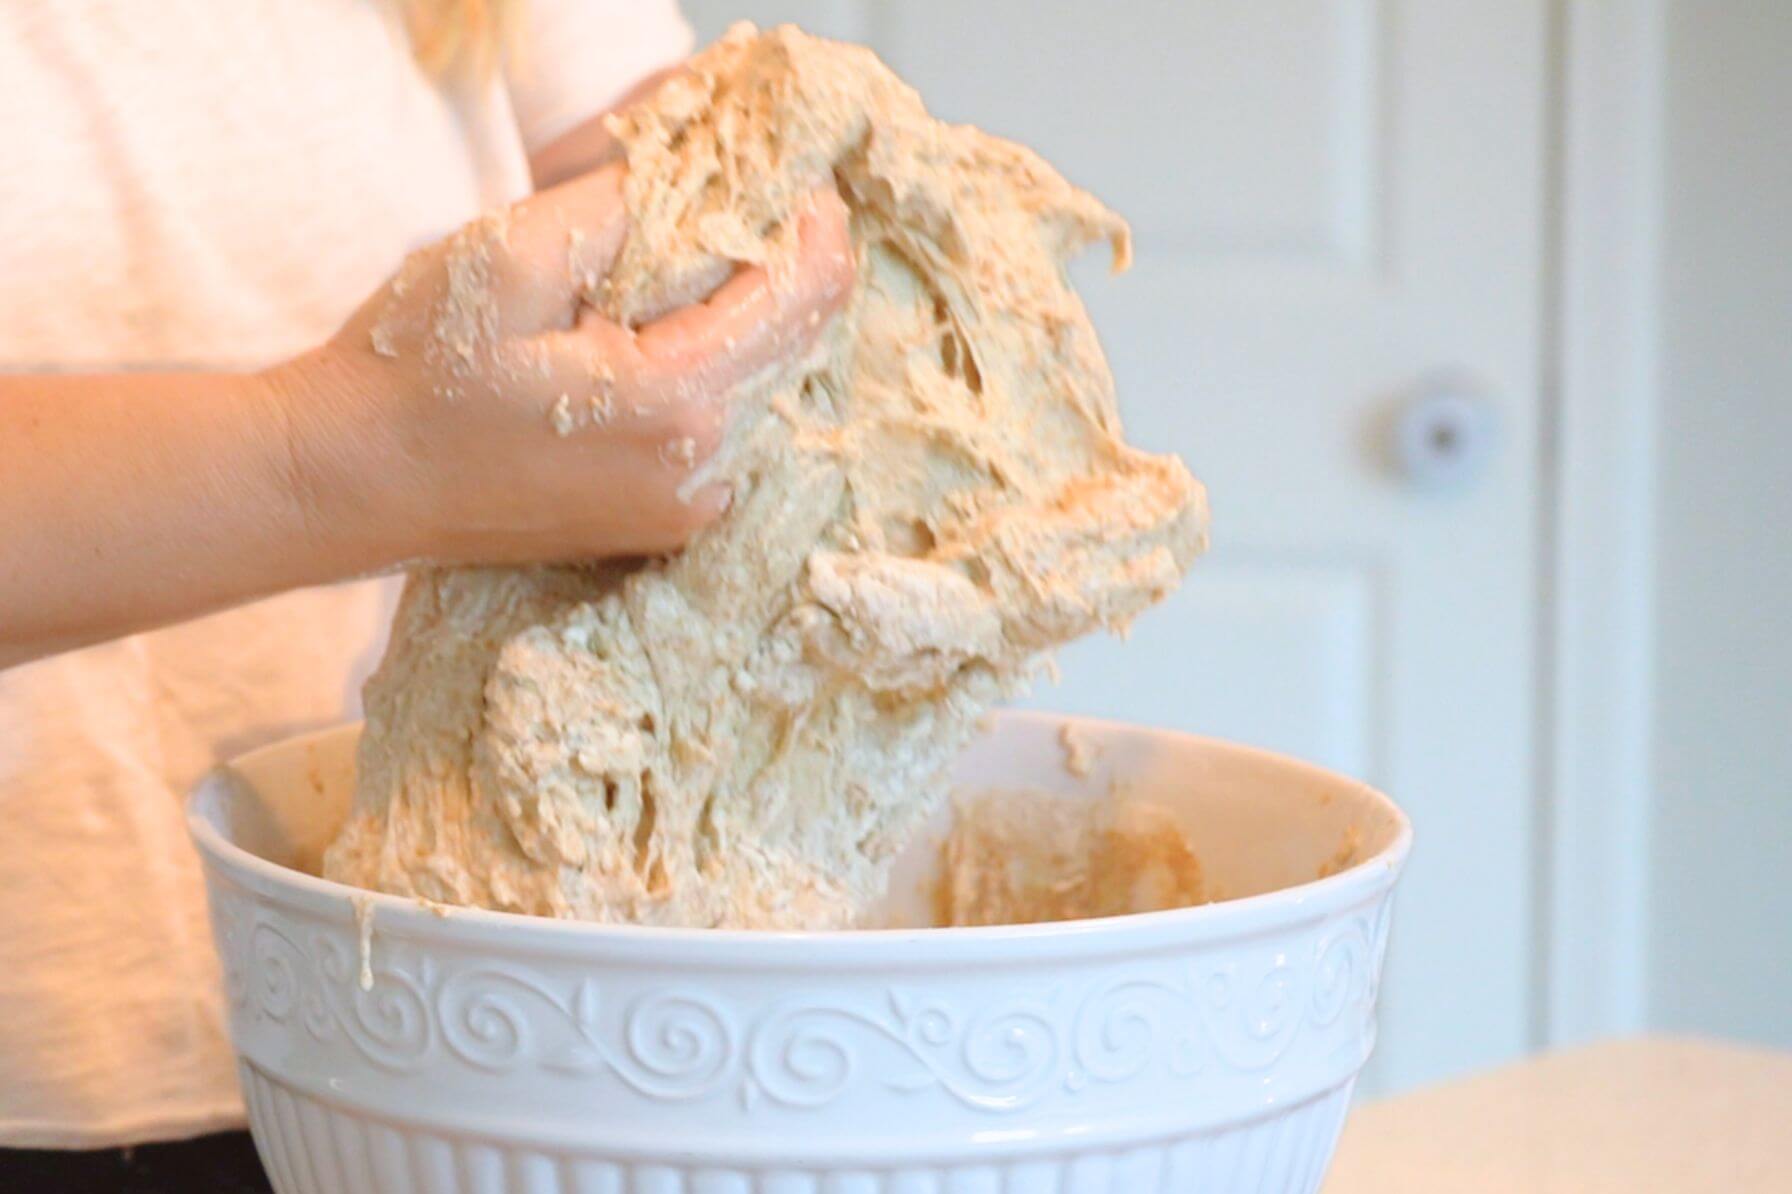
Step 3: Mix with your hands for 5 minutes. Using wet hands can make this somewhat less messy. Cover with a damp towel and allow to sit for 30 minutes.
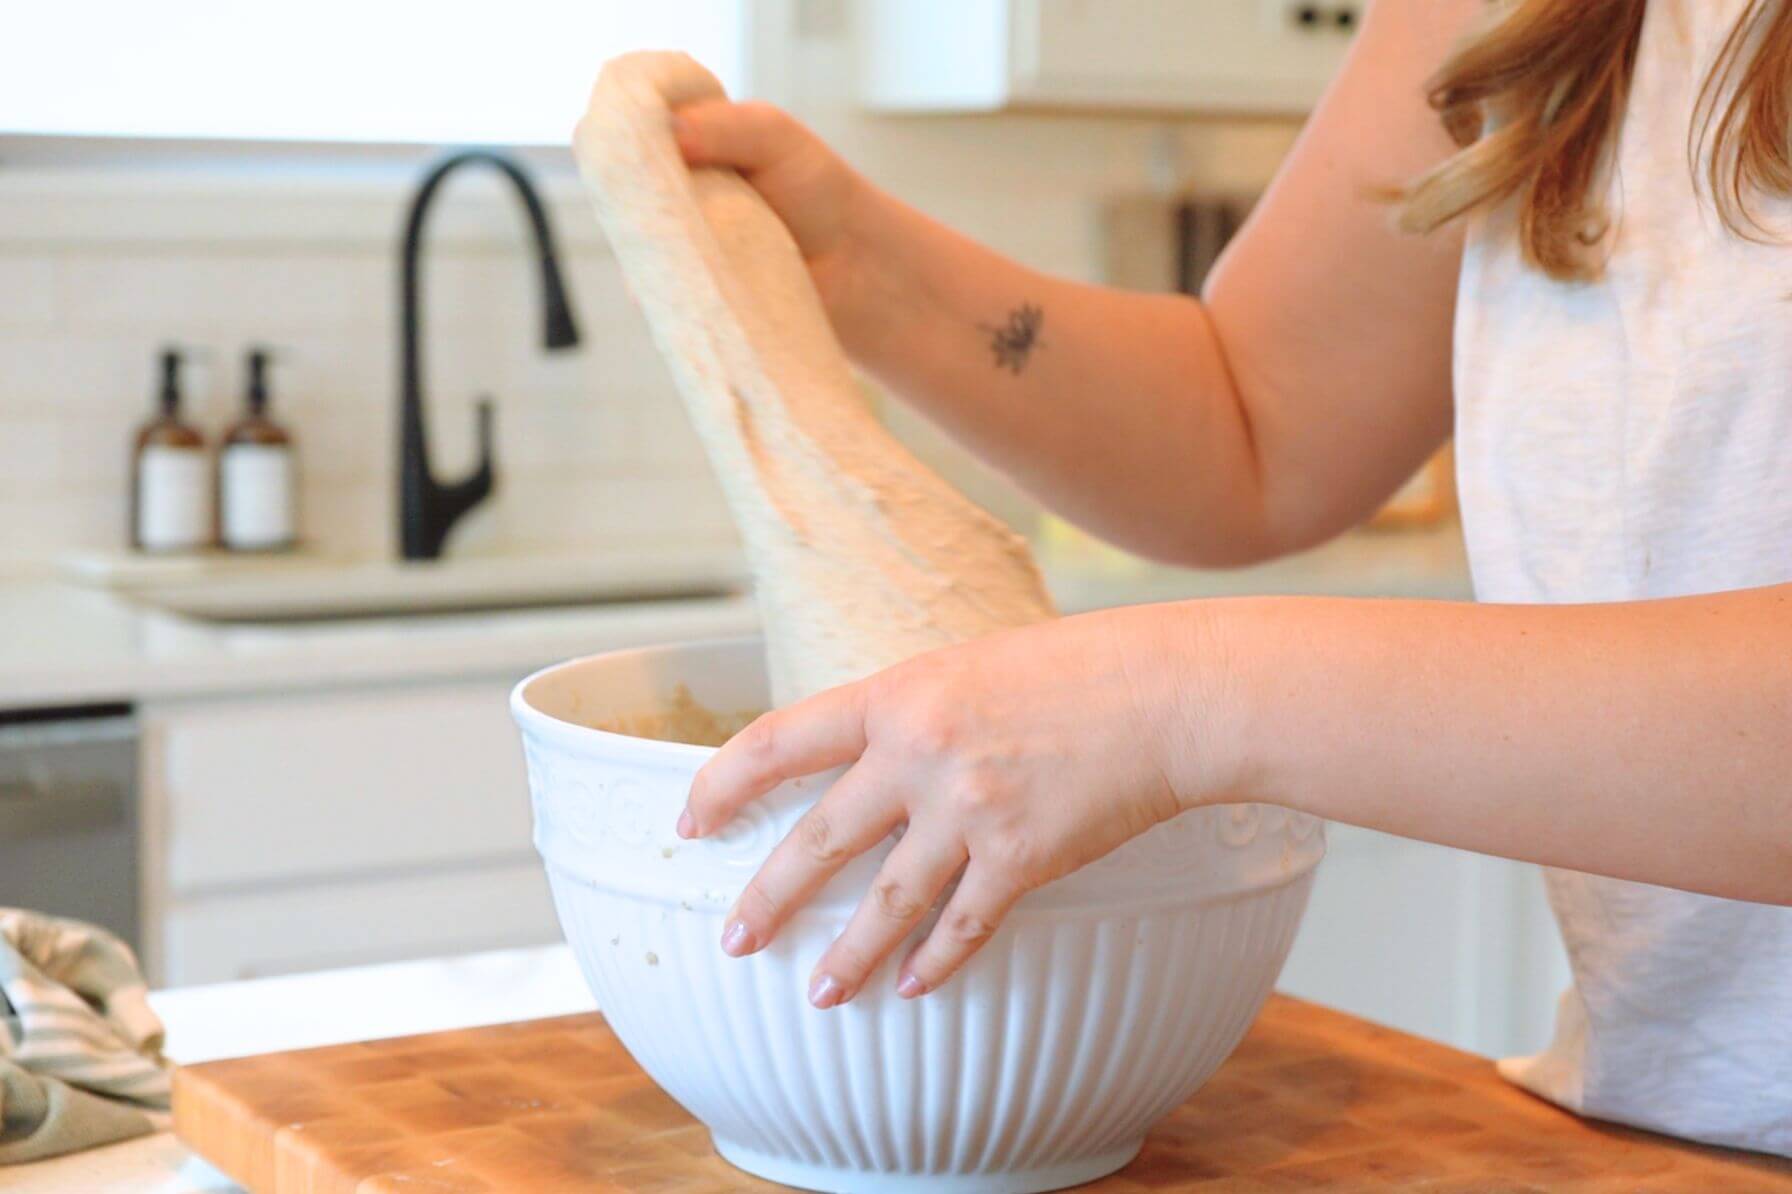
Step 4: Begin the stretch and fold process. Stretch and fold the dough 5-8 times (until you notice resistance from the dough). Do this for three cycles in 15-minute intervals. Cover with a damp towel between cycles.
Increase the stretch and fold cycles to every 30 minutes. Complete three cycles of stretch and folds. Cover with a damp towel between cycles.
After all stretch and fold cycles are complete, cover with a damp towel and allow to rest on the counter for 5-6 hours or until doubled and domed on top. I’ve found that any space below 73° F slows down the process. So find a warm place or use a proofing box.
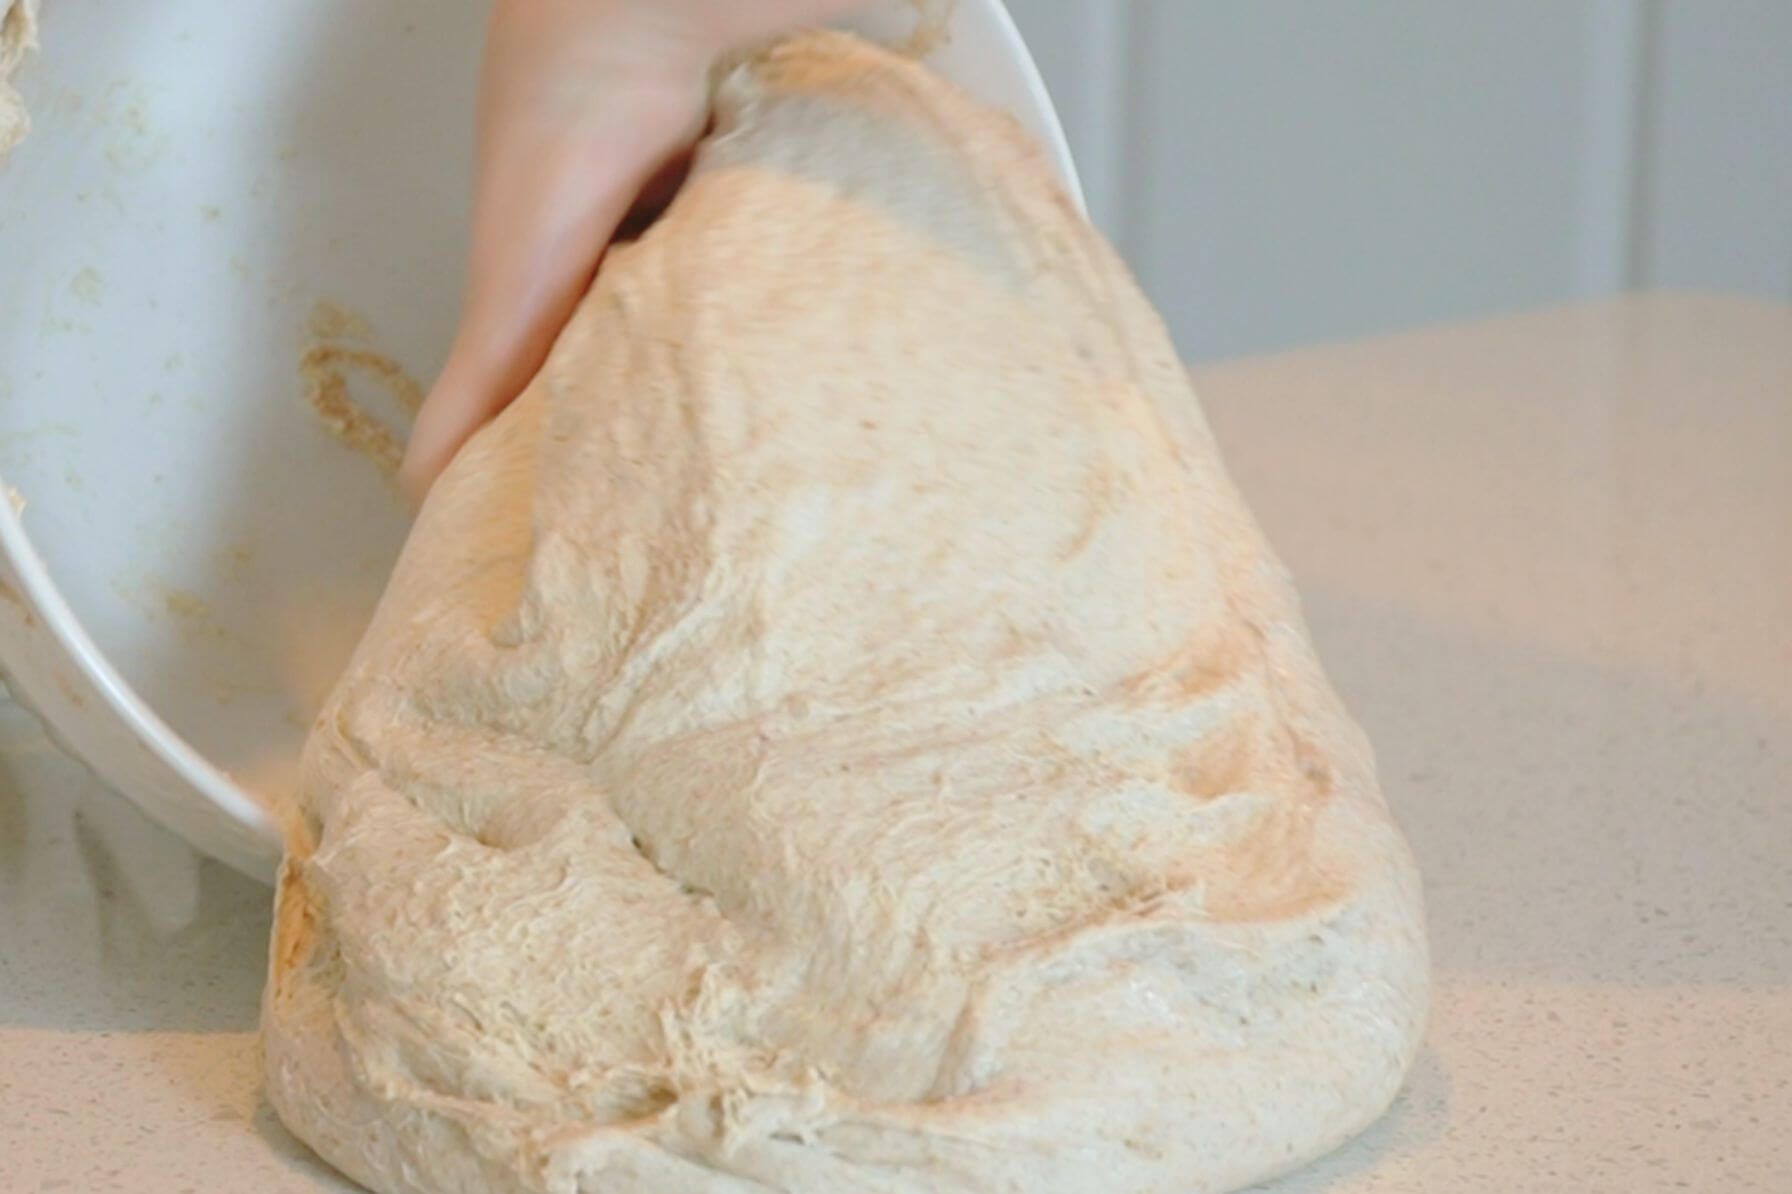
Step 5: Once the dough has doubled and is domed on top, turn it out onto a clean counter or work surface.

Step 6: Use a bench scraper to divide the dough into 8 equal portions.
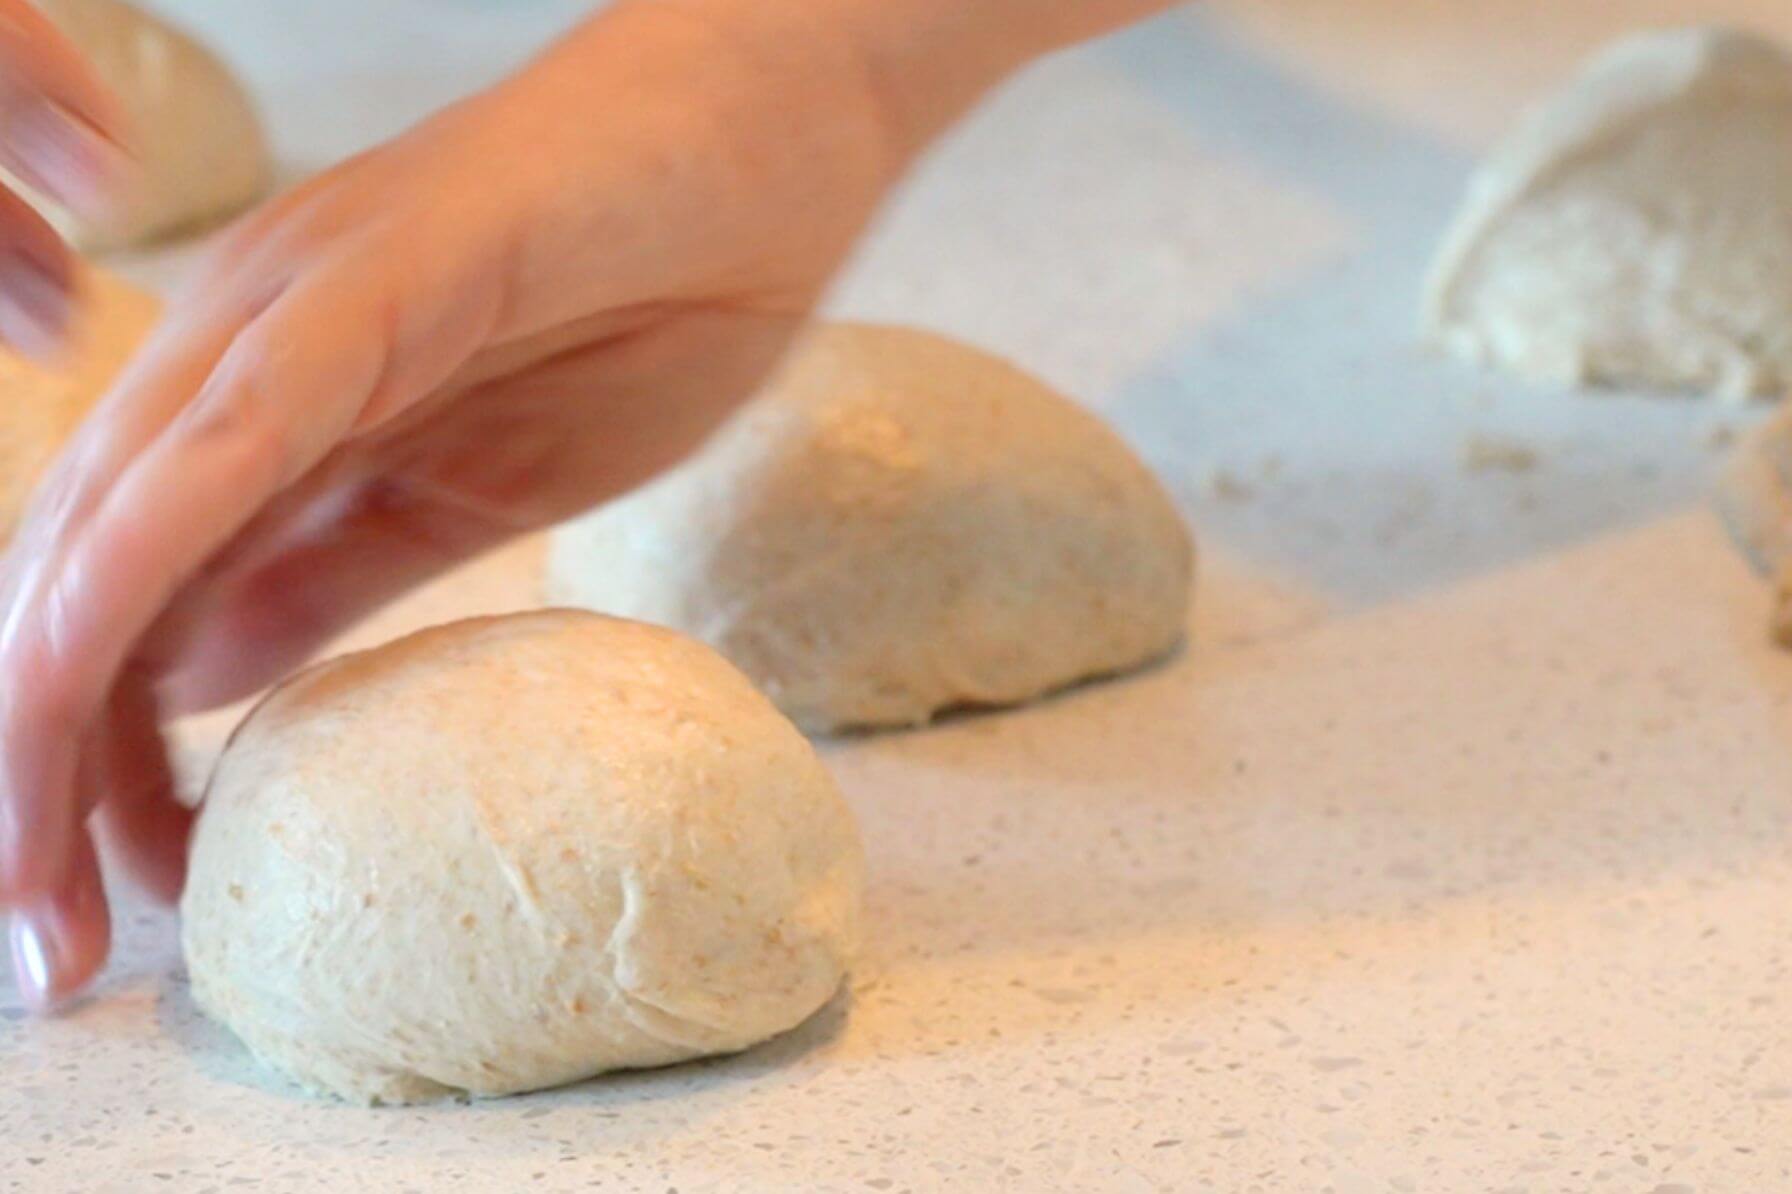
Step 7: Shape each portion into a ball by turning it clockwise while simultaneously pulling it toward yourself on the countertop. The friction on the dry counter will create tension and aid in shaping.
Allow to rest for 15-20 minutes.

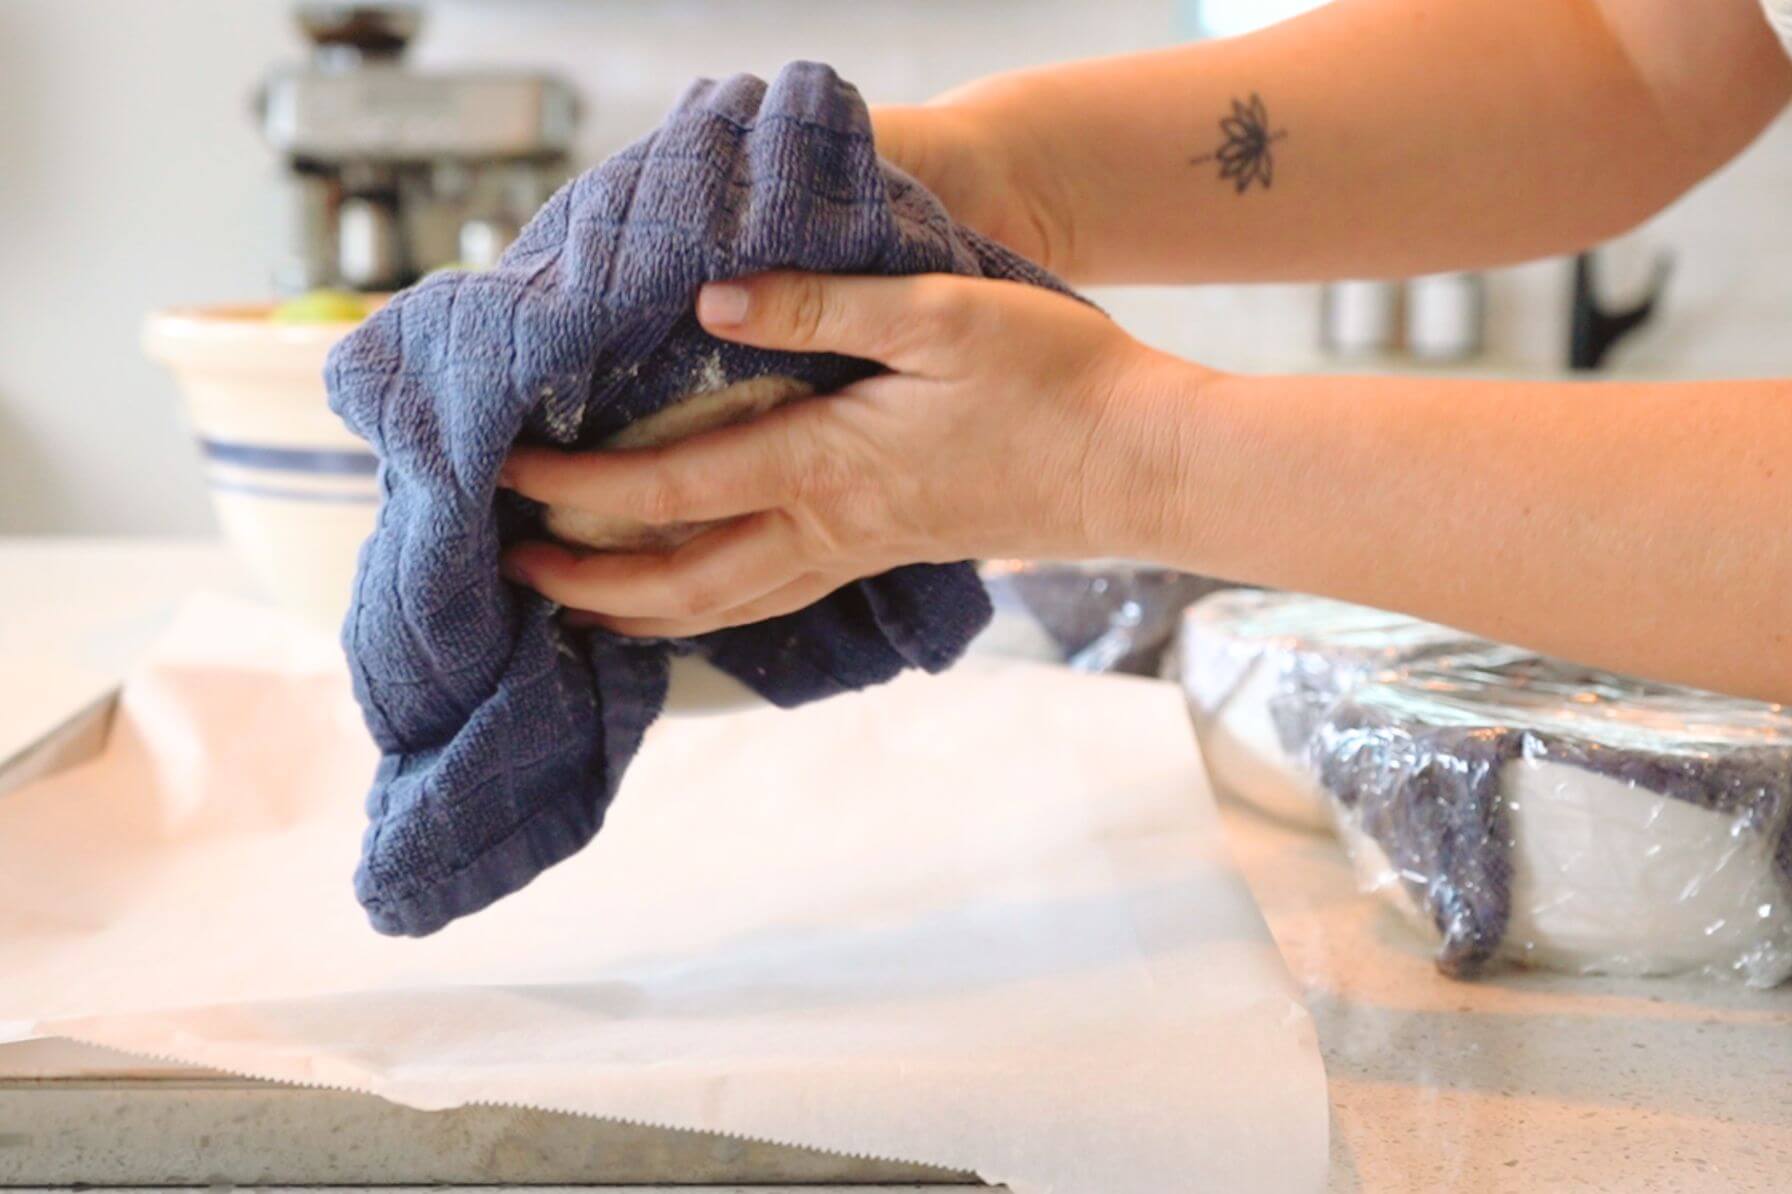
Step 8: Meanwhile, prepare 8 small bowls for cold proofing. Line each bowl with a towel and generously flour the towel (I used cereal bowls lined with clean dishtowels).
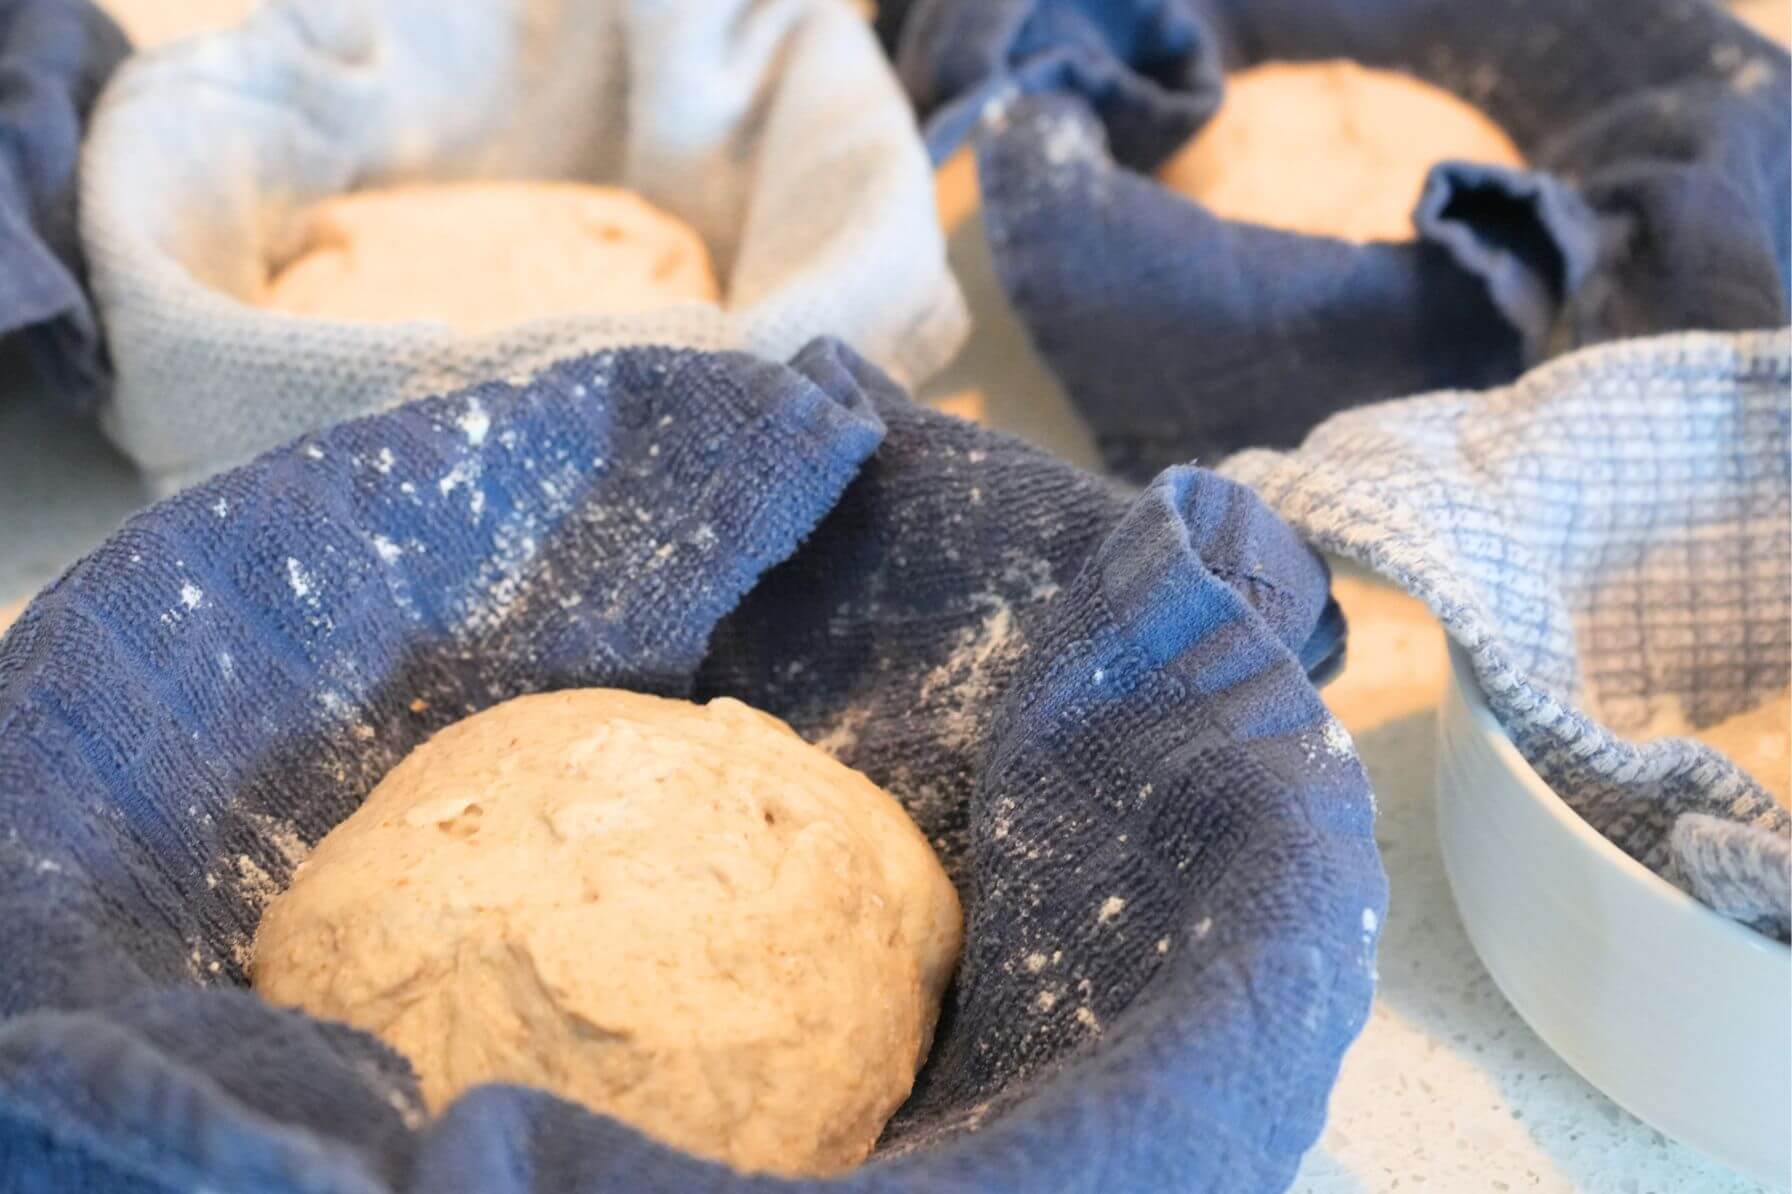
Step 9: Use a bench scraper to transfer the dough to the bowls FACE DOWN (sprinkling a little water on the bench scraper and your hands can prevent sticking).
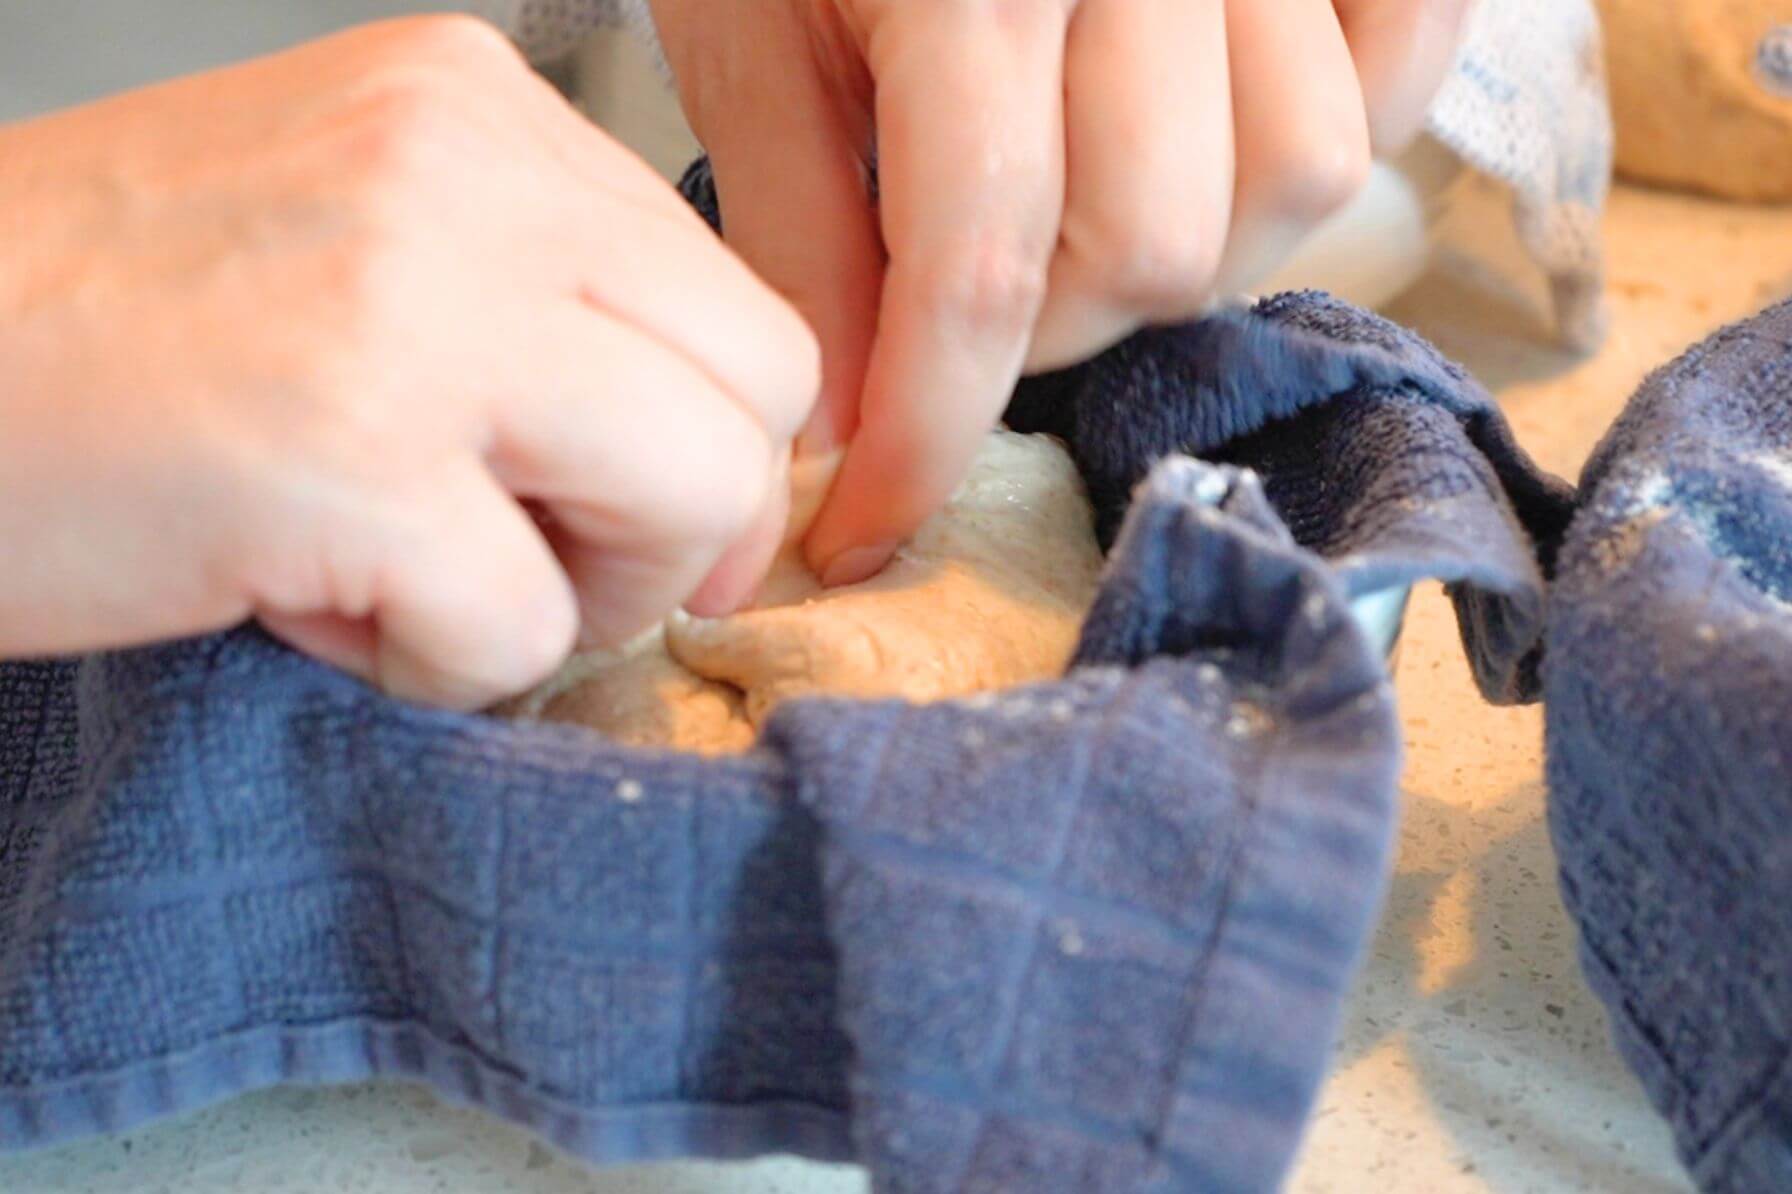
Step 10: Gently pinch the left and right sides together. Then, pinch the top and bottom together. This creates tension and a nice seam.
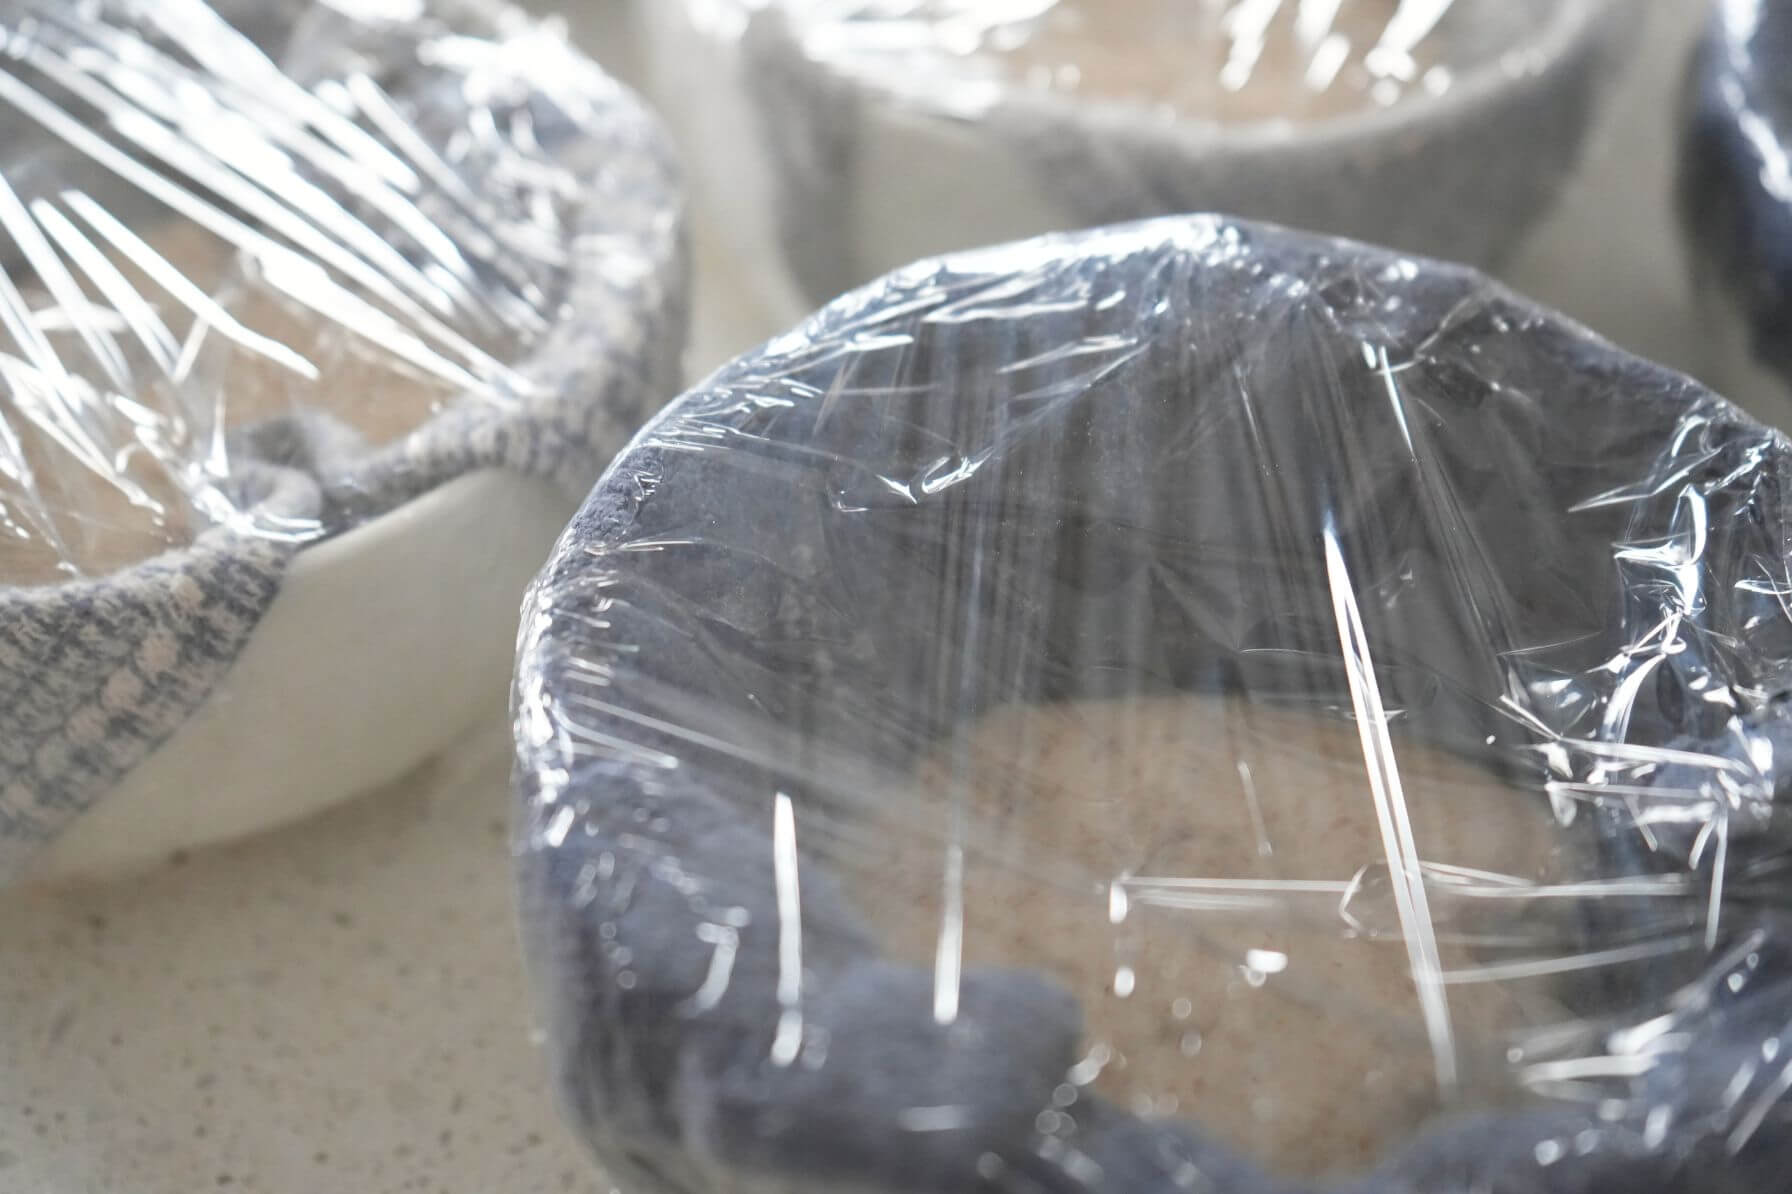
Step 11: Cover each bowl with plastic (I used plastic wrap).

Step 12: Stick them in the fridge for 12-15 hours.

Step 13: The next day, fill an oven-safe baking dish or cast iron skillet with water and place it on the bottom rack of the oven. This will create steam, which is critical for developing the bread’s oven spring (final rise) and crust.
With the filled dish in the oven, preheat the oven to 450° F.
Step 14: Line a large baking sheet with parchment paper.
Turn out each dough ball onto the baking sheet. Note: you may have to bake in batches. I can only fit 6 bread bowls on my baking sheet.

Step 15: Use a bread lame or razor to score an “X” in each dough ball.
Step 16: Bake at 450° F for 20 minutes.
Drop the temperature to 425° F and continue baking for another 20 minutes or until the bread reaches an internal temperature of 190° F.
Remove the bread bowls from the oven and transfer them to a wire rack to cool. Allow them to cool completely to room temperature before digging in.

Step 17: Once you are done baking, let the water cool in the oven. Then, remove it from the oven.
To serve: cut a circle from the top of the bread bowl, slightly hollow it, and fill it with your favorite soup.
Tips for Success
- An active sourdough starter will ferment the dough faster. You can use inactive starter if you are in a pinch, but it will take longer to ferment. Snag my free sourdough starter eBook to learn how to make your own starter.
- Cereal bowls or other small bowls work well for cold proofing the dough. Try to use bowls that have tall sides to support the dough’s shape.
- For the most accurate and repeatable results, weigh your ingredients using a kitchen scale. If you don’t have a scale, I’ve also included the cup measurements in the printable recipe card.
- The scooped-out bread makes great croutons or sourdough breadcrumbs.

How To Serve
Creamy Soup: Anything creamy works great in a bread bowl. Broccoli cheese soup in a bread bowl is a classic. One of our family favorites is broccoli potato and cheddar soup.
Chili: Bread bowls are perfect for chili. Growing up in Western Maryland, we always ate chili topped with cheese and a spoonful of sugar.
French Onion Soup: Use the leftover tops of sourdough bread bowls for French onion soup. In my weeknight meals video on YouTube, I show how to make caramelized onions and French onion soup.
Chocolate Fondue: A bread bowl is perfect for chocolate fondue or dip.
Dips: Fill a bread bowl with sourdough discard cheese sauce, hummus, and serve it with veggies.
Storing and Freezing
Room Temperature: For up to 2 days, wrap bread bowls in a clean kitchen towel to keep the crust crisp and the inside soft. For storage up to 4 days, place them in a zip-top bag to help retain moisture.
Freezer: Store cooled bread bowls in a freezer-safe bag. Thaw at room temperature and reheat in the oven to refresh the crust.

Sourdough Bread Bowl Schedule
This schedule is my general sourdough baking schedule. Of course, everyone’s timelines look different, but this will give you an idea of how to structure the process.
The Night Before
10:00 pm: Feed sourdough starter.
The Next Morning
10:00 AM: Mix flour and water in a large bowl until combined.
10:30 AM: Add starter and salt to the flour/water mixture.
11:00 AM: Begin stretch and fold cycles.
1:15 PM: After the last stretch and fold, cover the dough with a damp towel and allow to bulk ferment.
7:30 PM (ish): Remove the dough from the bowl, divide into 8 equal pieces, and shape.
7:50 PM: Transfer dough to bowls, cover, and refrigerate 12-15 hours.
The Next Day
10:00 AM: Place baking dish filled with water in oven and preheat.
10:30 AM: Turn out the dough and score.
10:35 AM: Bake.
FAQs
I had this issue when my proofing bowls were too wide. Sourdough bread bowls need support during cold proofing, so use any small, tall-sided container you have.
The best and safest way to create steam for open baking is to use an oven-safe dish. I use my cast iron skillet, but any baking dish will work. Just make sure it is safe up to 450° F.
You can store sourdough bread dough in the fridge for up to 3 days, making it easy to prep ahead and bake when needed.
Freezing the dough works too, though the texture isn’t quite as good. For best results, bake the bread bowls first, then freeze. They reheat easily for homemade bread anytime.
That’s totally optional. Sourdough is dense enough to hold the soup without leaking. So I don’t worry about toasting them. However, toasting the inside once it is hollowed can prevent the bread from getting soggy.
Let’s Connect!
If you tried this recipe and loved it, leave a comment or review below.
Also, don’t forget to pin this post and follow Moon + Magnolia on Pinterest. You can save all my recipes on your boards and keep up with the latest happenings!
Share your creations on Instagram and tag @moon_and_magnolia!


Sourdough Bread Bowls
Equipment
- Small Bowls and Towels
- Baking dish (or a cast iron skillet)
Ingredients
- 750 g all-purpose flour
- 200 g whole wheat flour
- 650 g cups water
- 200 g sourdough starter, active and bubbly
- 20 g tsp salt
Instructions
Prepare the Dough
- In a large bowl, combine the all-purpose flour, whole wheat flour, and water. Mix either with your hands or a Danish dough whisk until combined. Cover with a damp towel and allow to sit for 30 minutes.750 g (6 cups) all-purpose flour, 200 g (1 3/4 cups) whole wheat flour, 650 g (2 3/4 cups) cups water
- Add sourdough starter and salt to the flour mixture. Mix with your hand for 5 minutes. Using a wet hand can make this somewhat less messy.200 g (3/4 cup) sourdough starter, active and bubbly, 20 g (3 1/4 tsp) tsp salt
- Cover with a damp towel and let rest for 30 minutes.
Stretch and Fold
- Begin the stretch and fold process. Stretch and fold the dough 5-8 times (until you notice resistance from the dough). Do this for three cycles in 15-minute intervals. Cover with a damp towel between cycles.
- Increase the stretch and fold cycles to every 30 minutes. Complete three cycles of stretch and folds. Cover with a damp towel between cycles.
- After all stretch and fold cycles are complete, cover with a damp towel and allow to rest on the counter for 5-6 hours or until doubled and domed on top. I’ve found that any space below 73 degrees slows down the process, so find a warm place or use a proofing box.
Shape and Cold Proof
- Once the dough has doubled and is domed on top, turn it out on a clean counter or work surface.
- Use a bench scraper to divide the dough into 8 equal portions.
- Shape each portion into a ball by turning it clockwise while simultaneously pulling it toward yourself on the countertop. The friction on the dry counter will create tension and aid in shaping.
- Allow to rest for 15-20 minutes.
- Meanwhile, prepare 8 small bowls for cold proofing. Line each bowl with a towel and generously flour the towel (I used cereal bowls lined with clean dishtowels).
- Use a bench scraper to transfer the dough to the bowls FACE DOWN (sprinkling a little water on the bench scraper and your hands can prevent sticking).
- Gently pinch the left and right sides together. Then, pinch the top and bottom together. This creates tension and a nice seam.
- Cover each bowl with plastic (I used plastic wrap) and refrigerate for 12-15 hours.
The Next Day – Open Bake
- Fill an oven-safe baking dish or cast iron skillet with water and place it on the bottom rack of the oven. This will create steam, which is critical for developing the bread's oven spring (final rise) and crust.
- With the filled dish in the oven, preheat the oven to 450° F.
- Line a large baking sheet with parchment paper.
- Turn out each dough ball onto the baking sheet. Note: you may have to bake in batches. I can only fit 6 bread bowls on my baking sheet.
- Use a bread lame or razor to score an "X" in each dough ball.
- Bake at 450° F for 20 minutes.
- Drop the temperature to 425° F and continue baking for another 20 minutes or until the bread reaches an internal temperature of 190° F.
- Remove the bread bowls from the oven and transfer them to a wire rack to cool. Allow them to cool completely to room temperature before digging in.
- Once you are done baking, let the water and dish cool in the oven. Then, remove it from the oven.
Notes
- An active sourdough starter will ferment the dough faster. You can use inactive starter if you are in a pinch, but it will take longer to ferment.
- Cereal bowls or other small bowls work well for cold proofing the dough. Try to use bowls that have tall sides to support the dough’s shape.
- For the most accurate and repeatable results, weigh your ingredients using a kitchen scale. If you don’t have a scale, I’ve also included the cup measurements in the printable recipe card.
- The scooped-out bread makes great croutons or sourdough breadcrumbs.
Nutrition
Nutrition information is auto-calculated and may not reflect your final product. Please verify independently if needed.