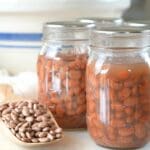
Pressure Canning Pinto Beans
Canning pinto beans is a simple way to stock your pantry with wholesome, ready-to-use food. It’s easy to do, and once you’ve made a batch, you’ll have convenient, home-cooked food on hand for months to come.
Servings: 9 pints
Calories: 191kcal
Equipment
- Pint jars (or quarts depending on preference)
- Canning lids and rings
- Canning Tongs (also called jar lifter)
- Regulator (option, but helpful)
Ingredients
- 3.5-5 pounds dry pinto beans (use 3.5 lbs for a canner of pints or 5 lbs for a canner of quarts)
- water
- canning salt (optional)
Instructions
- Either overnight or quick soak the beans:Overnight Soak: Place the pinto beans in a large bowl and cover with water by 2-3 inches. Make sure your bowl is big enough for the beans to expand. Allow them to soak for 12-18 hours.Quick Soak: Bring a pot of water to a boil. Then, pour the boiling water over the beans in a separate pot. Turn on the burner and boil the beans for 2 minutes. Remove from heat and set aside to soak for 1 hour.
- Drain the soaked beans and rinse them with clean water.
- Place the soaked beans in a large stock pot and cover them with water, at least 2 inches above the beans.
- Boil the beans for 30 minutes. Start the 30-minute timer once the beans come to a full boil.Don't drain the beans after this step. The cooking liquid is needed for canning.
- Meanwhile, prepare your canner and jars according to the manufacturer's instructions.Since this is a hot pack, I recommend keeping the jars warm inside the canner while you prep it. The canner should be just below a boil when you add the jars.
- Ladle the hot beans into the hot jars about 2/3 full, then top them off with the cooking liquid, leaving 1" of headspace. Optional: Add 1/2 teaspoon of canning salt per pint or 1 teaspoon per quart.The beans will absorb much of the liquid, so you want a higher water-to-bean ratio.If you don't have enough cooking liquid, you can also use boiling water.
- Use a clean debubbler to slide around the jar’s edges and release air bubbles. Re-check the headspace and add more liquid if needed.
- Wipe the jar rim with a clean, damp paper towel. Place a lid on each jar, making sure it is centered. Add a band to each jar and twist it until fingertip tight.
- Transfer the jars to the pressure canner using a jar lifter.
- Follow the manufacturer's instructions for sealing and venting your canner. Most canners will take 15 minutes or so to pressurize and also require 10 minutes of venting before placing the weight or setting the dial.
- Pressure can for 75 minutes for pints or 90 minutes for quarts. Adjust the pounds of pressure for your elevation.The chart below details the pressure needed for elevation changes.Keep an eye on the canner and adjust the heat to maintain the correct pressure (or use a regulator).

- Let the pressure canner completely depressurize. Once the pressure returns to zero and the vent lock drops, remove the weight and let the canner sit for 10 minutes before opening.
- Remove the cans from the pressure canner and allow them to cool undisturbed for 12-24 hours. Take off the ring and check the seal. Use a damp towel to clean off the outside of the jar before labeling and storing.
Notes
- Store home-canned goods upright and without the rings so you’ll know if the seal pops.
- Store your home-canned goods in a cool, dry place, ideally between 50° F and 70 ° F.
- Do not stack home-canned goods. The weight on the bottom jar can make it hard to tell if the seal has popped.
- Most manufacturers state how long their seals will last. Check the packaging for info.
- You may have more beans than will fit in the jars. I follow the NCHFP’s 3.5–5 lb guide, but extras usually end up on the dinner table.
- Beans tend to overboil, which can make a huge mess of the stove. Keep an eye on them and stir frequently.
- According to the National Center for Home Food Preservation, it is not safe to can beans without rehydrating and cooking them first (source).
- Save the herbs and seasonings for when you serve the beans, not when you can them.
Nutrition
Serving: 1cup | Calories: 191kcal | Carbohydrates: 35g | Protein: 13g | Fat: 1g | Saturated Fat: 0.1g | Polyunsaturated Fat: 0.3g | Monounsaturated Fat: 0.05g | Potassium: 771mg | Fiber: 9g | Sugar: 1g | Vitamin C: 3mg | Calcium: 47mg | Iron: 4mg
